Installation Instructions
4. Water Drainage
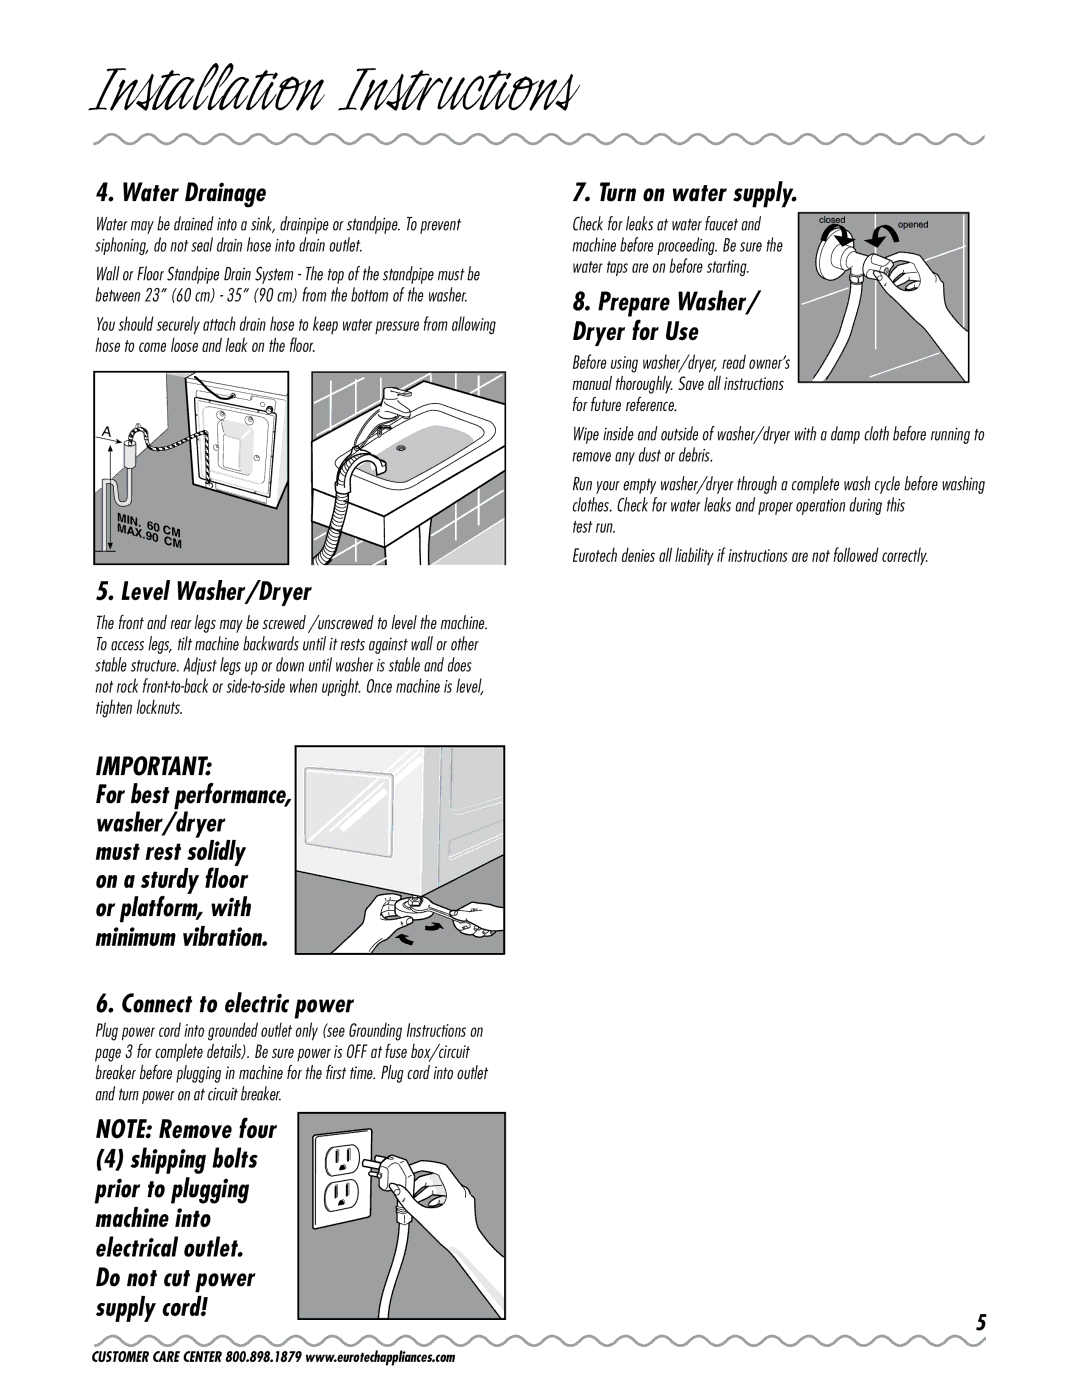
Water may be drained into a sink, drainpipe or standpipe. To prevent siphoning, do not seal drain hose into drain outlet.
Wall or Floor Standpipe Drain System - The top of the standpipe must be between 23” (60 cm) - 35” (90 cm) from the bottom of the washer.
You should securely attach drain hose to keep water pressure from allowing hose to come loose and leak on the floor.
A |
|
|
M |
|
|
IN. | 60 |
|
M | CM | |
AX. | 90 | |
| C | |
|
| M |
5. Level Washer/Dryer | ||
The front and rear legs may be screwed /unscrewed to level the machine. To access legs, tilt machine backwards until it rests against wall or other stable structure. Adjust legs up or down until washer is stable and does not rock
IMPORTANT:
For best performance, washer/dryer must rest solidly
on a sturdy floor or platform, with minimum vibration.
6. Connect to electric power
Plug power cord into grounded outlet only (see Grounding Instructions on page 3 for complete details). Be sure power is OFF at fuse box/circuit breaker before plugging in machine for the first time. Plug cord into outlet and turn power on at circuit breaker.
NOTE: Remove four
(4) shipping bolts prior to plugging machine into electrical outlet. Do not cut power supply cord!
7. Turn on water supply.
Check for leaks at water faucet and machine before proceeding. Be sure the water taps are on before starting.
8. Prepare Washer/ Dryer for Use
Before using washer/dryer, read owner’s manual thoroughly. Save all instructions for future reference.
Wipe inside and outside of washer/dryer with a damp cloth before running to remove any dust or debris.
Run your empty washer/dryer through a complete wash cycle before washing clothes. Check for water leaks and proper operation during this
test run.
Eurotech denies all liability if instructions are not followed correctly.
CUSTOMER CARE CENTER 800.898.1879 www.eurotechappliances.com