INSTALLATION INSTRUCTIONS
Read these instructions carefully and completely before you install the machine. The installation should be carried out by a qualified person who is familiar with all local codes and ordinances for electrical and plumbing connections. Incorrect installation may cause damage and/or injury. If the integrity of the machine is in doubt, do not use it. Call your dealer for qualified assistance.
The washer can be installed anywhere provided that the temperature is not less than 38° F (3° C) and the electrical cords and hoses behind the machine are not cramped.
ENGLISH
To install the washing machine, follow the steps below:
1.Move the machine to its installation position and remove the outer wrapping and the polystyrene base.
2.Model EWF150 has a plastic strip taped to the bottom of the machine to secure two cones that prevent the tub from moving during shipment. This plastic strip and the cones must be removed. To do this, simply peel away the tape on the bottom sides of the unit that hold the plastic strip and cones in place.
NOTE: Failure to remove these cones will likely cause the unit to vibrate excessively during the spin cycles.
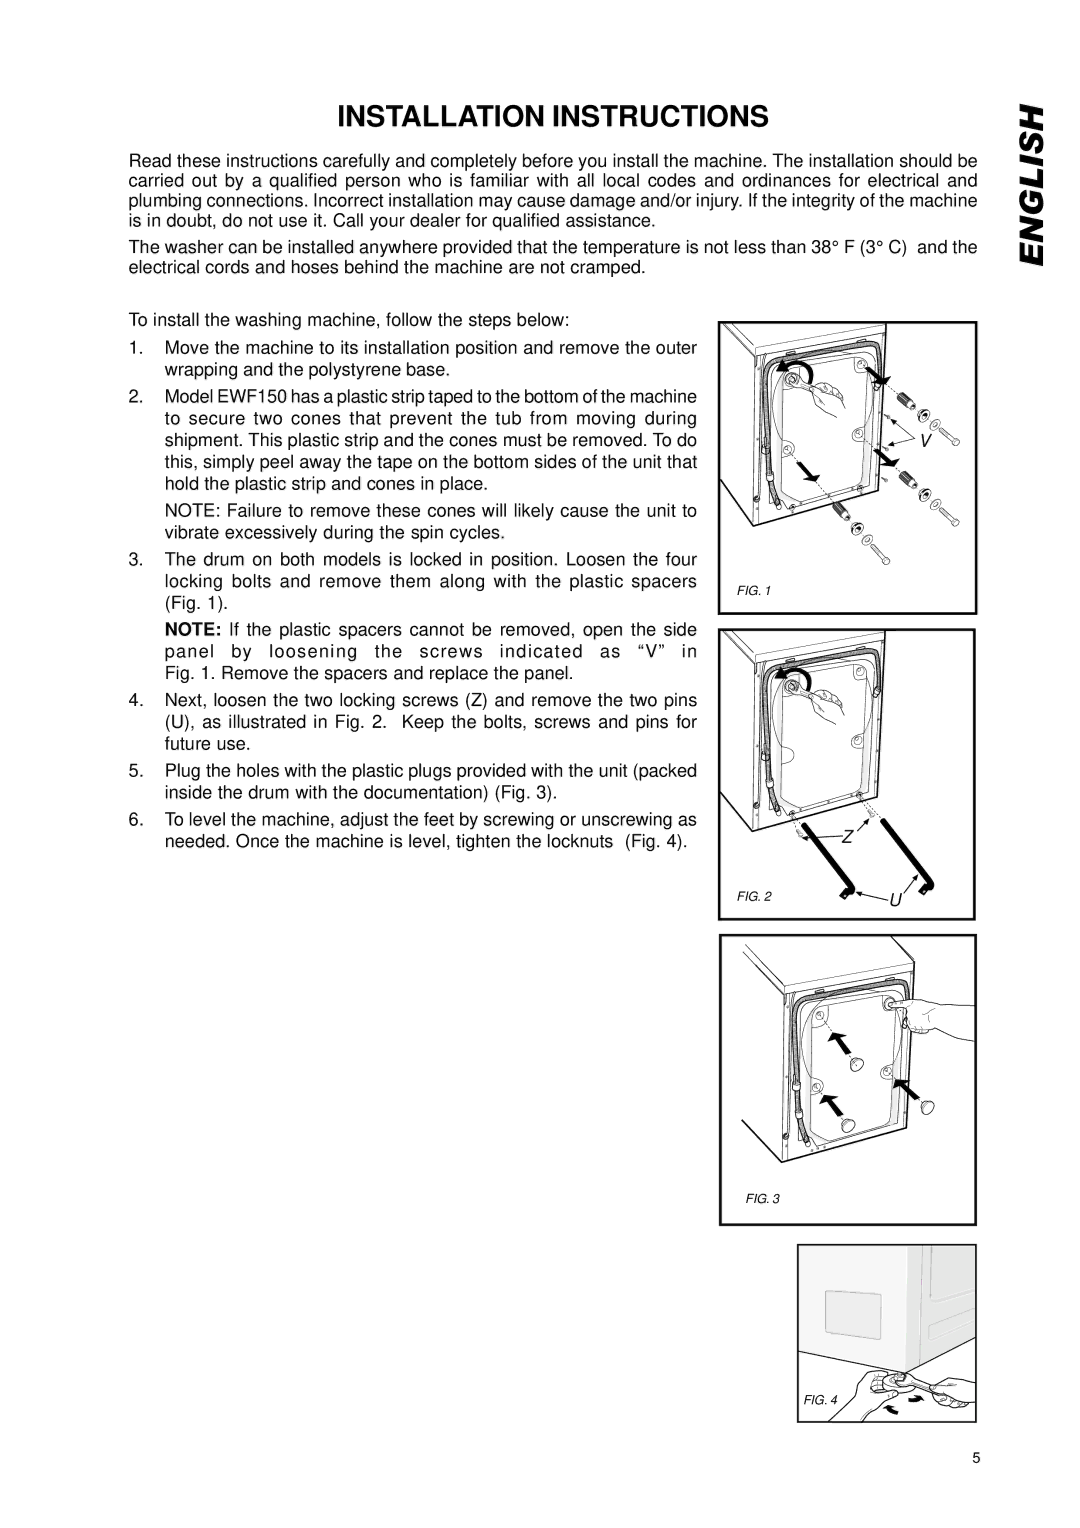
3.The drum on both models is locked in position. Loosen the four locking bolts and remove them along with the plastic spacers (Fig. 1).
NOTE: If the plastic spacers cannot be removed, open the side panel by loosening the screws indicated as “V” in Fig. 1. Remove the spacers and replace the panel.
4.Next, loosen the two locking screws (Z) and remove the two pins (U), as illustrated in Fig. 2. Keep the bolts, screws and pins for future use.
5.Plug the holes with the plastic plugs provided with the unit (packed inside the drum with the documentation) (Fig. 3).
6.To level the machine, adjust the feet by screwing or unscrewing as needed. Once the machine is level, tighten the locknuts (Fig. 4).
V |
FIG. 1 |
| Z |
FIG. 2 | U |
FIG. 3
FIG. 4 |
5 |