Manuals
/
Extron electronic
/
Home Audio
/
Stereo Amplifier
Extron electronic
MPA 152 PLUS
manual
Other Mounting Options, Rack Mounting Procedure
Models:
MPA 152 PLUS
1
21
22
22
Download
22 pages
61.53 Kb
15
16
17
18
19
20
21
22
Page 21
Image 21
Page 20
Page 22
Page 21
Image 21
Page 20
Page 22
Contents
ENERGY STAR Qualified Stereo Mini Power Amplifier
MPA 152 Plus
User Guide
Audio
Safety Instructions English
Safety Instructions
Instructions de sécurité Français
Sicherheitsanweisungen Deutsch
Regulatory Compliance Guide on the Extron website
FCC Class B Notice
Specifications Availability
Conventions Used in this Guide
Notifications
Contents
MPA 152 Plus Contents
Important Safety Instructions
Important Safety Instructions
About the MPA 152 Plus MPA 152 Plus Features
Introduction
MPA 152 Plus Features
About the MPA 152 Plus
MPA 152 Plus Introduction
MPA 152 Plus Introduction
MPA 152 Plus Rear Panel Features
Power Connector
Panels and Cabling
MPA 152 Plus Panels and Cabling
Figure 3. Power Connector
Audio Inputs
Remote Control
Wiring for remote control
Figure 5. Remote Control Wiring
Ground to ground G Vol/Mute to C 10 V to
Figure 7. MPA 152 Plus Summing Diagram
Audio Output
Front Panel Features and Operation
Setup and Operation
Setting Input Level
Front Panel Features and Operation
Setting Bass and Treble
Remote Control Options
Defeating the Auto Power-downTimer
Amplifier Fails to Exit
Troubleshooting
Standby Mode Promptly
Amplifier Enters Standby Mode Too Early
Mounting
Rack Mounting
UL Guidelines for Rack Mounting
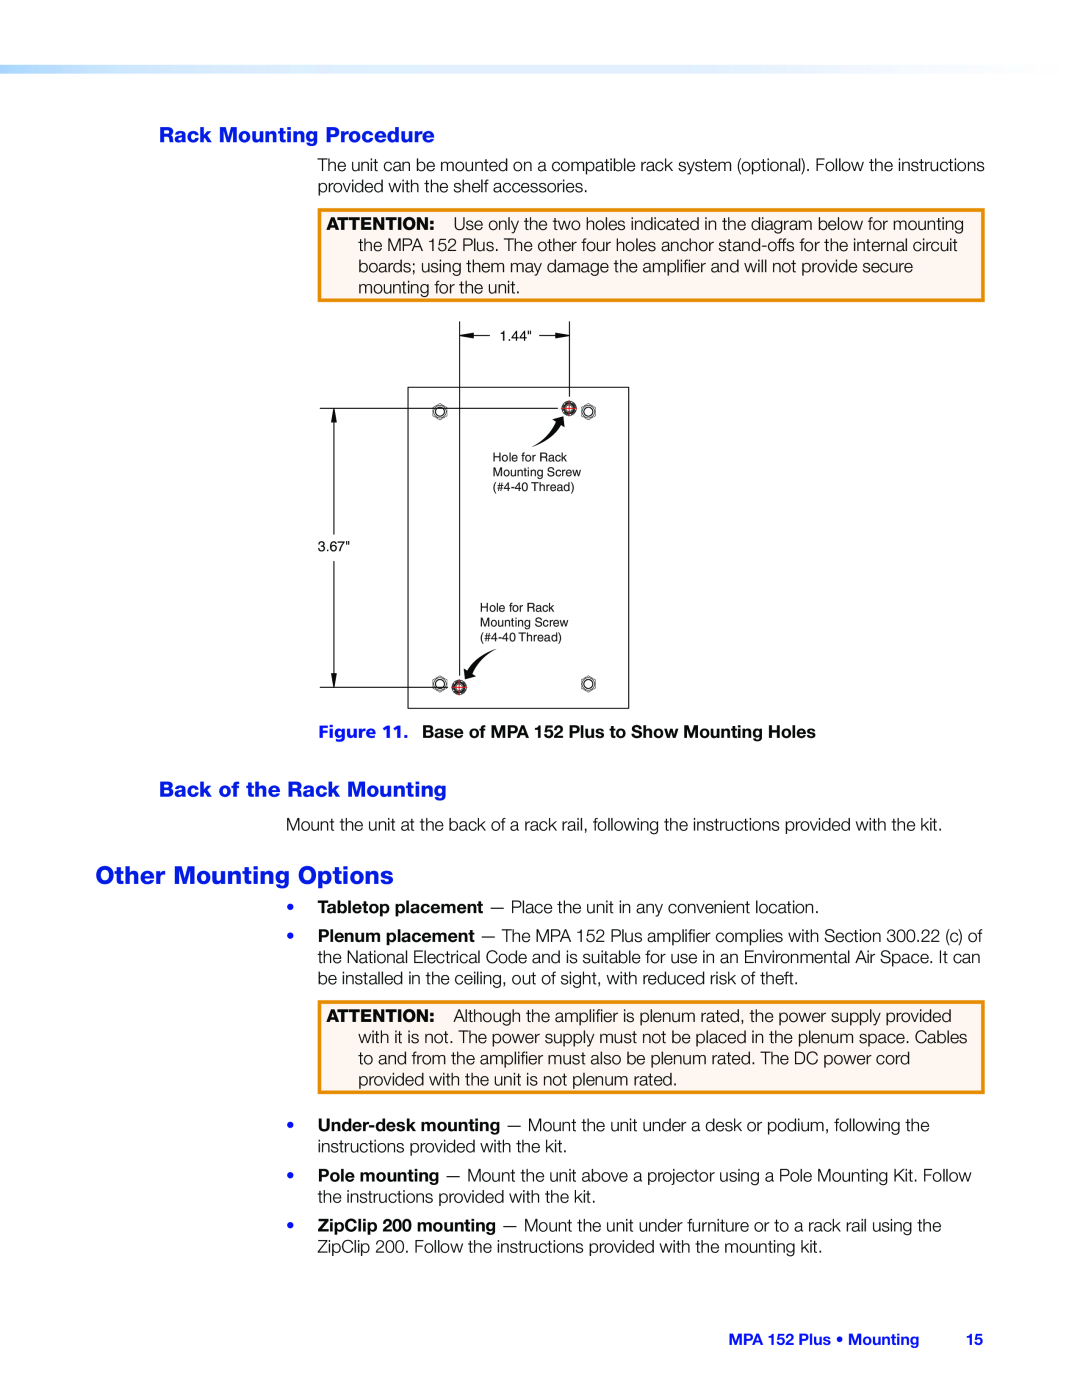
Rack Mounting Procedure
Other Mounting Options
Back of the Rack Mounting
Extron Warranty
Top
Page
Image
Contents