RGB 160XI, RGB 164XI specifications
Extron Electronics has long been renowned for its innovative solutions in the realm of audio-visual technology. Among its portfolio, the RGB 160XI and RGB 164XI matrix switchers stand out for their exceptional performance in routing high-quality RGBHV signals, catering primarily to the needs of professional AV environments.The RGB 160XI is a 16-input, 1-output matrix switcher designed to handle various resolutions, making it ideal for applications requiring flexibility in signal management. With a capability to switch between different video sources seamlessly, it ensures that users can transition smoothly during presentations or events. On the other hand, the RGB 164XI builds upon these features by offering an additional output, providing greater versatility. This model serves as an ideal solution for setups that require multiple outputs, such as simultaneous displays in both large venues and control rooms.
One of the standout features of both the RGB 160XI and RGB 164XI is their superior signal integrity. These matrix switchers utilize advanced circuitry and high-performance components that minimize signal degradation, ensuring that video quality remains pristine even over long cable runs. Additionally, they support a range of resolutions up to 1900x1200, accommodating the demands of high-definition content.
Both models incorporate Extron’s proprietary technologies, including the exclusive Global Configured Video Switching. This technology allows for effortless integration into existing systems while providing intuitive control capabilities through standard AV control systems. Users can also benefit from the built-in diagnostic tools, which simplify troubleshooting processes by offering real-time status updates and signal path verification.
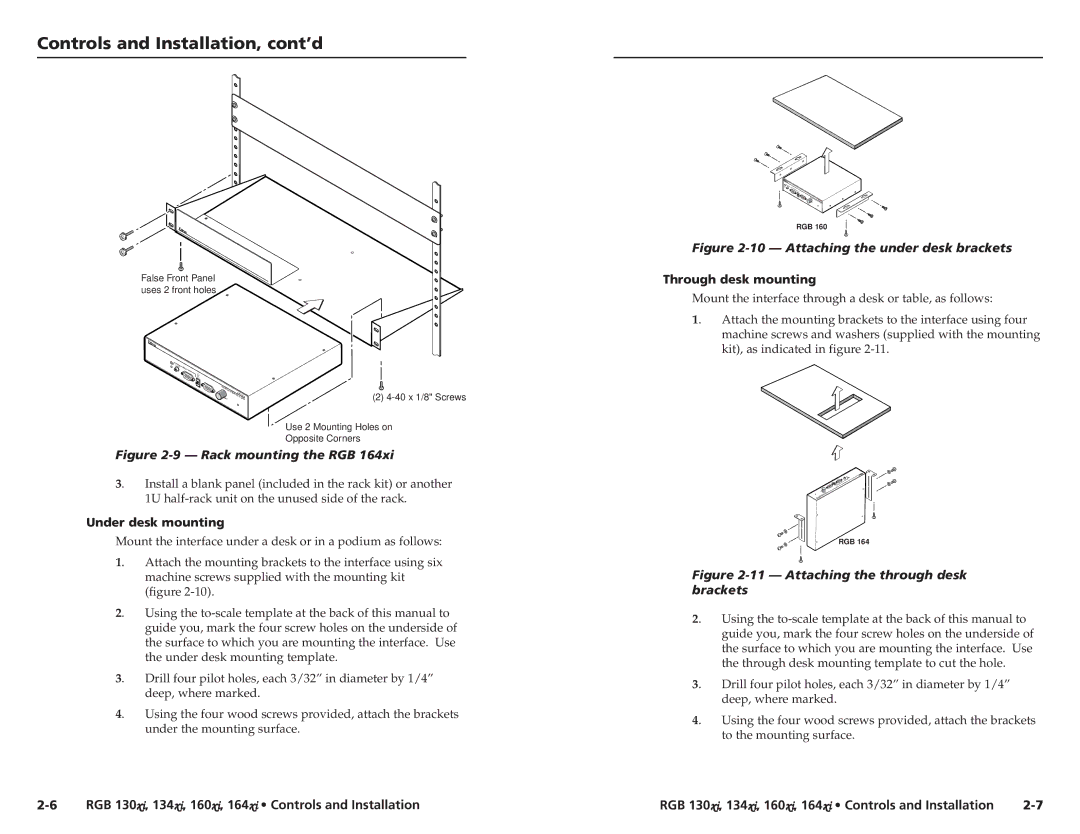
Further enhancing their practicality, these switchers feature a compact design that facilitates easy installation into equipment racks or wall-mounted configurations. Both the RGB 160XI and RGB 164XI come equipped with front-panel controls and indicators, catering to environments where direct user interaction is common.
Moreover, Extron has ensured that these devices comply with industry standards for reliability and durability, making them suitable for continuous use in demanding settings such as auditoriums, lecture halls, and broadcasting studios. With features like range-extending cables and optional remote control interfaces, the RGB 160XI and RGB 164XI matrix switchers are exemplary tools for professionals seeking to elevate their AV capabilities.
In conclusion, the RGB 160XI and RGB 164XI from Extron Electronics excel in flexibility, reliability, and high-performance video routing, making them invaluable assets for any professional AV setup. Their combination of advanced technology and user-friendly features positions them as leaders in the field of matrix switching solutions.

