COMB DIAMETER & DOCUMENT SIZES
Comb diameter sizes & margin depth adjustments
|
|
|
|
|
|
|
|
|
|
mm | inch |
| number of pages | |
| ||||
6mm | 1/4” |
| ||
|
|
|
|
|
8mm | 5/16” |
| ||
|
|
|
|
|
10mm | 3/8” |
| ||
|
|
|
|
|
12mm | 1/2” |
| ||
|
|
|
|
|
16mm | 5/8” |
| ||
|
|
|
|
|
18mm | 1 1/16” |
| ||
|
|
|
|
|
22mm | 7/8” |
| ||
|
|
|
|
|
25mm | 1” |
| ||
|
|
|
|
|
32mm | 1 1/4” |
| ||
|
|
|
|
|
38mm | 1 1/2” |
| ||
|
|
|
|
|
45mm | 1 3/4” |
| ||
|
|
|
|
|
51mm | 2” |
| ||
Need Help?
Customer Service….
www.fellowes.com
Let our experts help you
with a solution.
Always call Fellowes
before contacting
your place of purchase.
SET UP
1 | 2 | 3 | 4 |
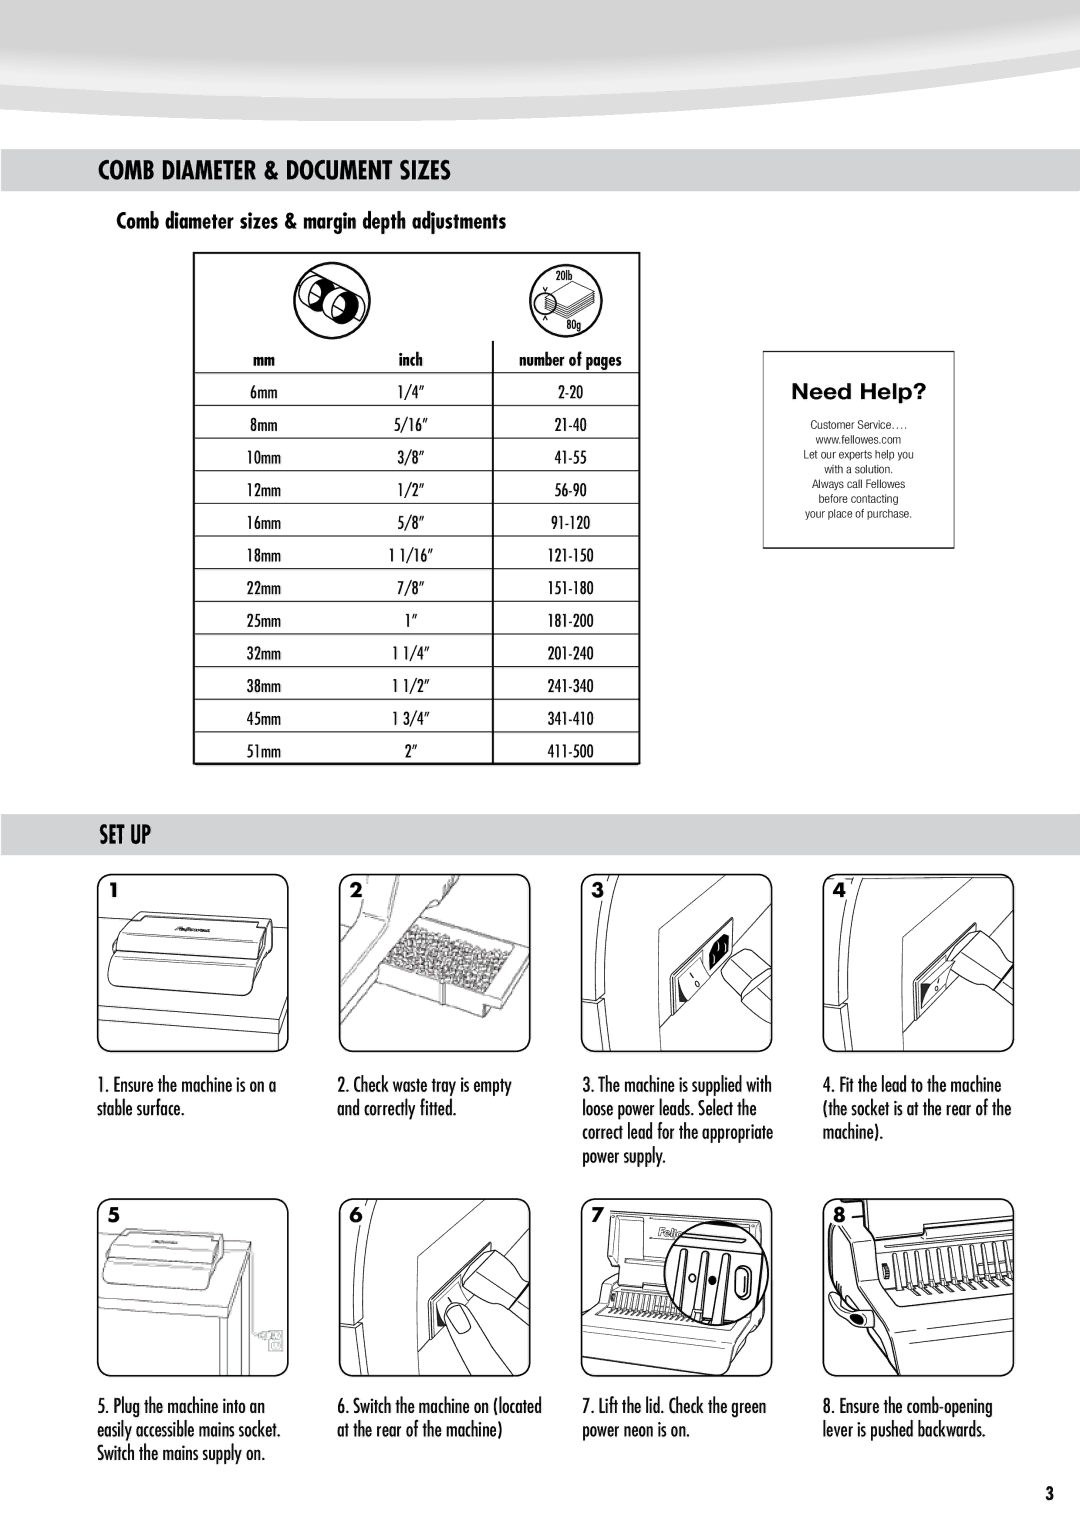
1.Ensure the machine is on a stable surface.
5
2.Check waste tray is empty and correctly fitted.
6
3.The machine is supplied with loose power leads. Select the correct lead for the appropriate power supply.
7 ![]()
4.Fit the lead to the machine (the socket is at the rear of the machine).
8
5.Plug the machine into an
easily accessible mains socket. Switch the mains supply on.
6.Switch the machine on (located at the rear of the machine)
7. Lift the lid. Check the green | 8. Ensure the |
power neon is on. | lever is pushed backwards. |
3
