
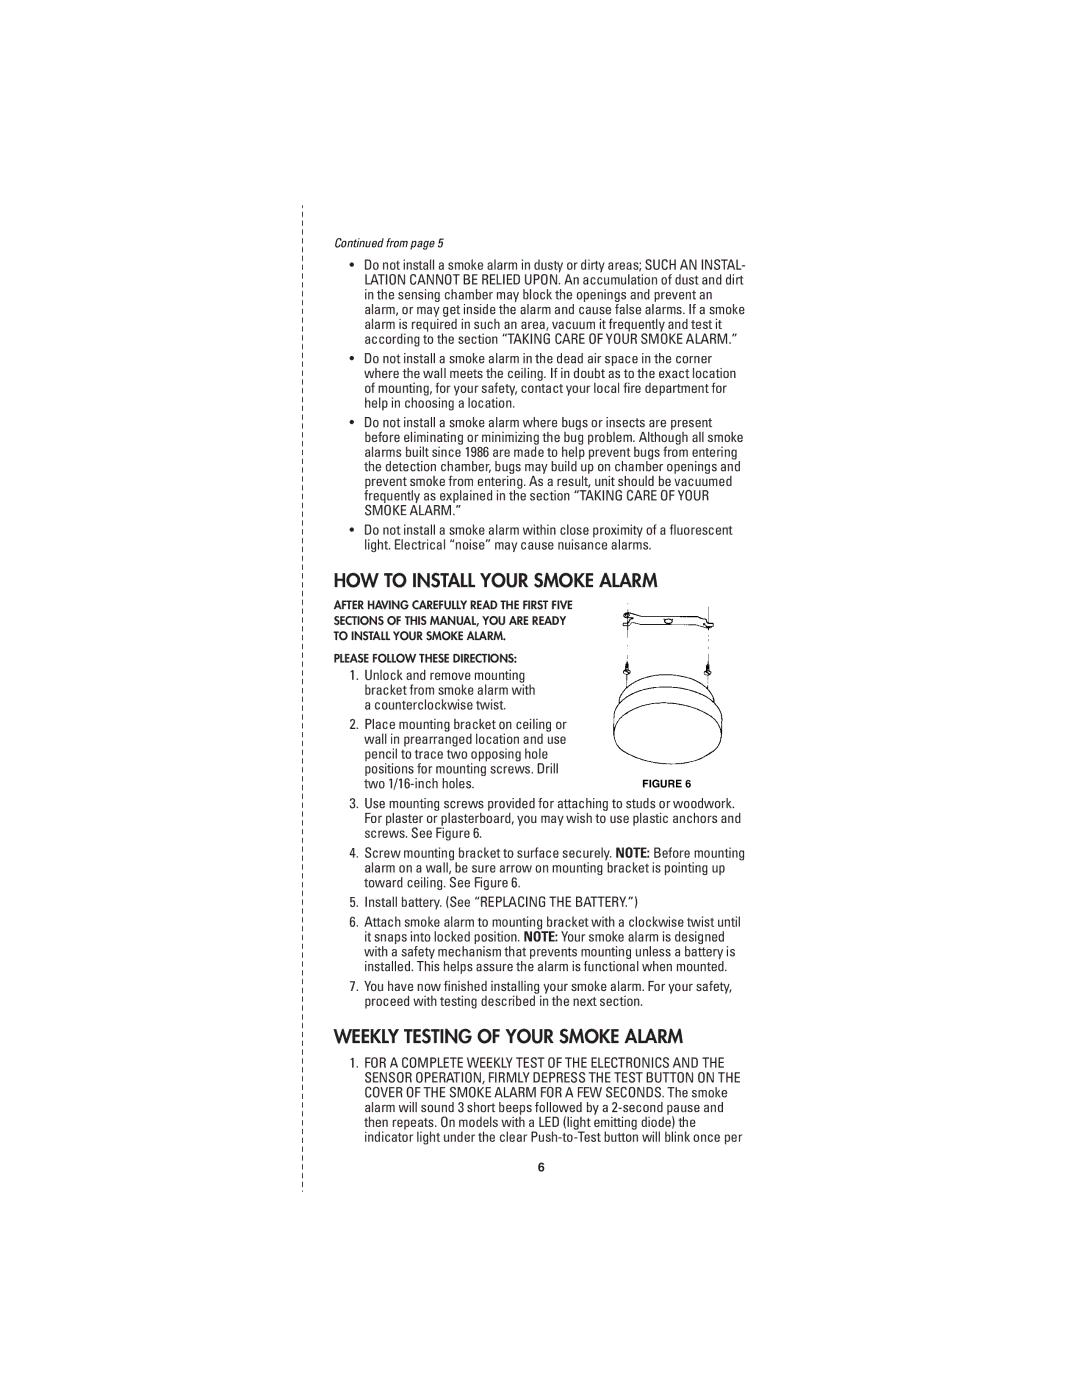
Model B, Model C, Model E, Model PB, A specifications
Firex is a prominent brand known for its cutting-edge fire safety technology, offering a range of models designed to cater to various safety needs across different environments. Among its notable products, the Firex A, Model PB, Model E, Model C, and Model B stand out for their advanced features, innovative technologies, and reliable characteristics.Firex A is renowned for its compact design, which makes it suitable for residential settings. One of its main features is the dual-sensor technology that combines both photoelectric and ionization sensors. This feature allows the alarm to detect a wide range of fire types, from smoldering flames to fast-flaming fires. Additionally, the Firex A is equipped with a voice alarm that clearly communicates danger, enhancing user awareness and response times.
Model PB, designed for commercial use, incorporates advanced detection technology to provide quicker responses to smoke and heat. This model features a multi-sensor system that utilizes both optical and thermal sensors, ensuring it can react to various fire scenarios efficiently. Moreover, the Model PB includes a smart connectivity option, allowing users to integrate it into a larger fire safety management system, facilitating real-time monitoring and alerts.
Model E is specifically tailored for industrial applications, boasting robust features that meet stringent regulatory standards. It is built to function in extreme conditions, featuring a weather-resistant casing and enhanced sensitivity settings. One of its standout characteristics is its ability to filter out false alarms caused by dust or steam, thereby ensuring it operates reliably in challenging environments. Additionally, Model E can connect with other safety devices to create a synchronized alert system.
The Model C presents a balance of affordability and performance. Ideal for public spaces such as schools and offices, this model comes with a straightforward installation process and user-friendly interface. It features a built-in battery backup that ensures functionality during power outages. The Model C also has a unique tamper-resistant design, preventing unauthorized removal or disconnection, which enhances overall safety.
Finally, Model B is designed for high-occupancy environments, incorporating features like interconnected alarms that activate multiple units in case of an emergency. This model also emphasizes energy efficiency, utilizing low-power technology that reduces overall operational costs. With its sleek design and high sensitivity, Model B is an excellent choice for hotels, theaters, and similar venues.
In summary, Firex offers a diverse range of fire safety solutions, each tailored to specific needs with advanced technology, notable features, and robust characteristics that ensure safety and reliability in various settings.