Spread the legs at the base of the cymbal stand (I) and set evenly on the floor. Insert the top tube of the cymbal stand into the tripod base. Adjust height as necessary and tighten. Spread tripod legs out evenly. The wider the legs are spread the more stable the stand will be while playing.
Place the 14” crash cymbal (F) over the threaded top of the cymbal stand leaving one washer and one cymbal felt on the underside and one cymbal felt and washer on top. Tighten wing nut leaving enough room for the cymbal to move during play.
Spread the legs at the base of the
Place one 12”
The seat or drum throne has a black seat cushion that is attached to the top of the seats tripod base. Tighten the wing nut. Extend the tripods legs fully and adjust height that is comfortable for you by inserting the bolt with wing nut through one of the three height settings. See next page for complete diagram instructions.
Once seated you can now fully adjust any angles and height of the drums, cymbals, and stands to your liking. Remember there is no limit to your creativity, so feel free to experiment with your set up!
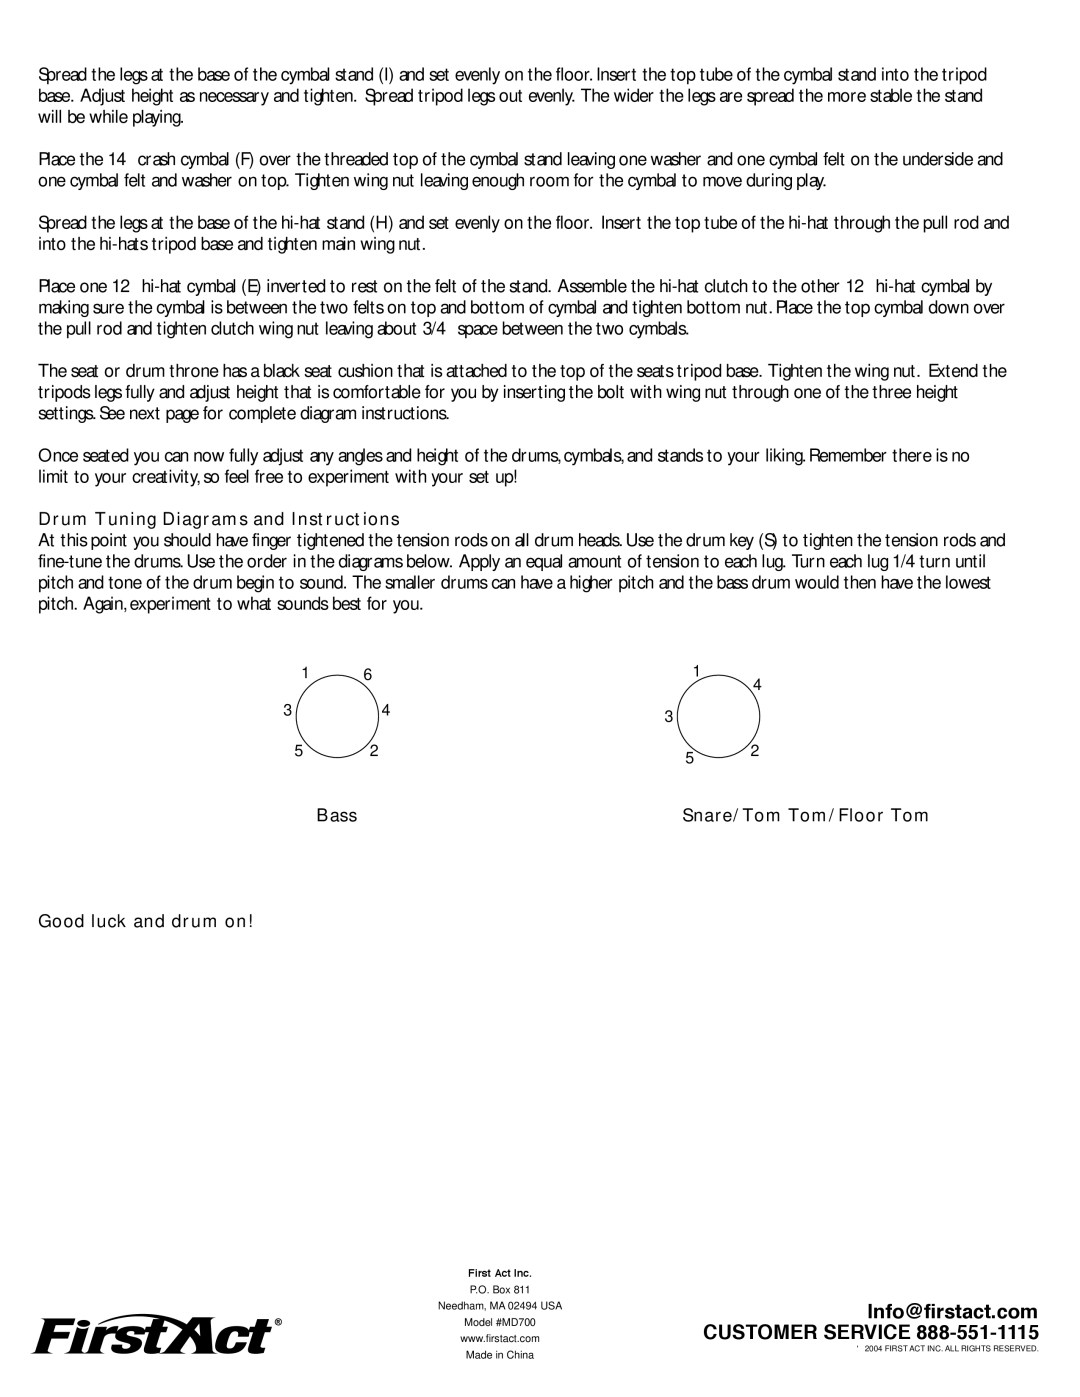
Drum Tuning Diagrams and Instructions
At this point you should have finger tightened the tension rods on all drum heads. Use the drum key (S) to tighten the tension rods and
1 | 6 |
| 1 | 4 |
|
|
|
| |
3 |
| 4 | 3 |
|
|
|
|
| |
5 | 2 |
| 5 | 2 |
|
|
|
| |
| Bass |
| Snare/ Tom Tom/ Floor Tom | |
Good luck and drum on!
First Act Inc. |
|
P.O. Box 811 | Info@firstact.com |
Model #MD700 | |
Needham, MA 02494 USA |
|
www.firstact.com | CUSTOMER SERVICE |
Made in China | © 2004 FIRST ACT INC. ALL RIGHTS RESERVED. |
|
