4
Installation instructions
Preparing the rangehood for installation
Ensure the overhead cabinets are built according to Fig.5 (below).
Before drilling any holes, check that the area behind the surface to be drilled is clear of any electrical cables or pipes etc.
Recirculating
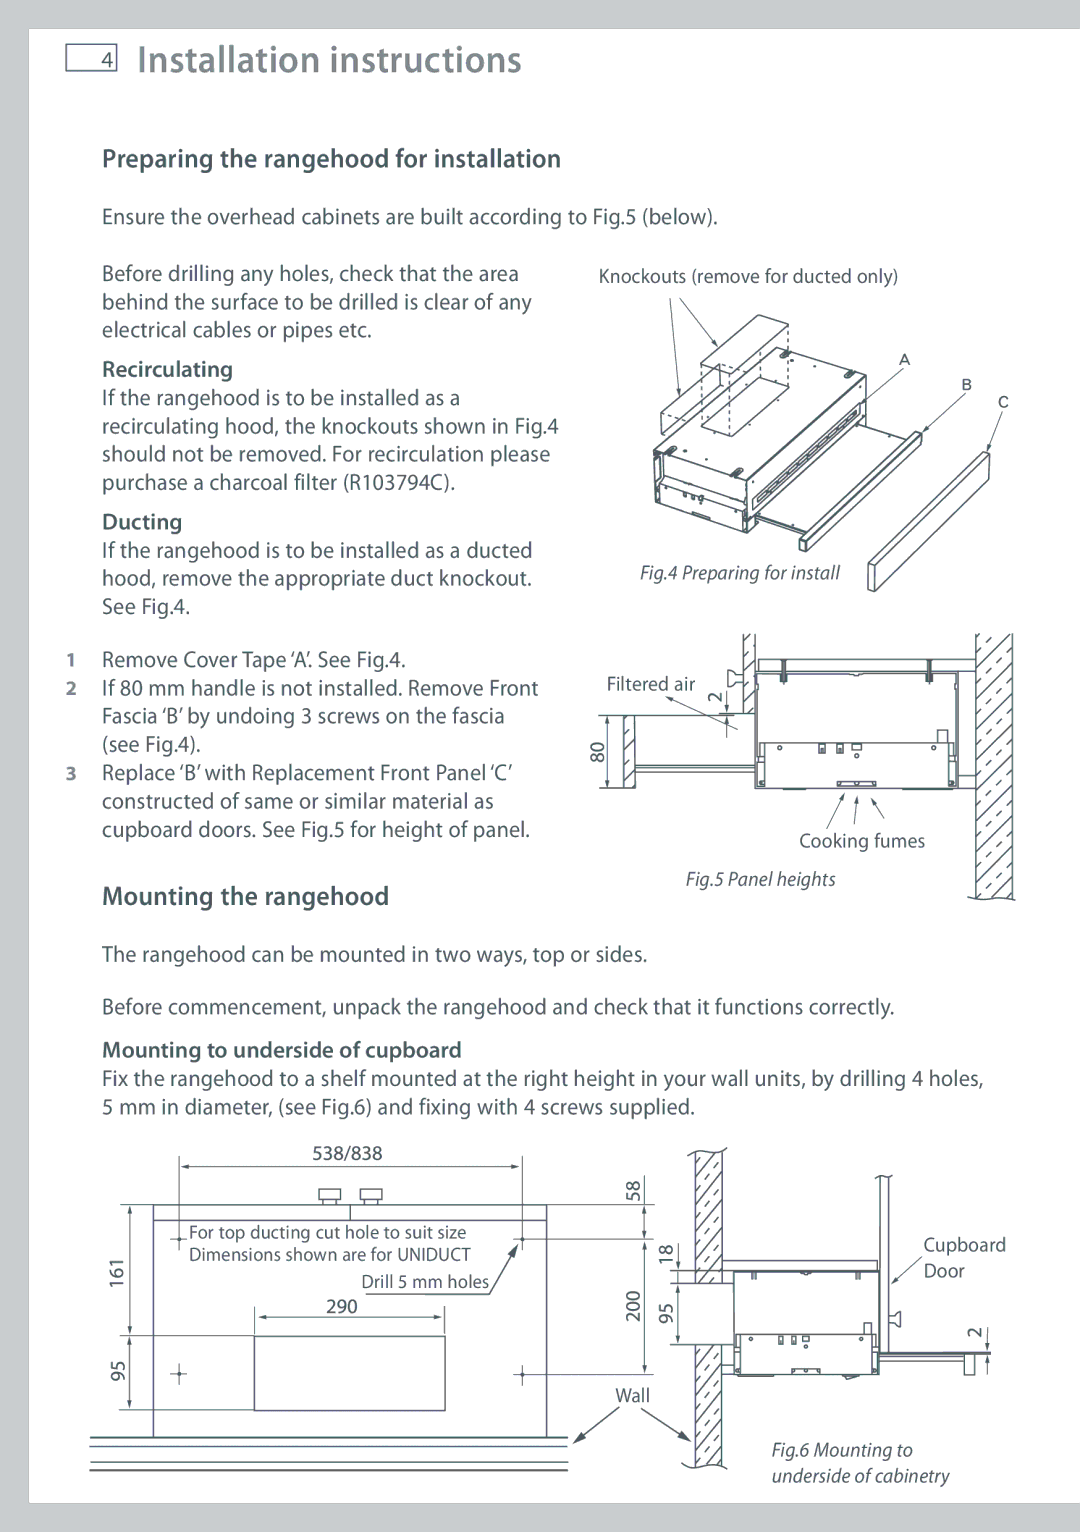
If the rangehood is to be installed as a recirculating hood, the knockouts shown in Fig.4 should not be removed. For recirculation please purchase a charcoal filter (R103794C).
Ducting
If the rangehood is to be installed as a ducted hood, remove the appropriate duct knockout. See Fig.4.
Knockouts (remove for ducted only)
Fig.4 Preparing for install
1 | Remove Cover Tape ‘A’. See Fig.4. | Filtered air |
2 | If 80 mm handle is not installed. Remove Front | |
| Fascia ‘B’ by undoing 3 screws on the fascia |
|
| (see Fig.4). |
|
3 | Replace ‘B’ with Replacement Front Panel ‘C’ |
|
| constructed of same or similar material as |
|
cupboard doors. See Fig.5 for height of panel. | Cooking fumes |
| |
Mounting the rangehood | Fig.5 Panel heights |
| |
The rangehood can be mounted in two ways, top or sides. |
|
Before commencement, unpack the rangehood and check that it functions correctly.
Mounting to underside of cupboard
Fix the rangehood to a shelf mounted at the right height in your wall units, by drilling 4 holes, 5 mm in diameter, (see Fig.6) and fixing with 4 screws supplied.
For top ducting cut hole to suit size Dimensions shown are for UNIDUCT
Drill 5 mm holes
Cupboard ![]() Door
Door
Wall