Assembly | Label Decoration |
Fork Post
9 | Fork Cover |
|
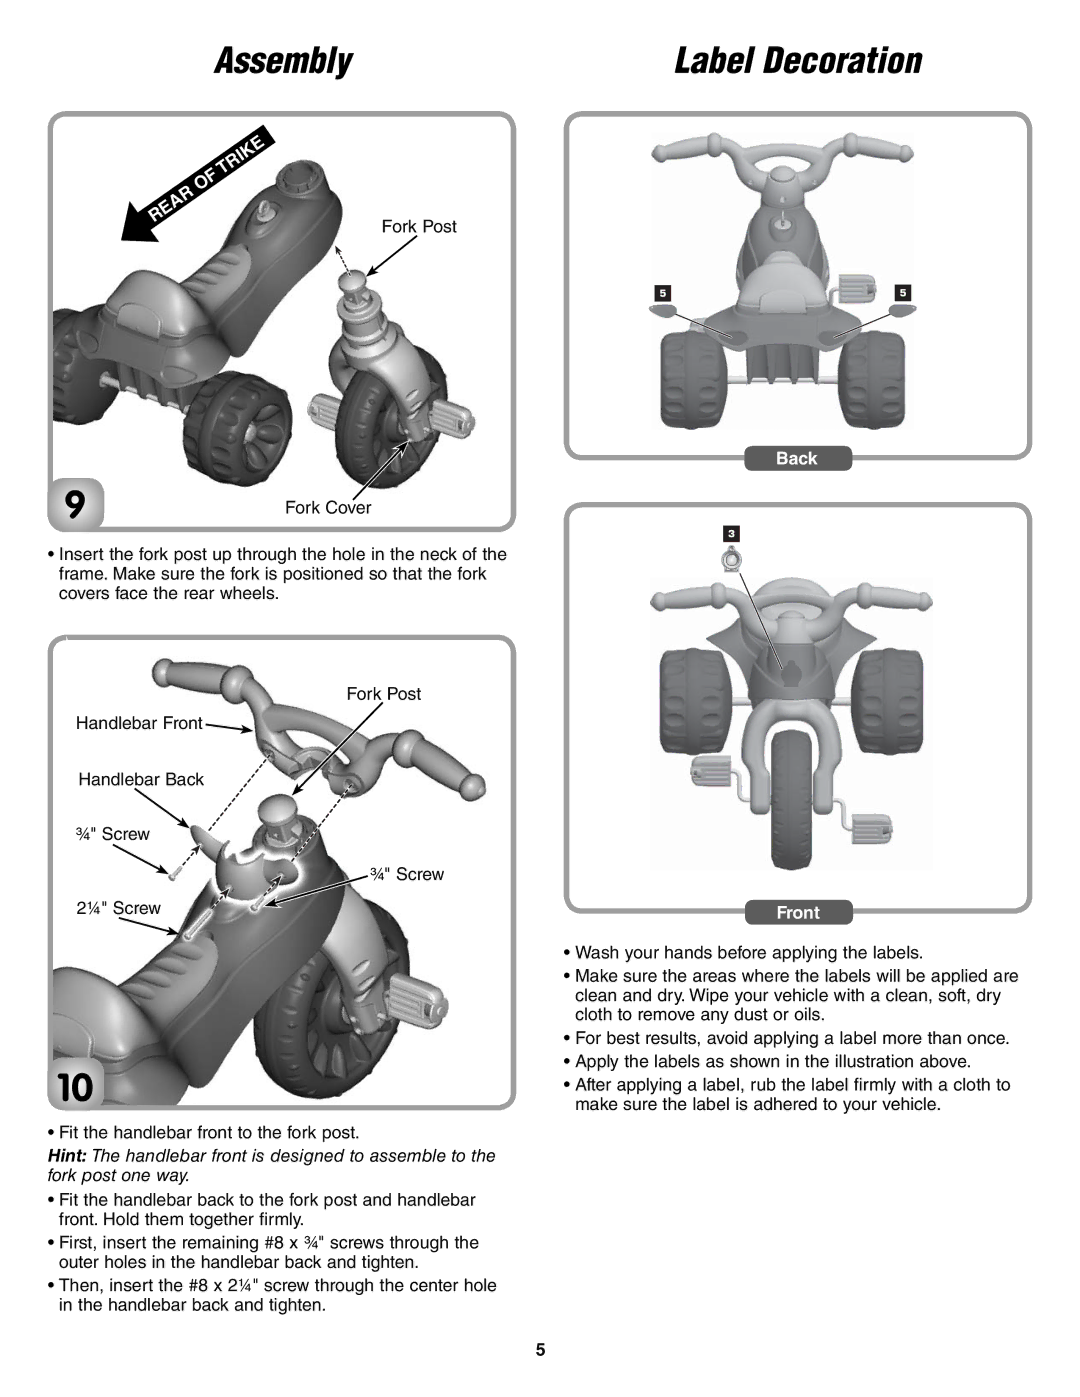
•Insert the fork post up through the hole in the neck of the frame. Make sure the fork is positioned so that the fork covers face the rear wheels.
Fork Post
Handlebar Front ![]()
Handlebar Back
¾" Screw
¾" Screw
2¼" Screw
10
• Fit the handlebar front to the fork post.
Hint: The handlebar front is designed to assemble to the fork post one way.
•Fit the handlebar back to the fork post and handlebar front. Hold them together fi rmly.
•First, insert the remaining #8 x ¾" screws through the outer holes in the handlebar back and tighten.
•Then, insert the #8 x 2¼" screw through the center hole in the handlebar back and tighten.
5 |
| 5 |
Back
Front
•Wash your hands before applying the labels.
•Make sure the areas where the labels will be applied are clean and dry. Wipe your vehicle with a clean, soft, dry cloth to remove any dust or oils.
•For best results, avoid applying a label more than once.
•Apply the labels as shown in the illustration above.
•After applying a label, rub the label fi rmly with a cloth to make sure the label is adhered to your vehicle.
5
