4
Starting and Stopping
Before starting your Hedgetrimmer. | A | ||
|
|
| |
1. Form a loop in mains cable and push the |
|
| |
loop through the hole in the handle as |
|
| |
illustrated in | Fig. A. |
|
|
2. To secure, position the loop over the hook |
|
| |
and pull back as illustrated in | Fig. B. |
| |
3. Connect to mains and switch on |
|
| |
4. Remove blade cover as illustrated in |
| Fig. | |
C. |
|
| C |
|
|
| |
B |
To start your Hedgetrimmer
1.There are two switch levers fitted to your Hedgetrimmer.
2.Both switch levers need to be held in the
operating position | (See Fig D) for the |
product to start. |
|
To stop your Hedgetrimmer
•Move Hedgetrimmer away from cutting area before stopping.
1. To stop, release one |
| of the switch |
levers. (Fig E) |
|
|
D |
E |
How to Use
How to Use your Hedgetrimmer
1.Inspect area to be cut before each use - remove objects which can be thrown or become entangled in the cutting blades.
2.Always keep the Hedgetrimmer in front of your body. Hold handle firmly with both hands and stand in a secure and stable position.
3.Allow the cutting blades to reach full speed before entering the material to be cut.
4.Always work going away from people and solid objects such as walls, large stones, trees, vehicles etc.
5.If blade stalls, immediately stop the Hedgetrimmer. Disconnect the Hedgetrimmer from the power source and clear jammed debris from the cutting blades. Inspect blades
and repair or replace as needed.
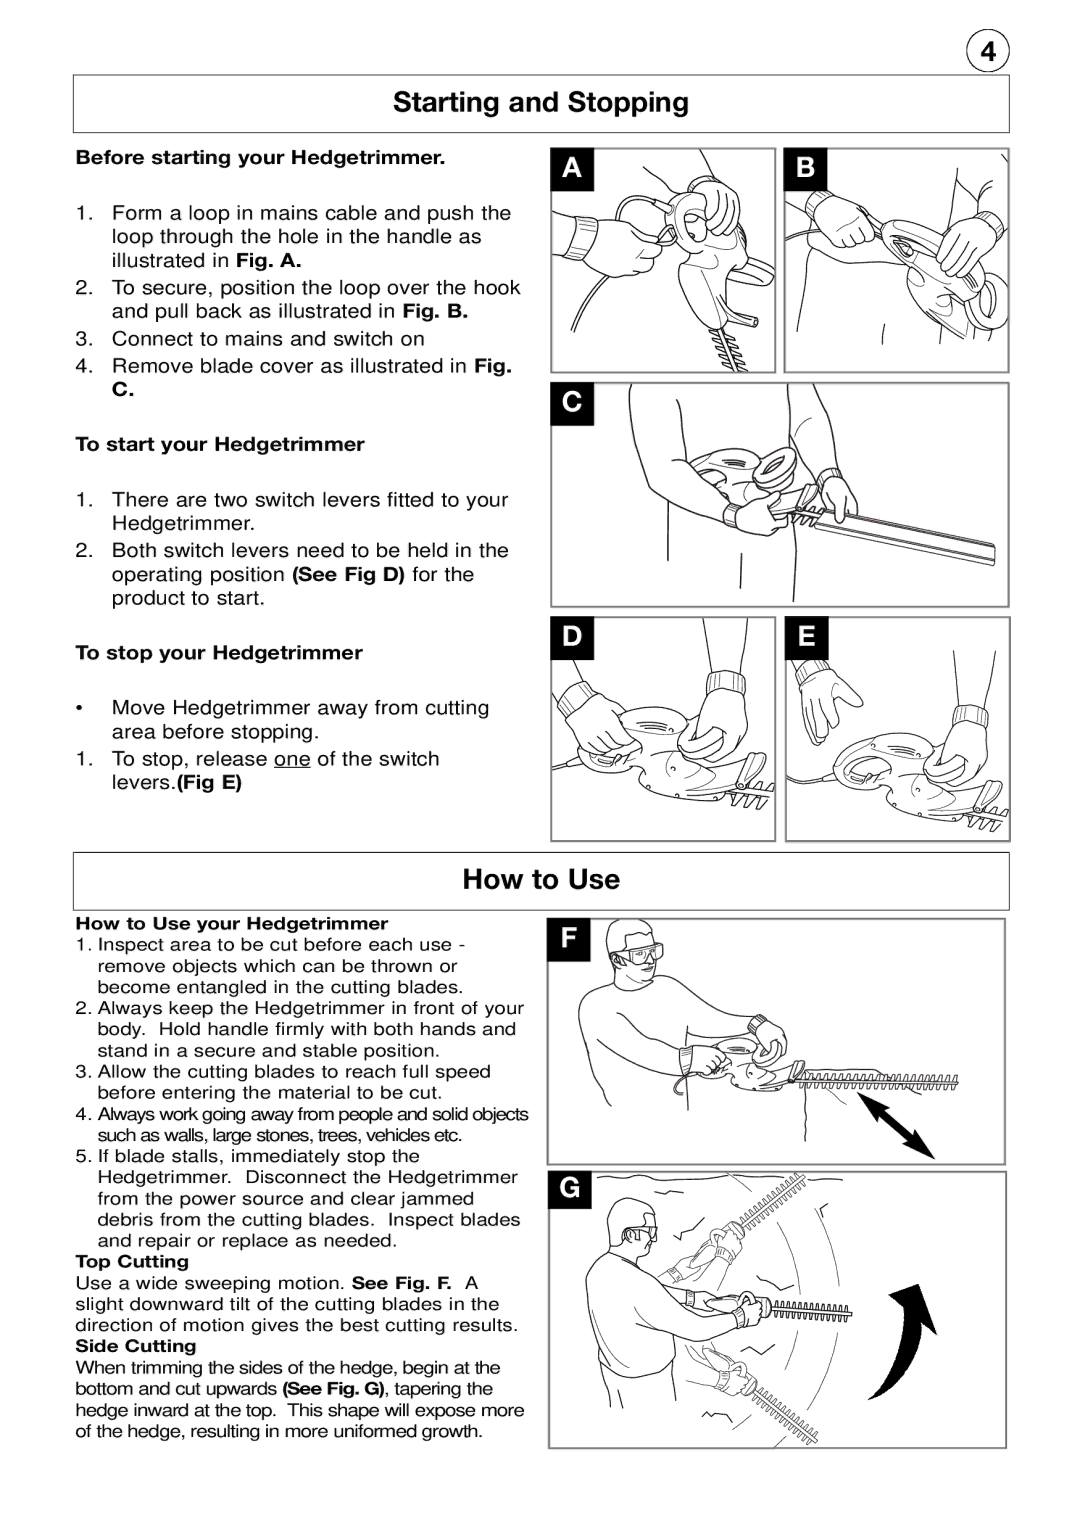
Top Cutting
Use a wide sweeping motion.See Fig. F. A slight downward tilt of the cutting blades in the
direction of motion gives the best cutting results.
Side Cutting
When trimming the sides of the hedge, begin at the
bottom and cut upwards(See Fig. G), tapering the hedge inward at the top. This shape will expose more
of the hedge, resulting in more uniformed growth.
F ![]()
G