Assembly Instructions
A1 |
B1 |
C |
E1 |
A2 |
B2 |
D |
1 | 2 |
| |
| 3 |
E2 |
|
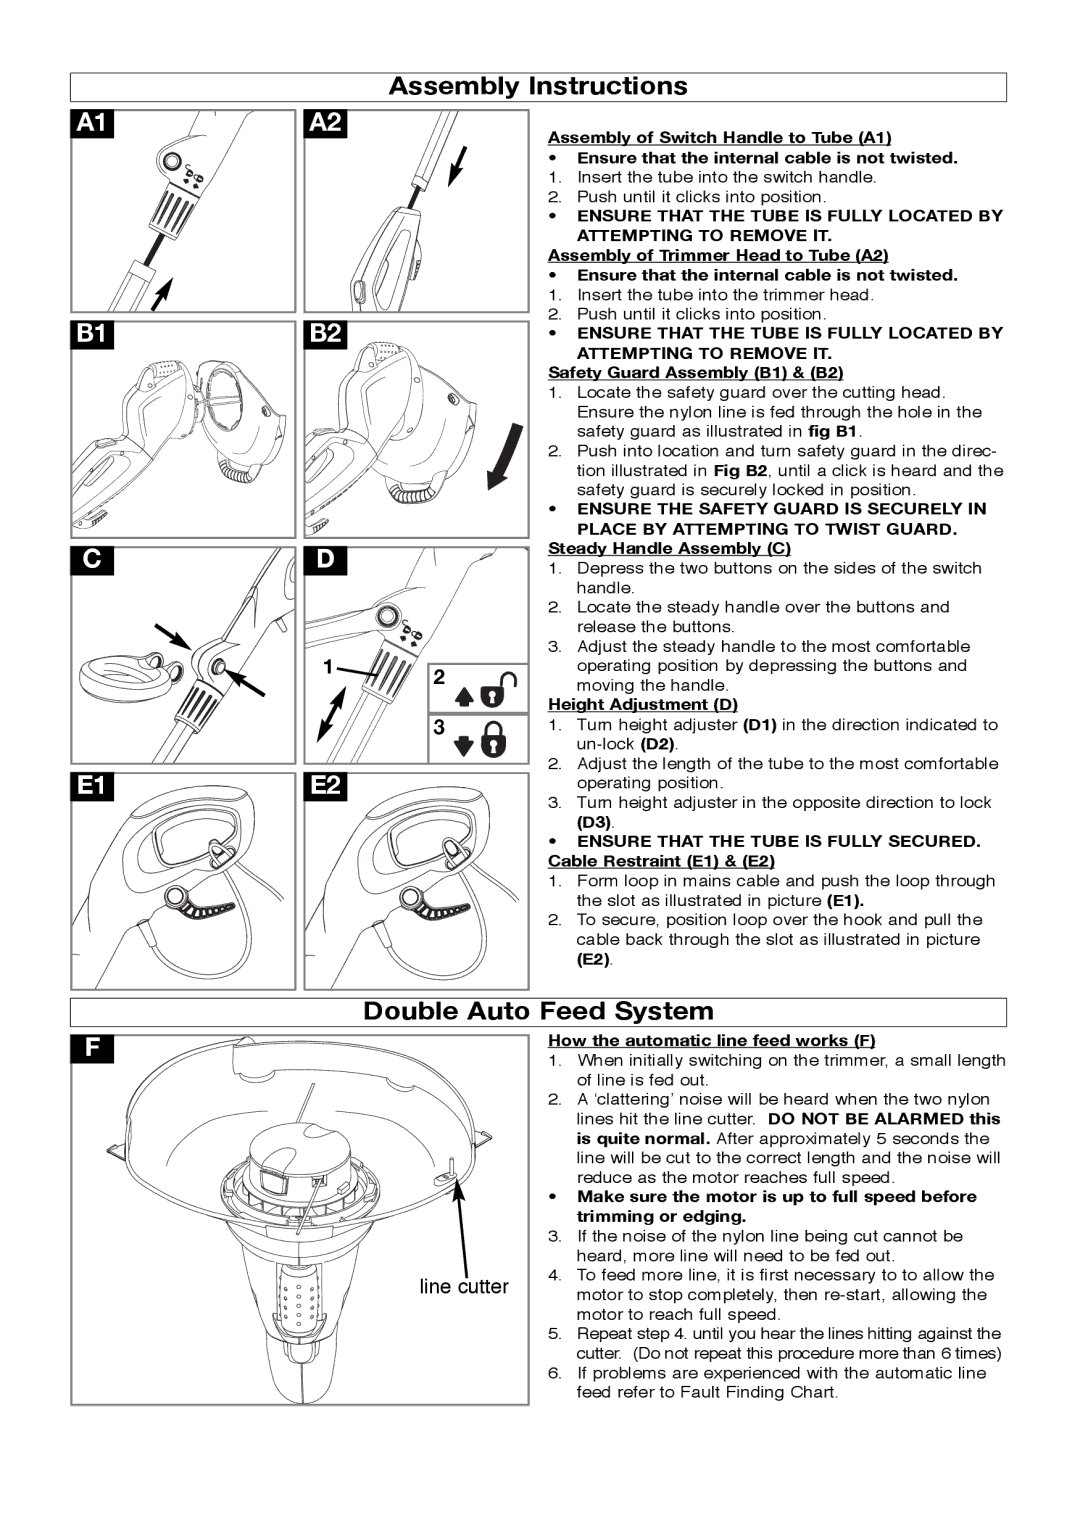
Assembly of Switch Handle to Tube (A1)
•Ensure that the internal cable is not twisted.
1.Insert the tube into the switch handle.
2.Push until it clicks into position.
•ENSURE THAT THE TUBE IS FULLY LOCATED BY
ATTEMPTING TO REMOVE IT.
Assembly of Trimmer Head to Tube (A2)
•Ensure that the internal cable is not twisted.
1.Insert the tube into the trimmer head.
2.Push until it clicks into position.
•ENSURE THAT THE TUBE IS FULLY LOCATED BY
ATTEMPTING TO REMOVE IT.
Safety Guard Assembly (B1) & (B2)
1.Locate the safety guard over the cutting head.
Ensure the nylon line is fed through the hole in the safety guard as illustrated in fig B1.
2.Push into location and turn safety guard in the direc- tion illustrated in Fig B2, until a click is heard and the
safety guard is securely locked in position.
•ENSURE THE SAFETY GUARD IS SECURELY IN
PLACE BY ATTEMPTING TO TWIST GUARD.
Steady Handle Assembly (C)
1.Depress the two buttons on the sides of the switch handle.
2.Locate the steady handle over the buttons and release the buttons.
3.Adjust the steady handle to the most comfortable operating position by depressing the buttons and
moving the handle.
Height Adjustment (D)
1.Turn height adjuster (D1) in the direction indicated to
2.Adjust the length of the tube to the most comfortable operating position.
3.Turn height adjuster in the opposite direction to lock
(D3).
•ENSURE THAT THE TUBE IS FULLY SECURED. Cable Restraint (E1) & (E2)
1.Form loop in mains cable and push the loop through the slot as illustrated in picture (E1).
2.To secure, position loop over the hook and pull the
cable back through the slot as illustrated in picture (E2).
Double Auto Feed System
F
line cutter
How the automatic line feed works (F)
1.When initially switching on the trimmer, a small length of line is fed out.
2.A ‘clattering’ noise will be heard when the two nylon lines hit the line cutter. DO NOT BE ALARMED this is quite normal. After approximately 5 seconds the line will be cut to the correct length and the noise will
reduce as the motor reaches full speed.
•Make sure the motor is up to full speed before trimming or edging.
3.If the noise of the nylon line being cut cannot be heard, more line will need to be fed out.
4.To feed more line, it is first necessary to to allow the motor to stop completely, then
5.Repeat step 4. until you hear the lines hitting against the cutter. (Do not repeat this procedure more than 6 times)
6.If problems are experienced with the automatic line feed refer to Fault Finding Chart.