TSB 05-4-12 (Continued)
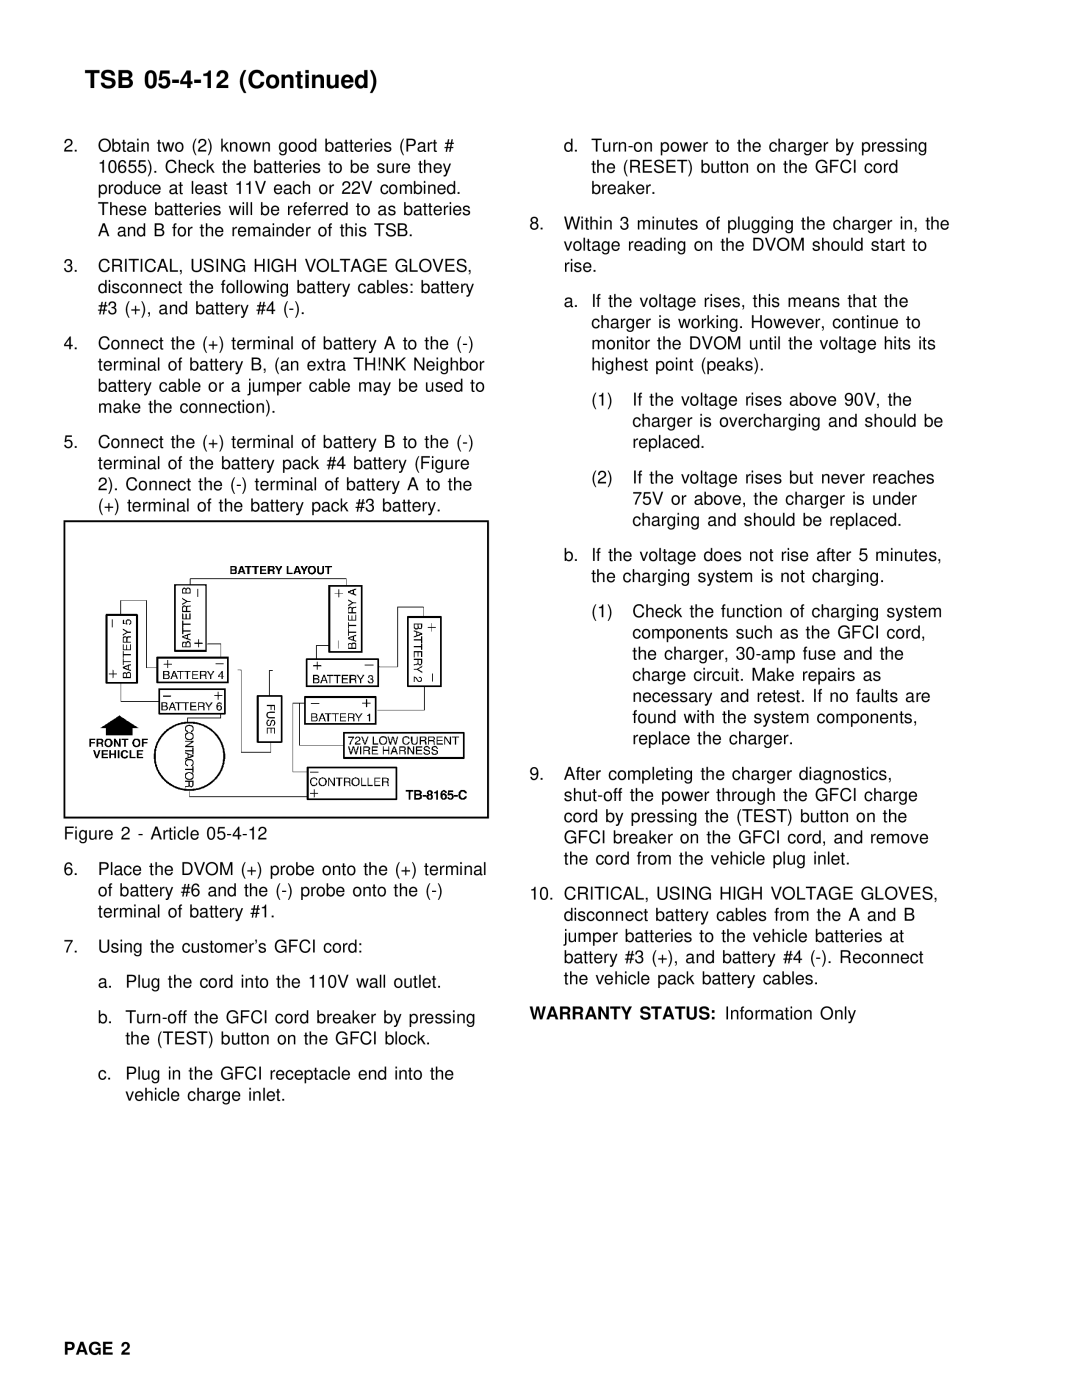
2.Obtain two (2) known good batteries (Part # 10655). Check the batteries to be sure they produce at least 11V each or 22V combined. These batteries will be referred to as batteries A and B for the remainder of this TSB.
3.CRITICAL, USING HIGH VOLTAGE GLOVES, disconnect the following battery cables: battery #3 (+), and battery #4
4.Connect the (+) terminal of battery A to the
5.Connect the (+) terminal of battery B to the
(+)terminal of the battery pack #3 battery.
Figure 2 - Article 05-4-12
6.Place the DVOM (+) probe onto the (+) terminal of battery #6 and the (-) probe onto the (-) terminal of battery #1.
7.Using the customer’s GFCI cord:
a.Plug the cord into the 110V wall outlet.
b.Turn-off the GFCI cord breaker by pressing the (TEST) button on the GFCI block.
c.Plug in the GFCI receptacle end into the vehicle charge inlet.
d.Turn-on power to the charger by pressing the (RESET) button on the GFCI cord breaker.
8.Within 3 minutes of plugging the charger in, the voltage reading on the DVOM should start to rise.
a.If the voltage rises, this means that the charger is working. However, continue to monitor the DVOM until the voltage hits its highest point (peaks).
(1)If the voltage rises above 90V, the charger is overcharging and should be replaced.
(2)If the voltage rises but never reaches 75V or above, the charger is under charging and should be replaced.
b.If the voltage does not rise after 5 minutes, the charging system is not charging.
(1)Check the function of charging system components such as the GFCI cord, the charger, 30-amp fuse and the charge circuit. Make repairs as necessary and retest. If no faults are found with the system components, replace the charger.
9.After completing the charger diagnostics, shut-off the power through the GFCI charge cord by pressing the (TEST) button on the GFCI breaker on the GFCI cord, and remove the cord from the vehicle plug inlet.
10.CRITICAL, USING HIGH VOLTAGE GLOVES, disconnect battery cables from the A and B jumper batteries to the vehicle batteries at battery #3 (+), and battery #4 (-). Reconnect the vehicle pack battery cables.
WARRANTY STATUS: Information Only
PAGE 2