
FGGF304DLF, DGGF3032KB, FGGF304DLB, FGGF304DLW specifications
The Frigidaire series of gas ranges, including the FGGF304DLW, FGGF304DLB, DGGF3032KB, and FGGF304DLF, showcases a commitment to functionality and modern design. These models are designed to enhance your cooking experience while delivering impressive performance and reliability.One of the standout features of these ranges is the powerful 4.8 cubic foot capacity oven. This ample space allows home cooks to tackle multiple dishes, whether you're roast cooking for a family gathering or baking a variety of goods. Additionally, the oven features Even Baking Technology, which ensures that your food is baked evenly every time. With its convenient hidden bake element, cleanup is simplified, as it minimizes spills while providing consistent baking results.
The cooktop is equipped with five sealed burners, providing flexibility to accommodate a variety of cooking styles. The center burner delivers an impressive output of 18,000 BTUs, making it perfect for searing meats or boiling water quickly. Each burner is designed to provide even heat distribution, preventing hot spots and leading to better cooking results. The continuous corner-to-corner grates allow for easy movement of pots and pans across the cooking surface, enhancing your cooking efficiency.
These Frigidaire models also boast a range of user-friendly features that make cooking simpler. The electronic oven controls are clearly marked and easy to read, allowing for quick adjustments while cooking. The models come with a built-in timer and delay start oven setting, offering convenience for busy home cooks.
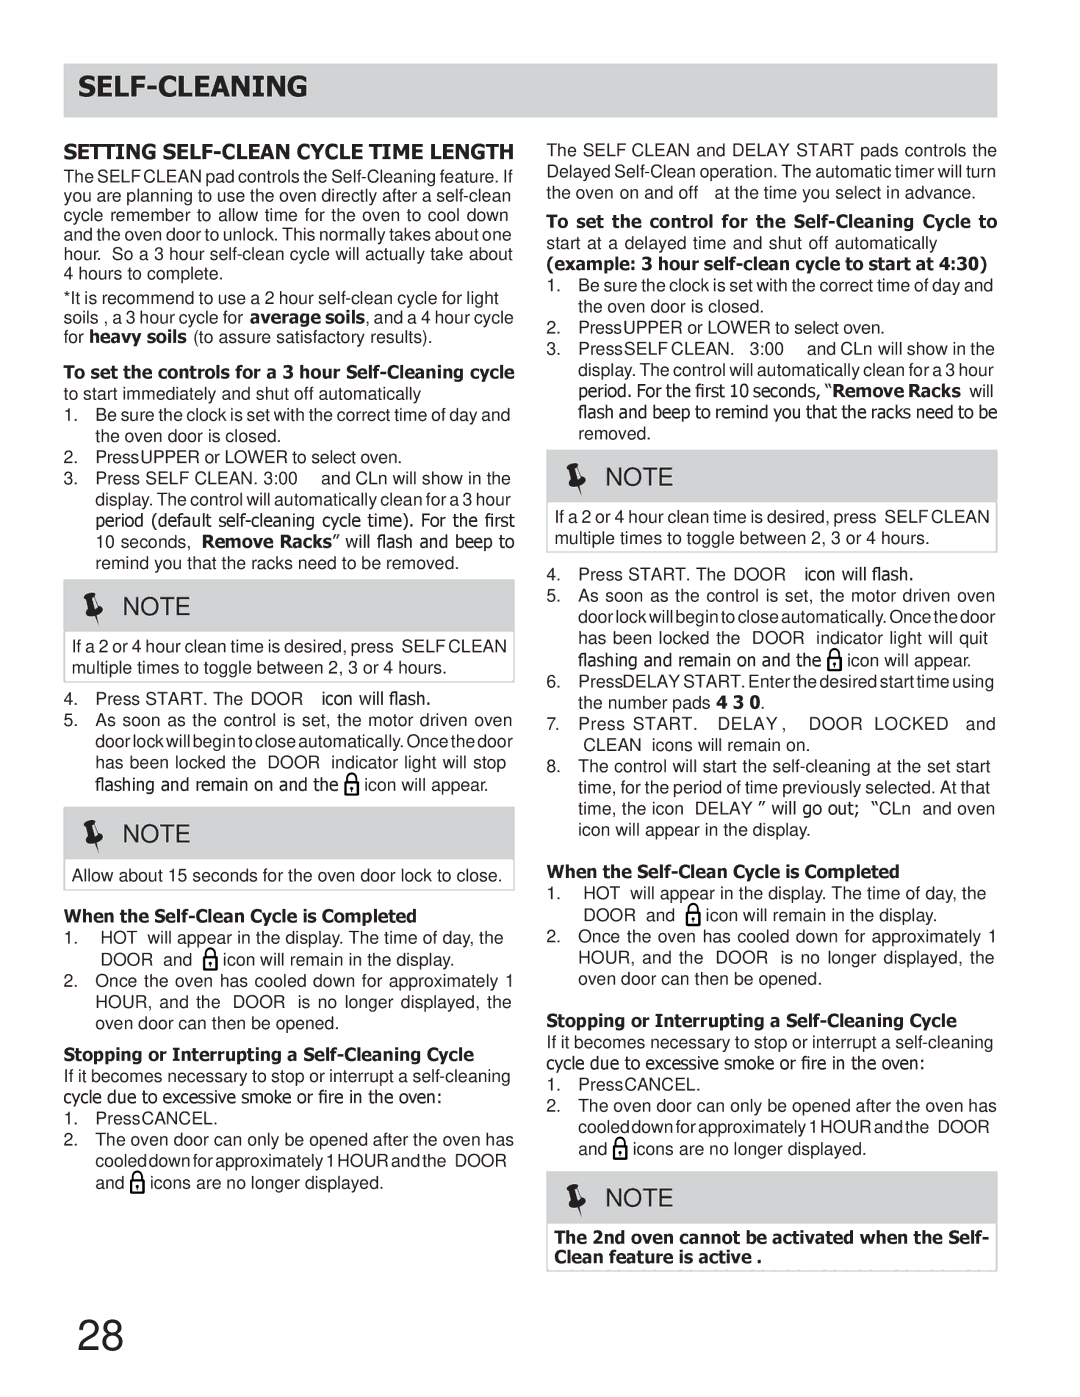
Another highlight is the self-cleaning feature, which saves time and effort when maintaining the oven. With just a touch of a button, it effectively cleans the interior using high temperatures to burn away food residue.
In terms of aesthetics, these Frigidaire units offer a sleek and modern design that complements any kitchen décor. Available in multiple finishes, such as classic white, black, and stainless steel, they not only perform well but also look great doing it.
Overall, the Frigidaire FGGF304DLW, FGGF304DLB, DGGF3032KB, and FGGF304DLF models provide a seamless blend of technology, design, and practical features that cater to today's home cooks. Whether you’re an experienced chef or a casual cook, these gas ranges promise to elevate your culinary adventures.