Grill Assembly
IMPORTANT: Remove all protective plastic film from stainless steel parts prior to assembly/use. This film is installed at the factory to prevent damage that could occur during shipment and handling.
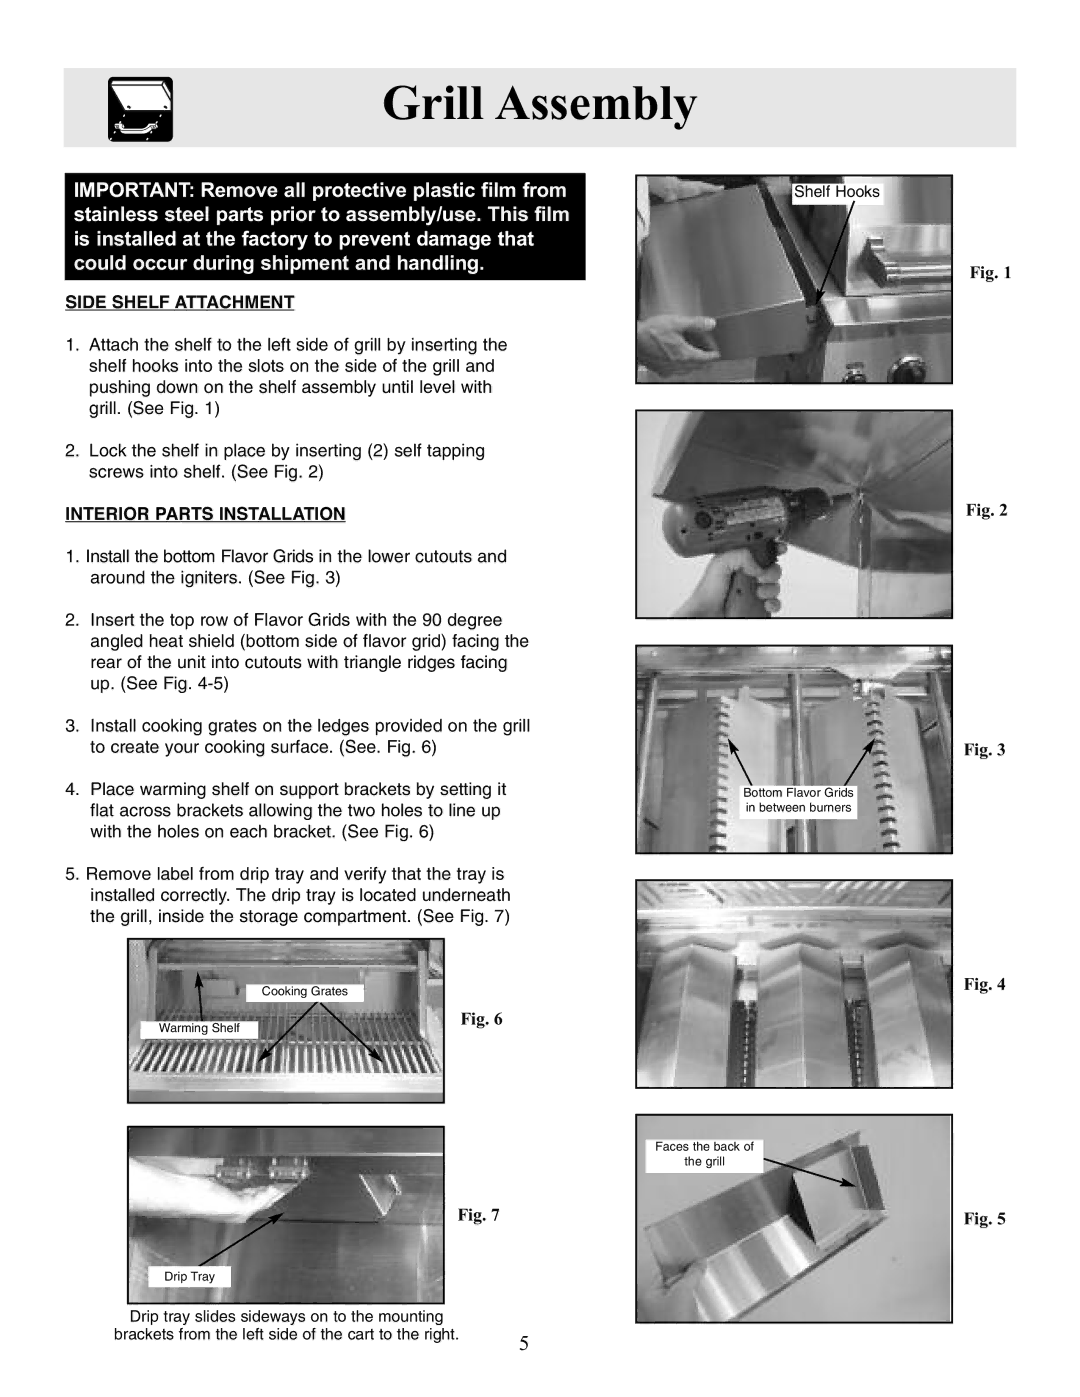
SIDE SHELF ATTACHMENT
1.Attach the shelf to the left side of grill by inserting the shelf hooks into the slots on the side of the grill and pushing down on the shelf assembly until level with grill. (See Fig. 1)
2.Lock the shelf in place by inserting (2) self tapping screws into shelf. (See Fig. 2)
INTERIOR PARTS INSTALLATION
1.Install the bottom Flavor Grids in the lower cutouts and around the igniters. (See Fig. 3)
2.Insert the top row of Flavor Grids with the 90 degree angled heat shield (bottom side of flavor grid) facing the rear of the unit into cutouts with triangle ridges facing up. (See Fig.
3.Install cooking grates on the ledges provided on the grill to create your cooking surface. (See. Fig. 6)
4.Place warming shelf on support brackets by setting it flat across brackets allowing the two holes to line up with the holes on each bracket. (See Fig. 6)
5.Remove label from drip tray and verify that the tray is installed correctly. The drip tray is located underneath the grill, inside the storage compartment. (See Fig. 7)
| Cooking Grates | Fig. 6 |
Warming Shelf |
|
|
|
|
| Fig. 7 |
|
|
|
|
|
| |
|
| Drip Tray |
|
|
|
|
|
|
|
| 5 |
|
|
|
|
| |
| Drip tray slides sideways on to the mounting | ||||
|
| ||||
brackets from the left side of the cart to the right. |
| ||||
Shelf Hooks
Bottom Flavor Grids in between burners
Faces the back of
the grill
Fig. 1
Fig. 2
Fig. 3
Fig. 4
Fig. 5