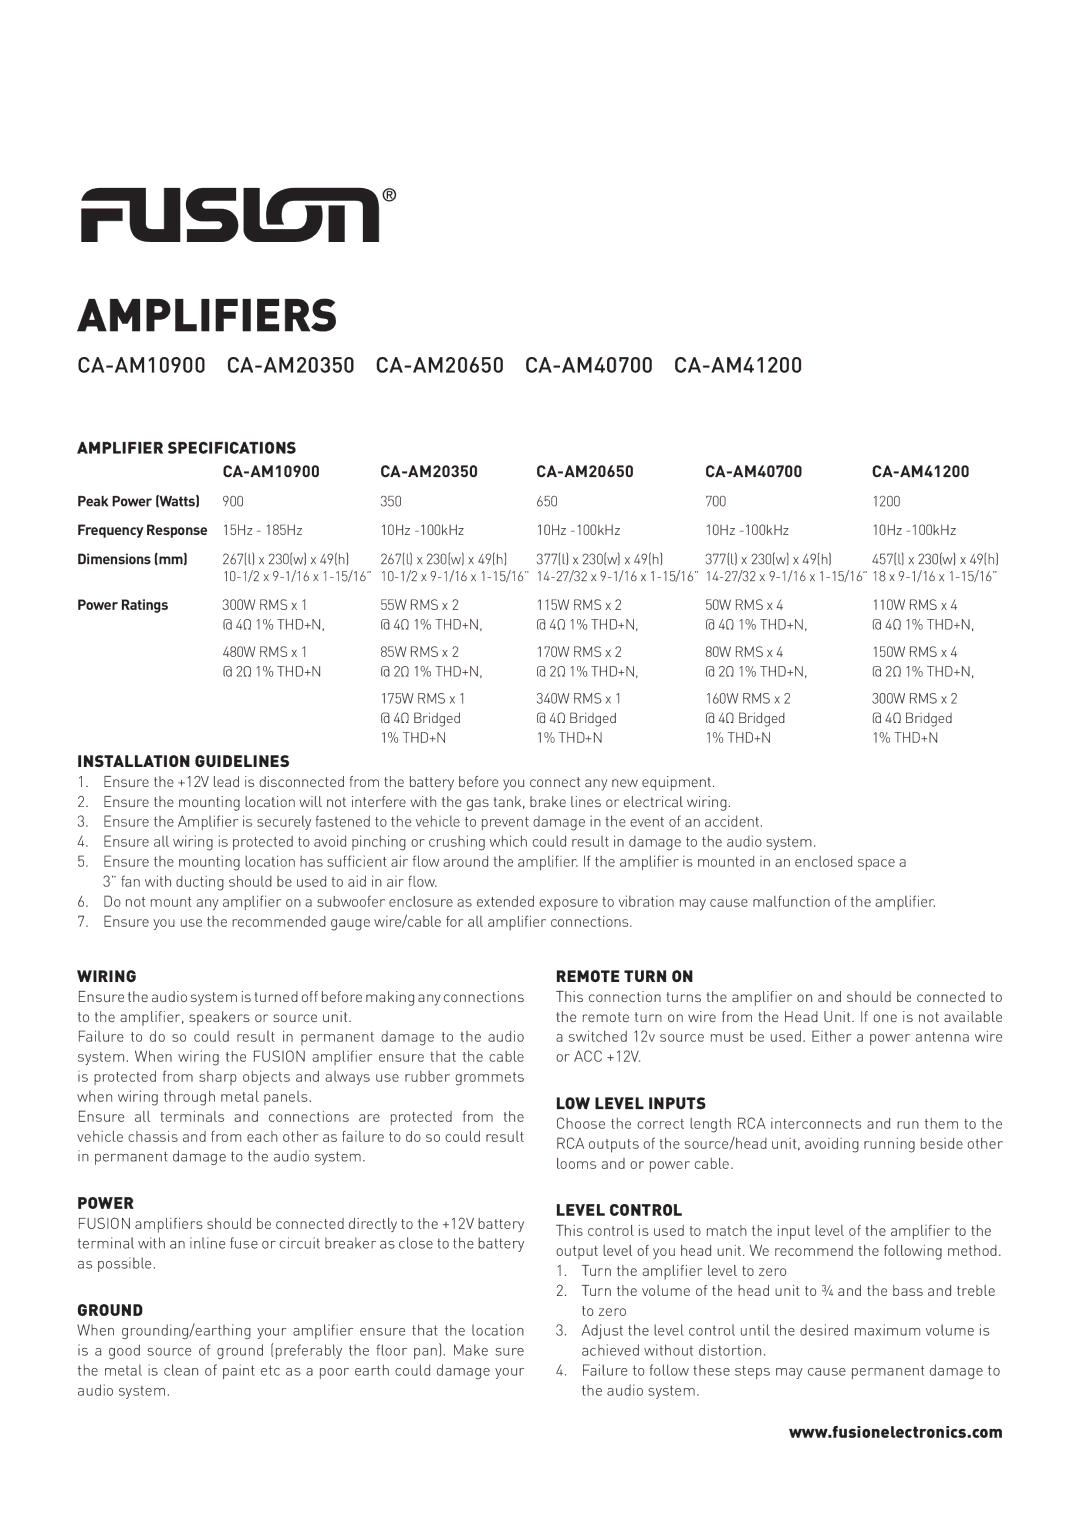
CA-AM10900, CA-AM20350, CA-AM40700, CA-AM20650, CA-AM41200 specifications
Fusion CA-AM41200, CA-AM20650, CA-AM40700, CA-AM20350, and CA-AM10900 are advanced materials designed for a variety of applications, showcasing a range of innovative features and technologies that enhance performance and usability in different environments.The CA-AM41200 is a high-strength composite that excels in structural applications. Its unique formulation combines lightweight characteristics with exceptional durability, making it ideal for aerospace and automotive industries. The material is resistant to corrosion and extreme temperatures, ensuring longevity and reliability. The advanced fiber-reinforced structure allows for improved load-bearing capacities, making it suitable for demanding applications where performance is critical.
The CA-AM20650 is engineered specifically for electronic devices. This material incorporates advanced thermal management technologies that reduce overheating in electronic components. Its low thermal conductivity allows for effective heat dissipation, enhancing the lifespan of electronic products. In addition, the CA-AM20650 features excellent dielectric properties, making it an ideal choice for insulating materials in various electrical applications.
CA-AM40700 is tailored for use in medical devices. Its biocompatibility ensures safe interaction with biological tissues, making it suitable for applications such as implants and surgical instruments. The material's ease of sterilization, combined with its mechanical strength, allows for reliable performance in medical environments. This versatility makes CA-AM40700 a preferred choice in the healthcare sector.
CA-AM20350 is designed for consumer goods, offering outstanding aesthetic qualities without sacrificing strength. This material exhibits superior impact resistance and flexibility, making it perfect for applications in packaging and durable goods. Its availability in various colors and finishes allows for customization, making it appealing to manufacturers looking for both functionality and visual appeal.
Lastly, CA-AM10900 focuses on sustainability, integrating recycled materials into its base formulation. This material not only meets performance standards but also aligns with environmental goals, appealing to eco-conscious consumers. Its strength and durability make it suitable for both indoor and outdoor applications, effectively bridging the gap between sustainability and practicality.
In summary, the Fusion CA-AM series represents a significant advancement in material science. Each variant addresses specific industry needs, incorporating modern technologies and characteristics that improve functionality, sustainability, and user experience across diverse applications. Whether in aerospace, electronics, medical, consumer goods, or sustainable practices, these materials offer unique solutions that define the future of manufacturing.