TURNING ON & SETTING THE INPUT POWER
The input power leads on the Emperor are supplied with 4mm gold banana type connectors (with optional crocodile clips) that should be connected directly to a suitable
When the charger is initially connected to a power source, it will ask you to confirm the maximum input power available from the power source and allow you to adjust the percentage of this power available to each output on the charger. This allows the Emperor L702B Pro to deliver the highest available power to each of the charger outputs (channels), without overloading the power source.
Each line is selected by pressing the ‘Inc’ and ‘Dec’ buttons to move the selection arrow up and down.
Power
On
Emperor L702B Pro v1 www.LogicRC.com
<INPUT POWER SETTING>
VOLTAGE : 12.0V
CURRENT : 20.0A
1OUTPUT RATE: 50%
2OUTPUT RATE: 50%
ESC
To edit a value press the ‘Enter’ button to highlight the selected value. To increase or decrease the highlighted value, press the ‘Inc’ or ‘Dec’ buttons. Once the desired value has been selected, press the ‘Enter’ button again to store this value.
Once the correct parameters have been entered press the ‘Esc’ button to continue to the main screens.
THE DISPLAY
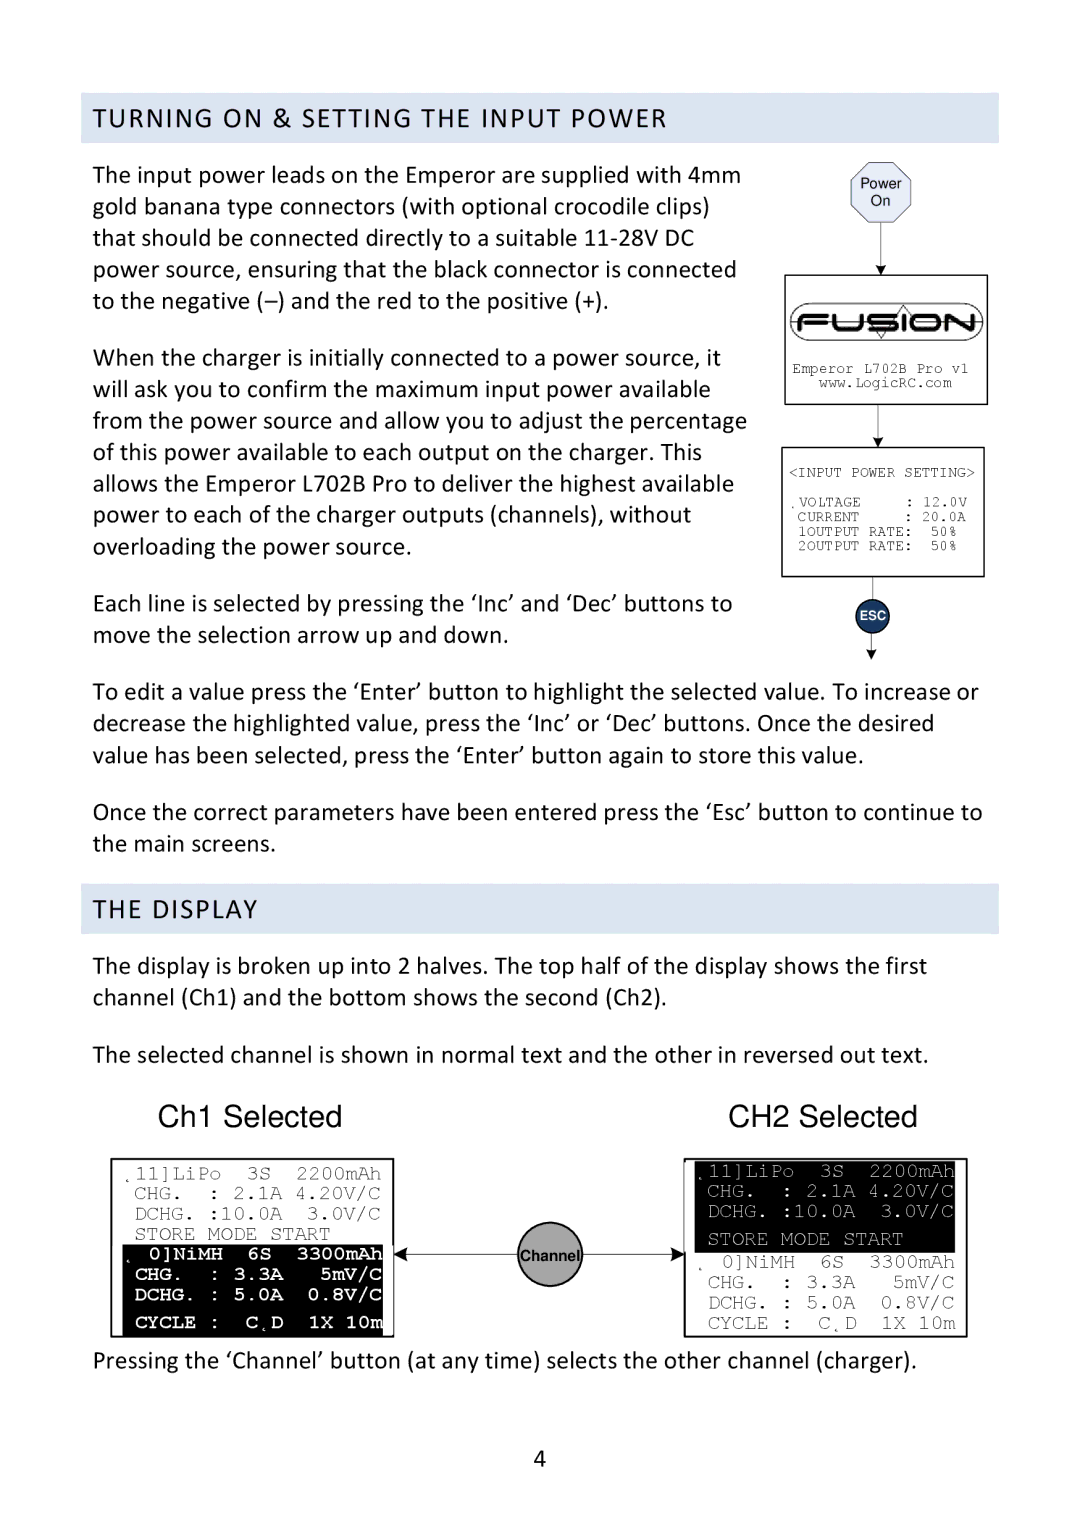
The display is broken up into 2 halves. The top half of the display shows the first channel (Ch1) and the bottom shows the second (Ch2).
The selected channel is shown in normal text and the other in reversed out text.
Ch1 Selected | CH2 Selected |
11]LiPo 3S 2200mAh CHG. : 2.1A 4.20V/C DCHG. :10.0A 3.0V/C
STORE MODE START
0]NiMH 6S 3300mAh ![]() CHG. : 3.3A 5mV/C
CHG. : 3.3A 5mV/C
DCHG. : 5.0A 0.8V/C
CYCLE : CD 1X 10m
11]LiPo 3S 2200mAh CHG. : 2.1A 4.20V/C DCHG. :10.0A 3.0V/C
STORE MODE START
Channel ![]() 0]NiMH 6S 3300mAh CHG. : 3.3A 5mV/C DCHG. : 5.0A 0.8V/C CYCLE : CD 1X 10m
0]NiMH 6S 3300mAh CHG. : 3.3A 5mV/C DCHG. : 5.0A 0.8V/C CYCLE : CD 1X 10m
Pressing the ‘Channel’ button (at any time) selects the other channel (charger).
4
