LEVEL CONTROL
This control is used to match the input level of the amplifier to the output level of you head unit. We recommend the following method. NOTE: Remove screws and the top cover of amplifier to access controls.
1.Turn the amplifier level to zero
2.Turn the volume of the head unit to and the bass and treble to zero
3.Adjust the level control until the desired maximum volume is achieved without distortion.
4.Failure to follow these steps may cause permanent damage to the audio system.
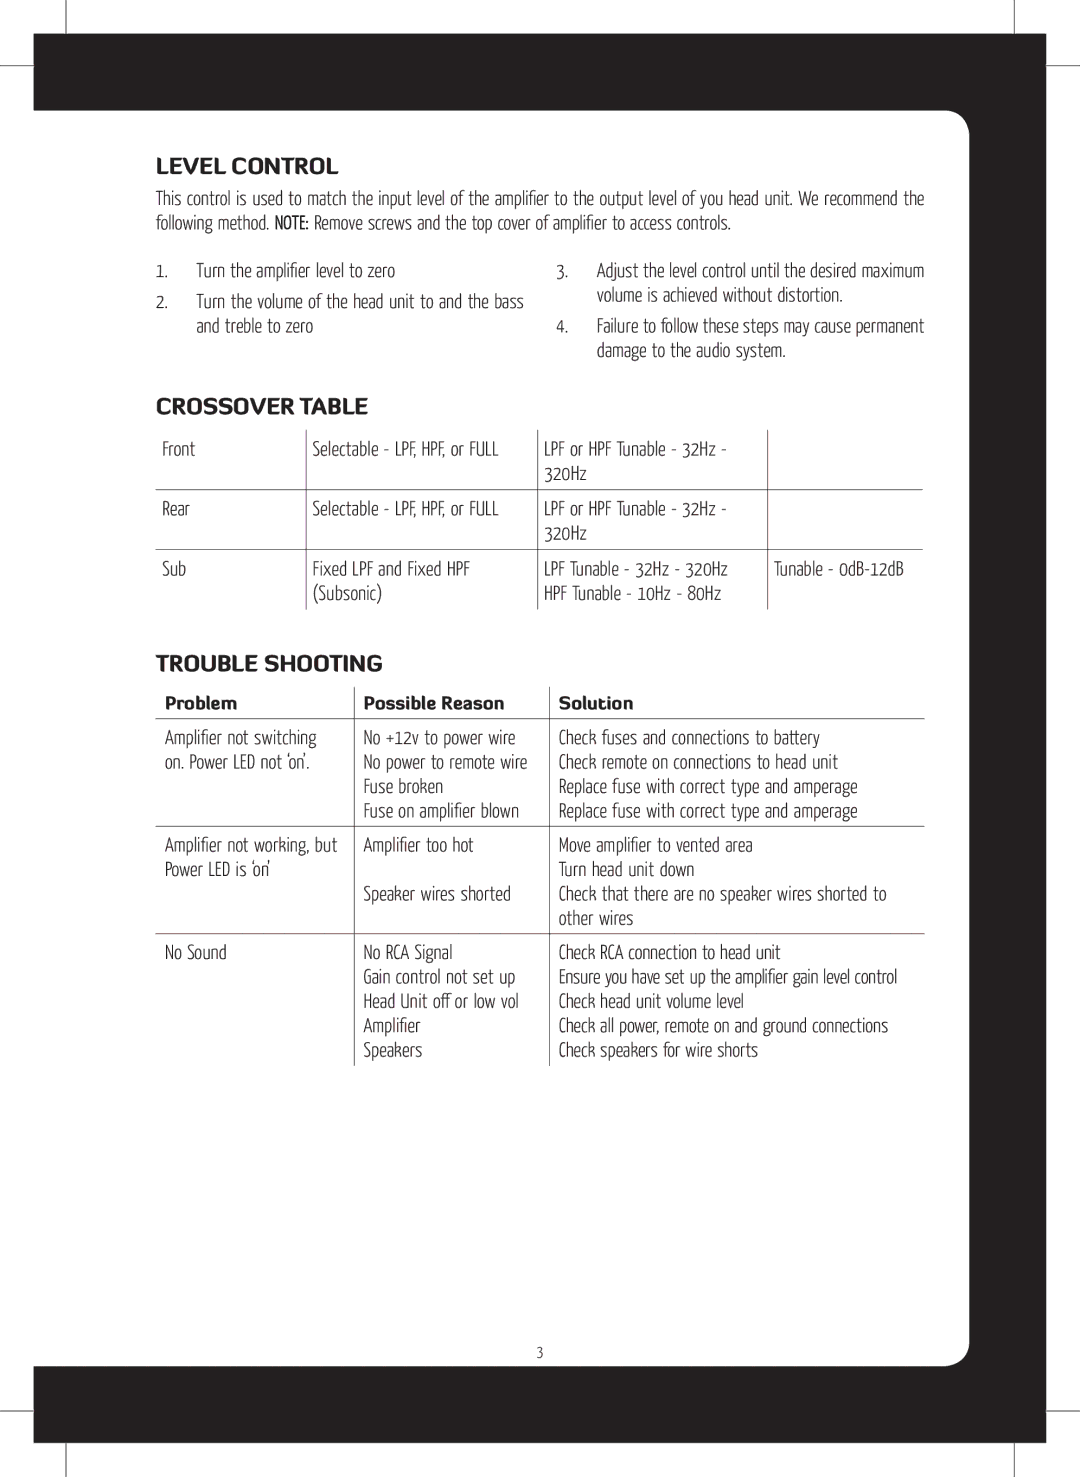
CROSSOVER TABLE
Front
Rear
Sub
Selectable - LPF, HPF, or FULL | LPF or HPF Tunable - 32Hz - |
|
| 320Hz |
|
Selectable - LPF, HPF, or FULL | LPF or HPF Tunable - 32Hz - |
|
| 320Hz |
|
Fixed LPF and Fixed HPF | LPF Tunable - 32Hz - 320Hz | Tunable - |
(Subsonic) | HPF Tunable - 10Hz - 80Hz |
|
|
|
|
TROUBLE SHOOTING
Problem | Possible Reason | Solution |
|
|
|
Amplifier not switching | No +12v to power wire | Check fuses and connections to battery |
on. Power LED not ‘on’. | No power to remote wire | Check remote on connections to head unit |
| Fuse broken | Replace fuse with correct type and amperage |
| Fuse on amplifier blown | Replace fuse with correct type and amperage |
|
|
|
Amplifier not working, but | Amplifier too hot | Move amplifier to vented area |
Power LED is ‘on’ |
| Turn head unit down |
| Speaker wires shorted | Check that there are no speaker wires shorted to |
|
| other wires |
|
|
|
No Sound | No RCA Signal | Check RCA connection to head unit |
| Gain control not set up | Ensure you have set up the amplifier gain level control |
| Head Unit off or low vol | Check head unit volume level |
| Amplifier | Check all power, remote on and ground connections |
| Speakers | Check speakers for wire shorts |
|
|
|
3