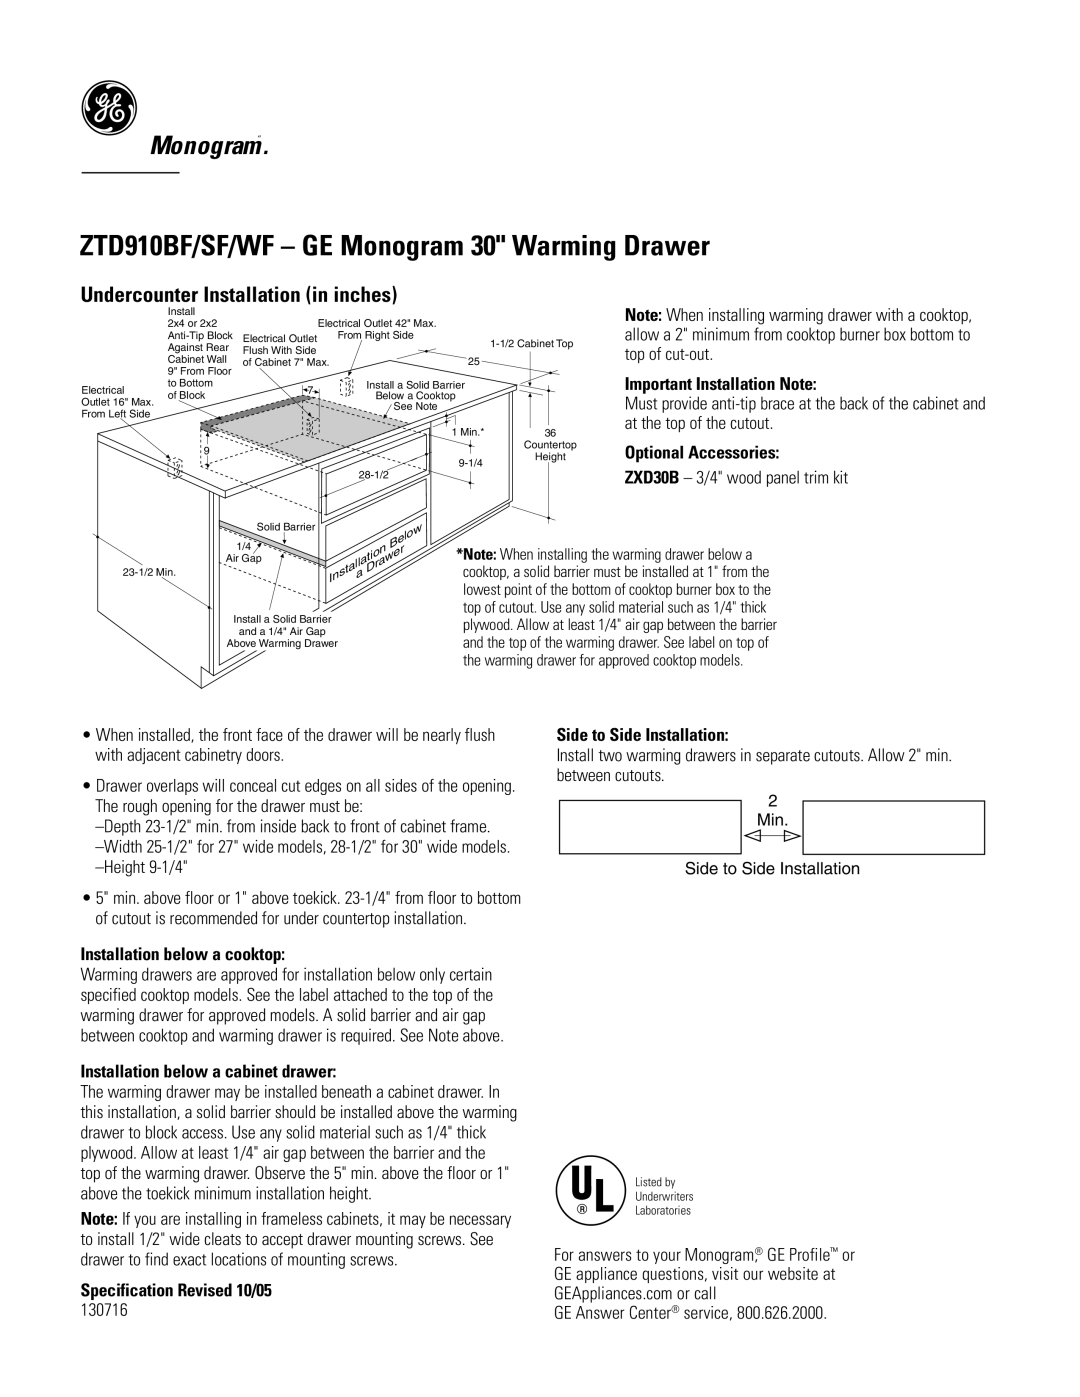
ZTD910BF/SF/WF specifications
The GE ZTD910BF/SF/WF is a revolutionary appliance that epitomizes efficiency and modern design in the realm of laundry machines. This line features a front-loading washer-dryer combo that caters to the demands of both residential and commercial users, offering a plethora of innovative technologies and functionalities aimed at simplifying the laundry process.One of the standout features of the GE ZTD910 series is its advanced washing technology. The appliance incorporates an energy-efficient washing system that reduces water consumption while still delivering exceptional cleaning results. With varying load capacities, users can easily adjust settings to accommodate different laundry volumes, making it ideal for families, apartments, or small businesses.
The washer also boasts a unique steam cleaning option, which helps penetrate and eliminate tough stains, allergens, and bacteria from fabrics. This feature is particularly beneficial for households with children or those with sensitive skin. Coupled with multiple wash cycles and customizable settings, the GE ZTD910 offers a tailored laundry experience that meets diverse fabric care needs.
Another hallmark of the ZTD910 series is the integrated dryer functionality. The washer-dryer combo uses a ventless drying system, allowing users to install the appliance in spaces previously unsuitable for traditional dryers. This system dries clothes efficiently without the need for external venting, making it a perfect choice for urban living situations.
The user-friendly interface features a digital display that simplifies programming and allows users to monitor cycles easily. With options for timed drying, sensor drying, and a quick wash feature, the GE ZTD910 flexibly adapts to the demands of a busy lifestyle.
In terms of energy efficiency, this model is designed to meet and exceed Energy Star standards, promoting environmentally friendly practices while reducing utility bills. Its eco-friendly certifications further add to its appeal for conscious consumers.
Finally, the sleek design of the GE ZTD910—with a stainless steel tub and polished exterior—ensures that it not only functions well but also complements modern home aesthetics. Robust construction guarantees durability, making it a worthy investment for years to come.
In summary, the GE ZTD910BF/SF/WF combines cutting-edge technology, user convenience, and energy efficiency, making it a premier choice for those seeking an all-in-one laundry solution. Whether for family use or business needs, this machine stands out as a model of innovation and practicality.

