
XCC-12 specifications
The Gevalia XCC-12 is a premium coffee machine designed to cater to the needs of coffee enthusiasts who seek convenience without compromising on taste. One of its standout features is the built-in grinder that allows users to brew coffee from freshly ground beans, enhancing the flavor and aroma of each cup. The machine boasts a sleek, modern design, making it an attractive addition to any kitchen countertop.One of the key technologies utilized in the Gevalia XCC-12 is its advanced brewing system. This system uses precise temperature control to ensure that water is heated to the optimal level for extracting the best flavors from the coffee grounds. This results in a rich, flavorful cup of coffee that satisfies even the most discerning palates. The machine also offers customizable brewing options, allowing users to adjust the strength and size of their coffee according to personal preferences.
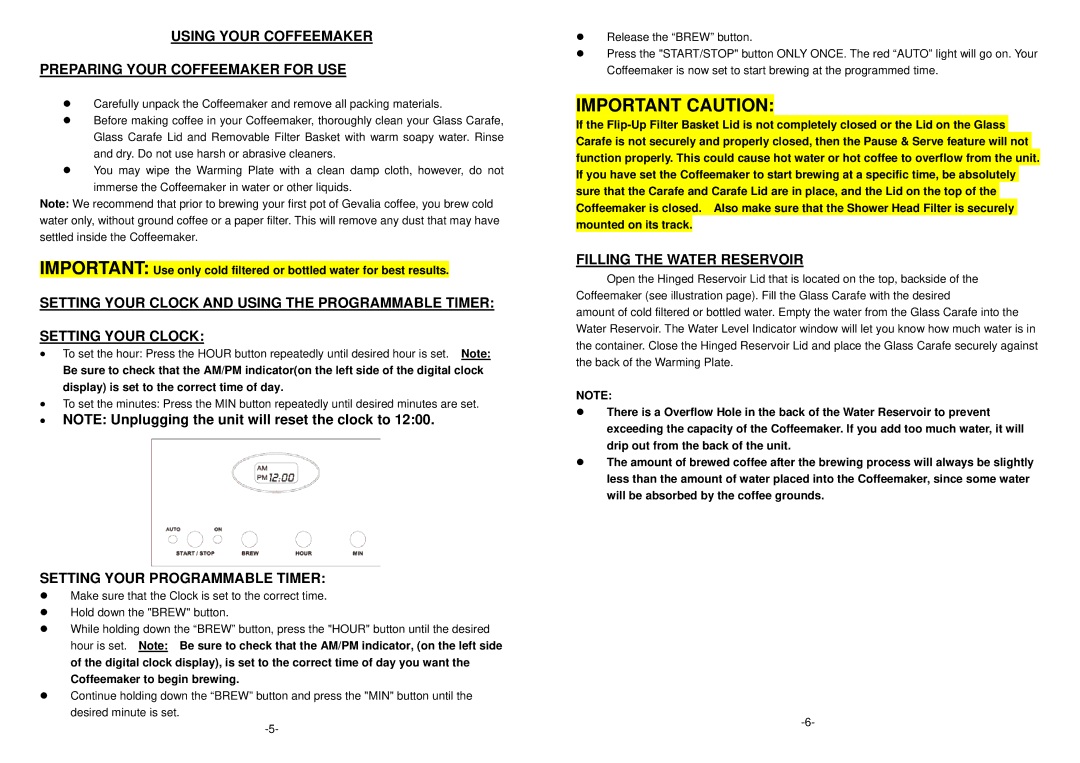
The Gevalia XCC-12 is equipped with a digital display, which simplifies the brewing process. The intuitive interface guides users through various settings, enabling them to select their desired brew strength, cup size, and other features with ease. In addition, the programmable timer allows users to set their coffee to brew at a specific time, ensuring that they wake up to the enticing aroma of freshly brewed coffee.
Another noteworthy characteristic of the Gevalia XCC-12 is its easy-to-clean design. The removable parts, including the water reservoir and the grounds container, make maintenance straightforward and hassle-free. This feature is particularly appealing to those with busy lifestyles who wish to enjoy delicious coffee without dedicating too much time to cleaning.
The Gevalia XCC-12 also incorporates energy-saving technologies, including an automatic shut-off feature, which turns the machine off after a specified period of inactivity. This not only conserves energy but also enhances safety, making it an ideal choice for families.
Overall, the Gevalia XCC-12 combines professional-grade brewing capabilities with user-friendly features. With its built-in grinder, precise brewing technology, digital interface, and easy maintenance, it represents a perfect blend of efficiency and quality for coffee lovers. Whether you prefer a robust espresso or a smooth drip coffee, the Gevalia XCC-12 is equipped to deliver an exceptional brewing experience every time.