Unpacking
Due to modern mass production techniques, it is unlikely that your GMC Power Tool is faulty or that a part is missing. If you find anything wrong, do not operate the tool until the parts have been replaced or the fault has been rectified. Failure to do so could result in serious personal injury.
Mounting
1.It is best to attach the band saw to a firm, stable surface at a convenient working height. A work bench is ideal.
2.Drill four 12 mm holes in the work bench to match the four holes in the base of the saw.
3.Attach the band saw to the work bench using 8 mm screws (inserted from the top), lock washers and nuts.
Assembly
The Band Saw is shipped partly disassembled and the saw table and rip fence have to be installed prior to use.
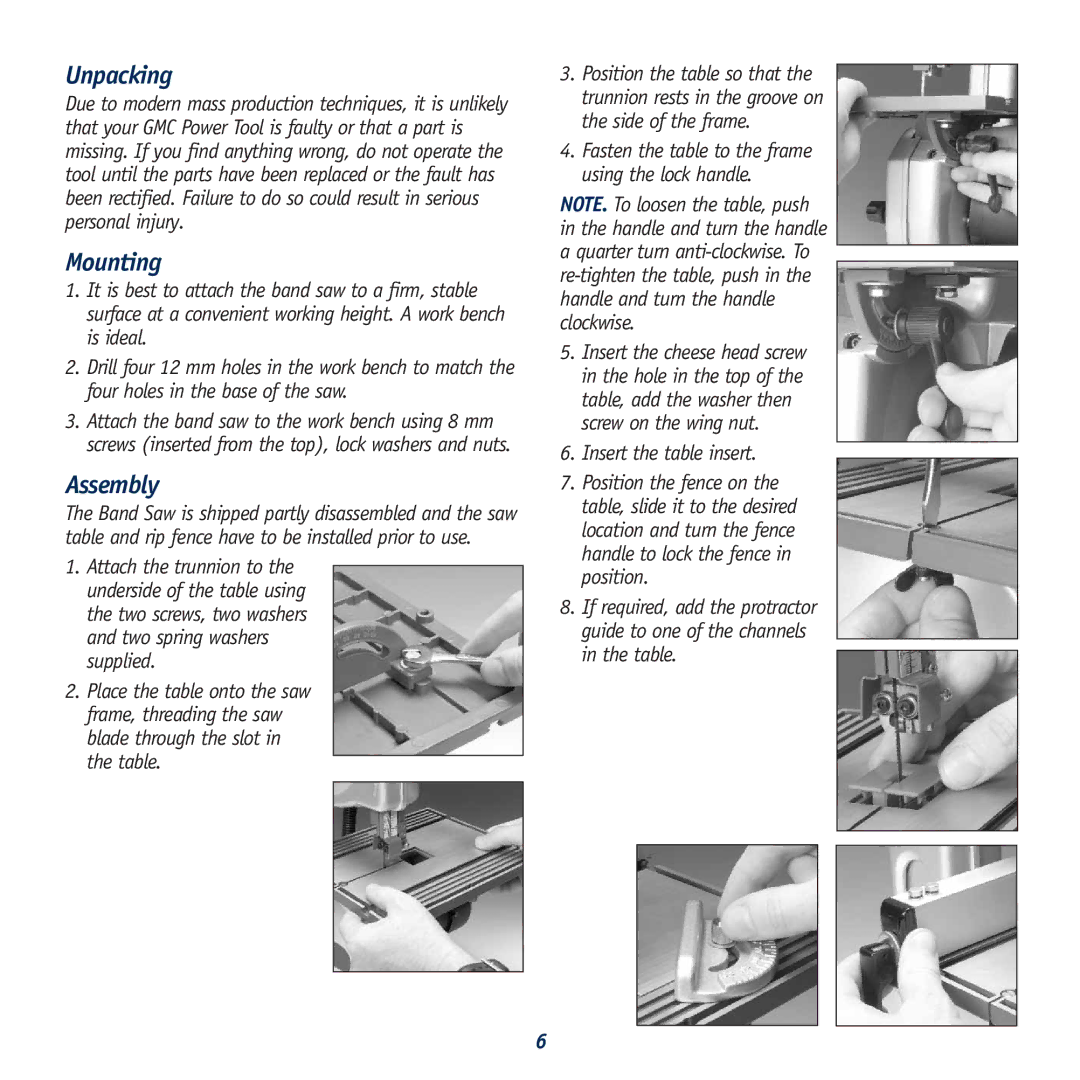
1.Attach the trunnion to the underside of the table using the two screws, two washers and two spring washers supplied.
2.Place the table onto the saw frame, threading the saw blade through the slot in the table.
3.Position the table so that the trunnion rests in the groove on the side of the frame.
4.Fasten the table to the frame using the lock handle.
NOTE. To loosen the table, push in the handle and turn the handle a quarter turn
5.Insert the cheese head screw in the hole in the top of the table, add the washer then screw on the wing nut.
6.Insert the table insert.
7.Position the fence on the table, slide it to the desired location and turn the fence handle to lock the fence in position.
8.If required, add the protractor guide to one of the channels in the table.
6