Fitting the handle
Firstly, place the 2 handle gaskets (supplied with the generator) over the holes on the petrol tank. Then proceed by placing the handle on top of the gaskets ensuring the 2 holes in the handles line up with the holes on the tank.
Screw the handle onto the petrol tank using the 2 screws provided with the unit. Ensure the flat washers and spring washers are fitted under the heads of the screws.
Mixing the fuel
1.The generator uses unleaded fuel and 2 stroke grade oil.
2.You need to mix both unleaded fuel and 2 stroke oil together.
3.The proportion should be 40 parts unleaded fuel and 1 part 2 stroke oil.
4.The mixture should be poured into an approved fuel container. This fuel container should be clearly marked as a fuel container, sealed and made from fuel resistant material.
5.Once the mixture has been poured, shake the fuel container well to ensure that the contents have been thoroughly mixed.
Filling the fuel tank
1.Switch off the engine.
2.Remove the fuel cap (2) by turning anticlockwise.
3.Pour the fuel/oil mix from the fuel container into the fuel tank (3). Because fuel expands, DO NOT FILL to the tip of the tank.
4.Replace fuel cap and turn clockwise to lock.
Earthing the generator
WARNING. It is advisable to properly
Note. The wire and earth stake are not supplied with the unit.
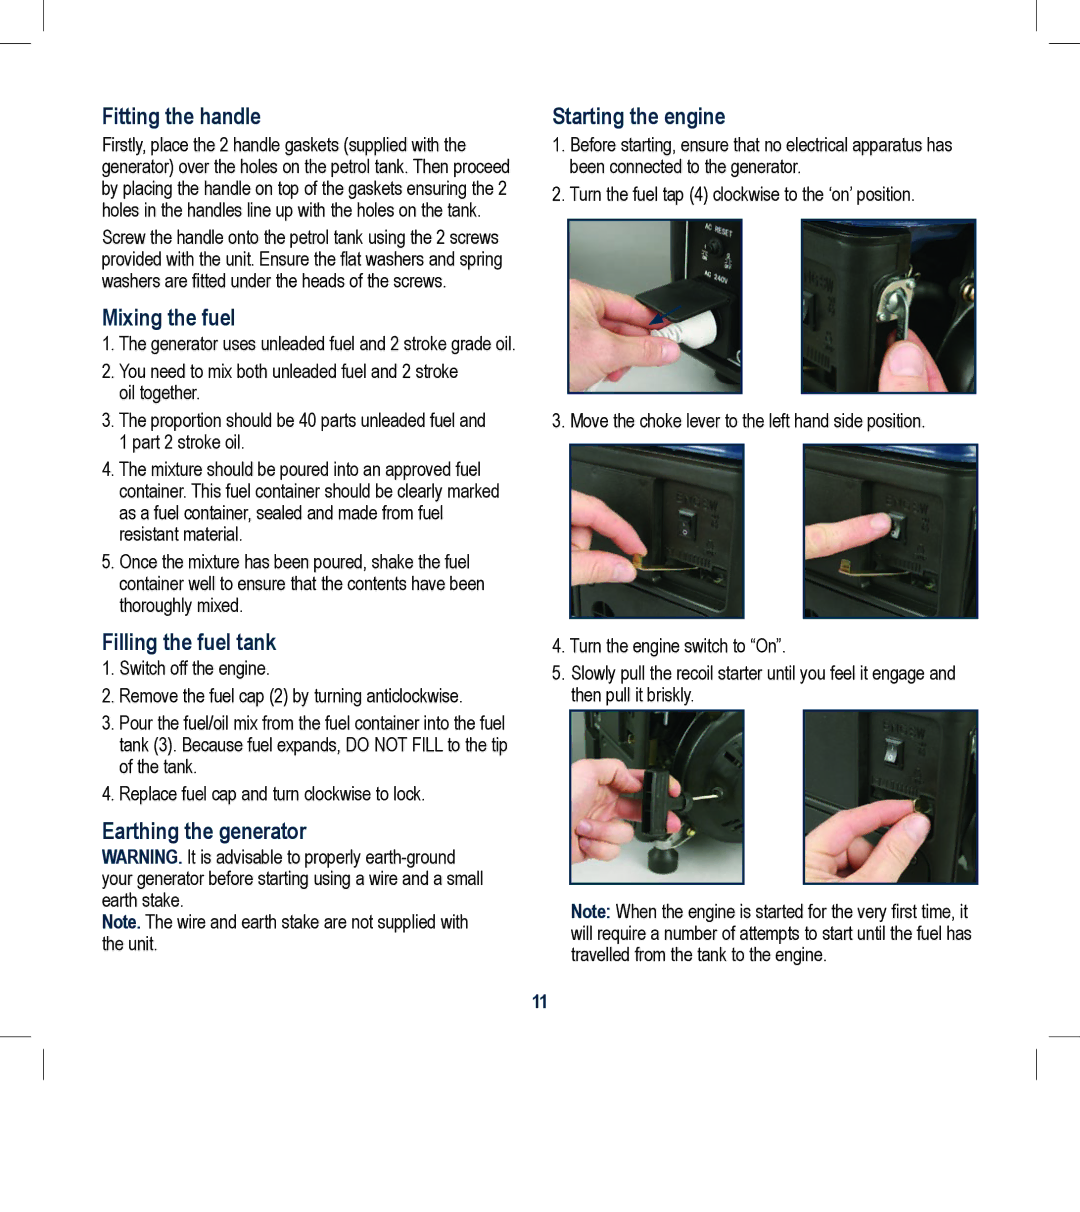
Starting the engine
1.Before starting, ensure that no electrical apparatus has been connected to the generator.
2.Turn the fuel tap (4) clockwise to the ‘on’ position.
3. Move the choke lever to the left hand side position.
4.Turn the engine switch to “On”.
5.Slowly pull the recoil starter until you feel it engage and then pull it briskly.
Note: When the engine is started for the very first time, it will require a number of attempts to start until the fuel has travelled from the tank to the engine.
11