
312414D specifications
The Graco 312414D is a top-tier airless paint sprayer designed specifically for both DIY enthusiasts and professional painters. This versatile sprayer stands out for its efficiency, ease of use, and innovative technologies that make it a valuable tool for any painting job.One of the main features of the Graco 312414D is its ability to handle a variety of coatings, including paints, stains, and sealers. This makes it ideal for a range of applications, from small indoor projects to larger exterior jobs. With its powerful motor, it can deliver a consistent spray pattern, allowing for a smooth and even application, reducing the risk of overspray and ensuring that surfaces receive a flawless finish.
The unit is equipped with Graco's advanced ProConnect technology, which allows users to easily change out the pump in just a few minutes. This feature minimizes downtime, enabling painters to complete their tasks more efficiently. Additionally, the Graco 312414D features a durable and robust construction, which ensures long-lasting performance, even under heavy use.
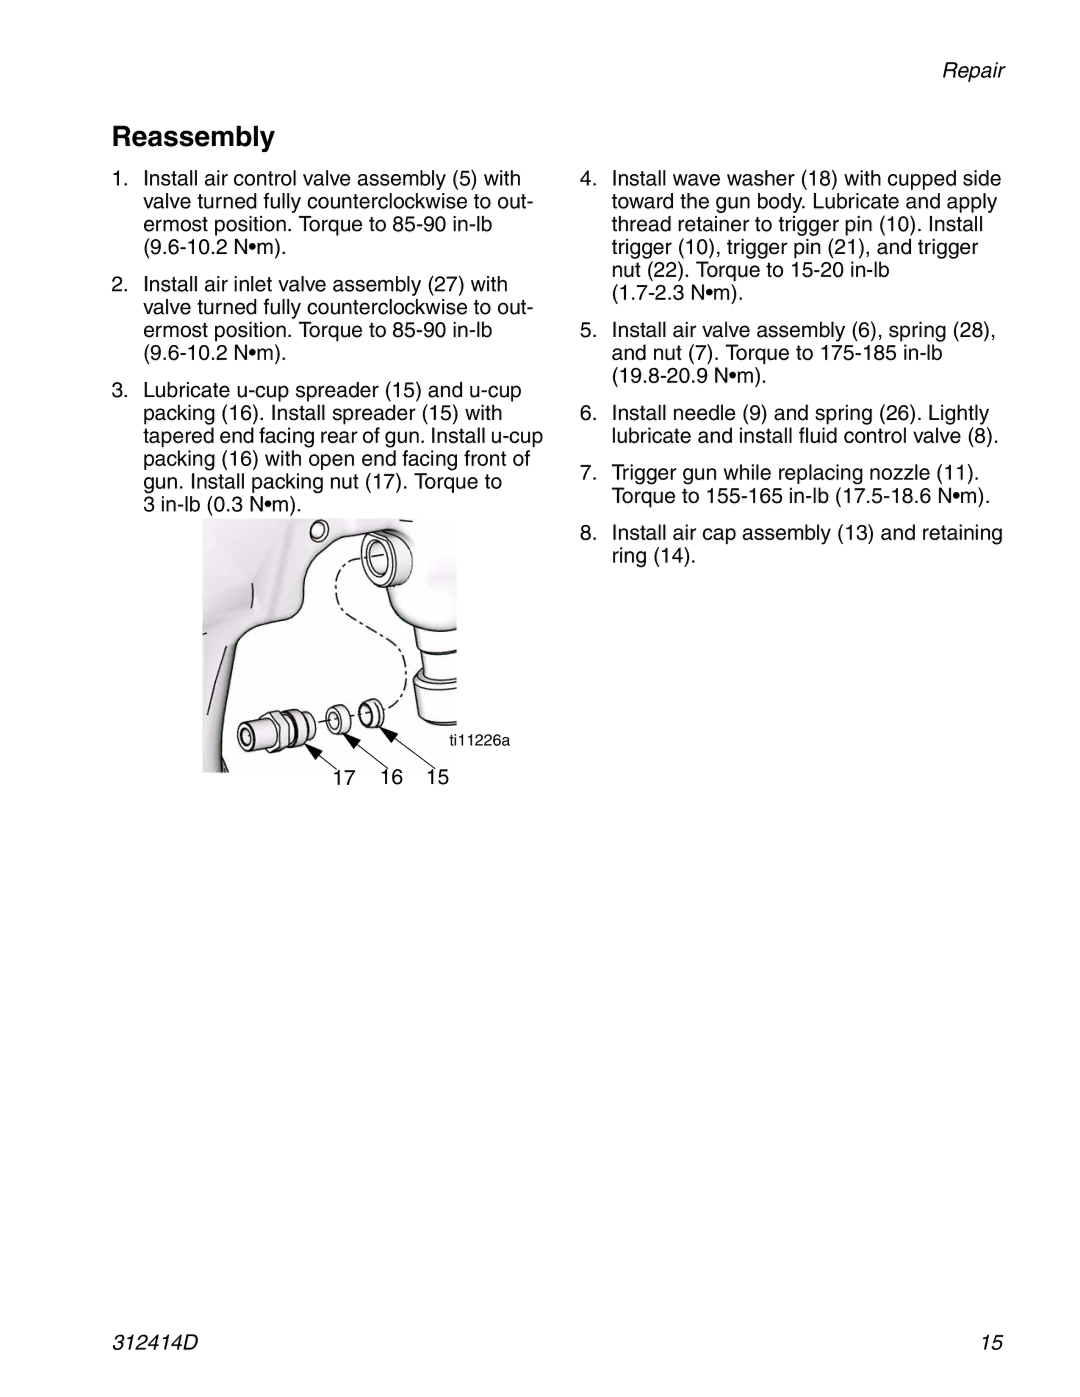
Another significant characteristic of the Graco 312414D is its adjustable pressure control, which provides users with the flexibility to customize the spray to suit different materials and surfaces. This feature allows for finer control and reduces waste, making projects more cost-effective. The gun's ergonomic design ensures comfortable handling and reduces fatigue, allowing users to work for extended periods without discomfort.
The sprayer also includes a tip guard and a reversible tip for quick unclogging, which increases usability and minimizes interruptions during painting. Graco’s FlexLiner bag system allows for easy cleanup and helps reduce material waste, making it an eco-friendly choice for painters.
In summary, the Graco 312414D airless paint sprayer is a reliable and efficient tool that offers advanced features and technologies tailored for a variety of painting applications. Its durability, ease of use, and adjustable settings make it a top choice for both professionals and home decorators alike, ensuring exceptional results every time. Whether you're tackling a small room or an entire exterior, the Graco 312414D delivers unmatched performance and convenience for all your painting needs.