Manuals
/
Graco
/
Lawn and Garden
/
Pressure Washer
Graco
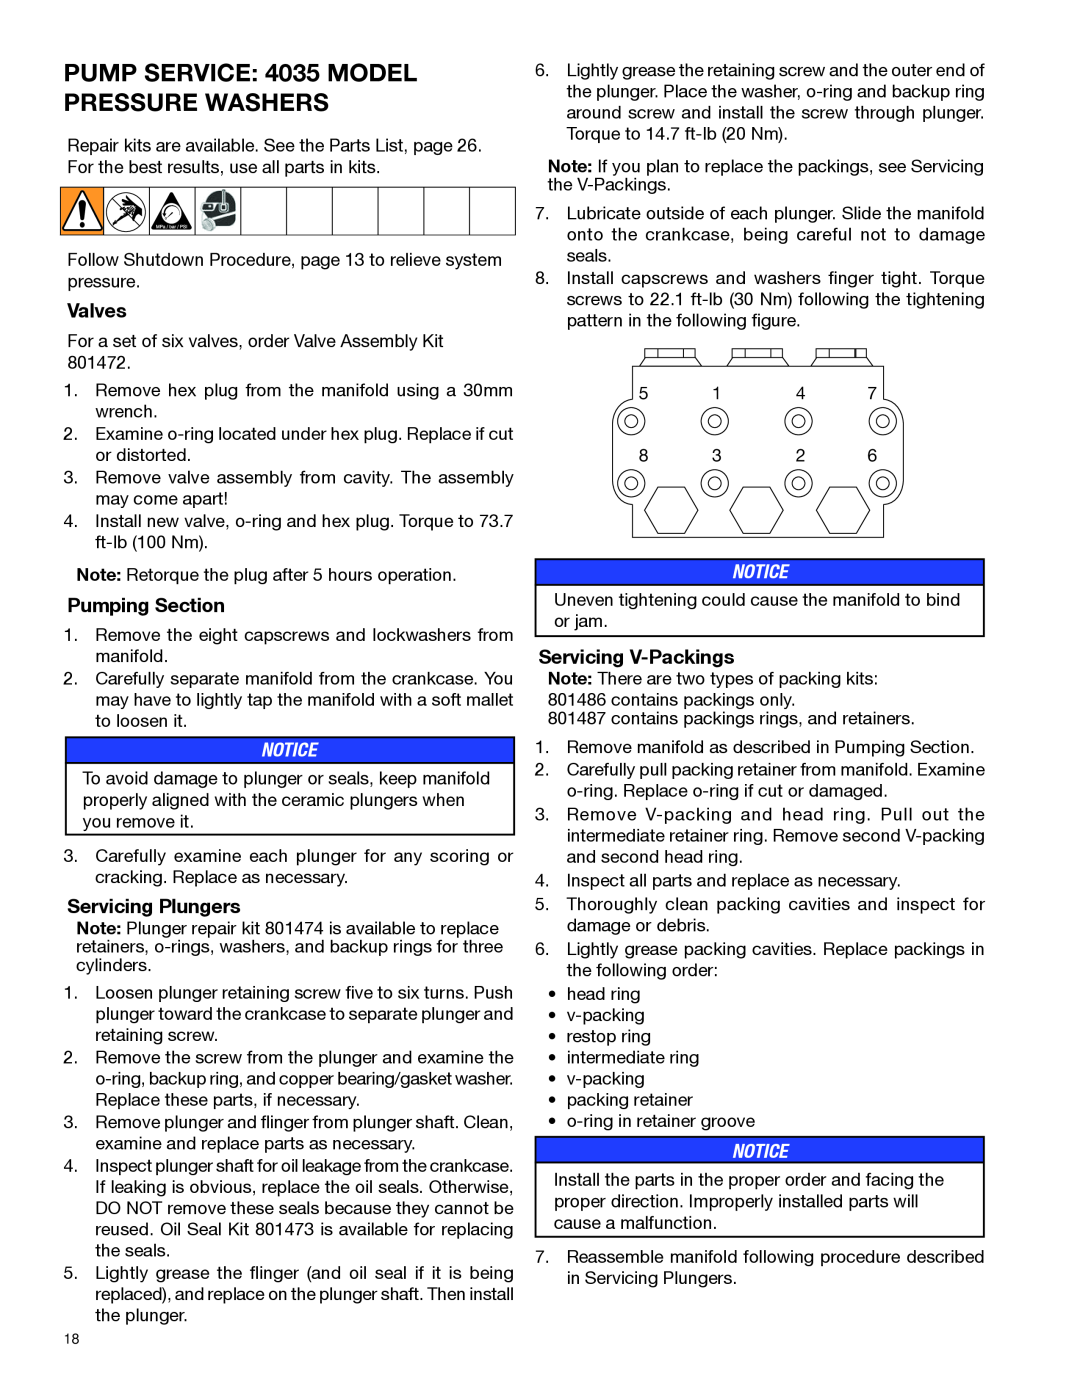
4043BD, 4035BD PUMP SERVICE 4035 MODEL PRESSURE WASHERS, Valves, Pumping Section
Models:
4035BD
4043BD
1
18
30
30
Download
30 pages
10.12 Kb
15
16
17
18
19
20
21
22
Troubleshooting
Warranty
Setup
Pump Assembly - Parts
Adjustable
Cleaning with detergents
Spray Precautions
Technical Data
Page 18
Image 18
Page 17
Page 19
Page 18
Image 18
Page 17
Page 19
Contents
For high pressure water cleaning For outdoor use only
G-Force Belt-Driven Pressure Washer 3A0519F
Instructions
CONTENTS
803508 For Use With Model 4043BD
SPRAY PRECAUTIONS
IMPORTANT USER INFORMATION
CARBON MONOXIDE HAZARD
FIRE & VENTILATION PRECAUTIONS
DETERGENT CLEANING PRECAUTIONS
BURN HAZARD
MISCELLANEOUS SAFETY PRECAUTIONS
ADJUSTMENT PRECAUTIONS
PERSONAL PROTECTIVE EQUIPMENT
Component Identification
Item Description
INSTALLATION & PREPARATION INSTRUCTIONS
Setup
Attire
Engine fuel tank
Nozzle Review
Nozzle connection
Water supply
Unloader
Pre-start inspection procedures
Adjustable
Thermal relief valve
OPERATING INSTRUCTIONS
Priming the pump
Start-up
Cleaning with detergents
Shutdown
Engine
STORAGE & MAINTENANCE INSTRUCTIONS
Belt Tension Adjustment
Pump
STORAGE & MAINTENANCE INSTRUCTIONS
32˚F 0˚C
Winterizing
Solution
Troubleshooting
Problem
Cause
Pumping Section
PUMP SERVICE 4043 MODEL PRESSURE WASHERS
Valves
Servicing Plungers
PUMP SERVICE 4035 MODEL PRESSURE WASHERS
Page
69 68 67 61 66 61 66 72 71 78 77 76 75 61 66 65 74
Pressure Washer - Parts
262297- Model 4043BD
15 16 17 18 19 2 3 16 20
Pressure Washer - Parts
Pump Assembly - Parts
803508 for use with Model 4043BD
Pump Assembly - Parts
262296- Model 4035BD
Pressure Washer - Parts
24E790 for use with Model 4035BD
Pump Assembly - Parts
24E790 for use with Model 4035BD
Page
Technical Data
Model
Graco Information
Graco Standard Warranty
For Graco Canada Customers
Original instructions. This manual contains English. MM 3A0519
Top
Page
Image
Contents