®
G1705 & G1794 Router Bit Spindle
For The G1035 & G1026 Shapers
To install the router bit spindle, proceed as follows:
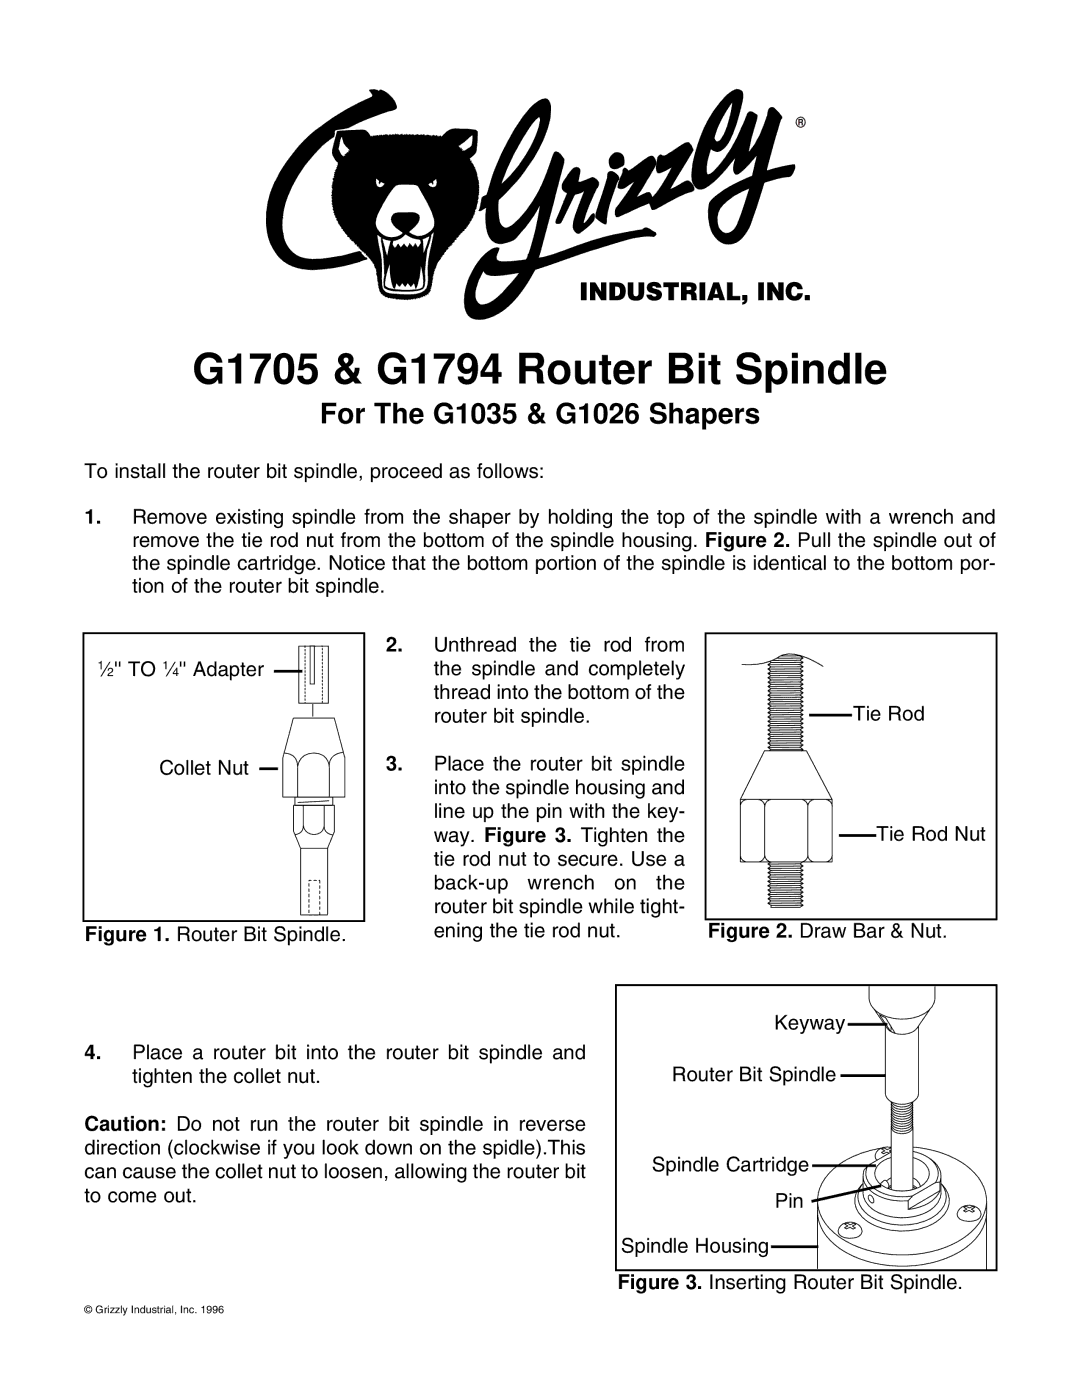
1.Remove existing spindle from the shaper by holding the top of the spindle with a wrench and remove the tie rod nut from the bottom of the spindle housing. Figure 2. Pull the spindle out of the spindle cartridge. Notice that the bottom portion of the spindle is identical to the bottom por- tion of the router bit spindle.
2.Unthread the tie rod from
1⁄2'' TO 1⁄4'' Adapter | the spindle and completely |
|
| thread into the bottom of the | Tie Rod |
| router bit spindle. | |
Collet Nut | 3. Place the router bit spindle |
|
| into the spindle housing and |
|
| line up the pin with the key- | Tie Rod Nut |
| way. Figure 3. Tighten the | |
| tie rod nut to secure. Use a |
|
|
| |
| router bit spindle while tight- |
|
Figure 1. Router Bit Spindle. | ening the tie rod nut. | Figure 2. Draw Bar & Nut. |
Keyway
4.Place a router bit into the router bit spindle and
tighten the collet nut. | Router Bit Spindle | |
Caution: Do not run the router bit spindle in reverse |
| |
direction (clockwise if you look down on the spidle).This | Spindle Cartridge | |
can cause the collet nut to loosen, allowing the router bit | ||
| ||
to come out. | Pin | |
| Spindle Housing | |
| Figure 3. Inserting Router Bit Spindle. |
© Grizzly Industrial, Inc. 1996
