4..Install the other table bracket on the opposite end of the table top in a similar manner.
5. Repeat Steps
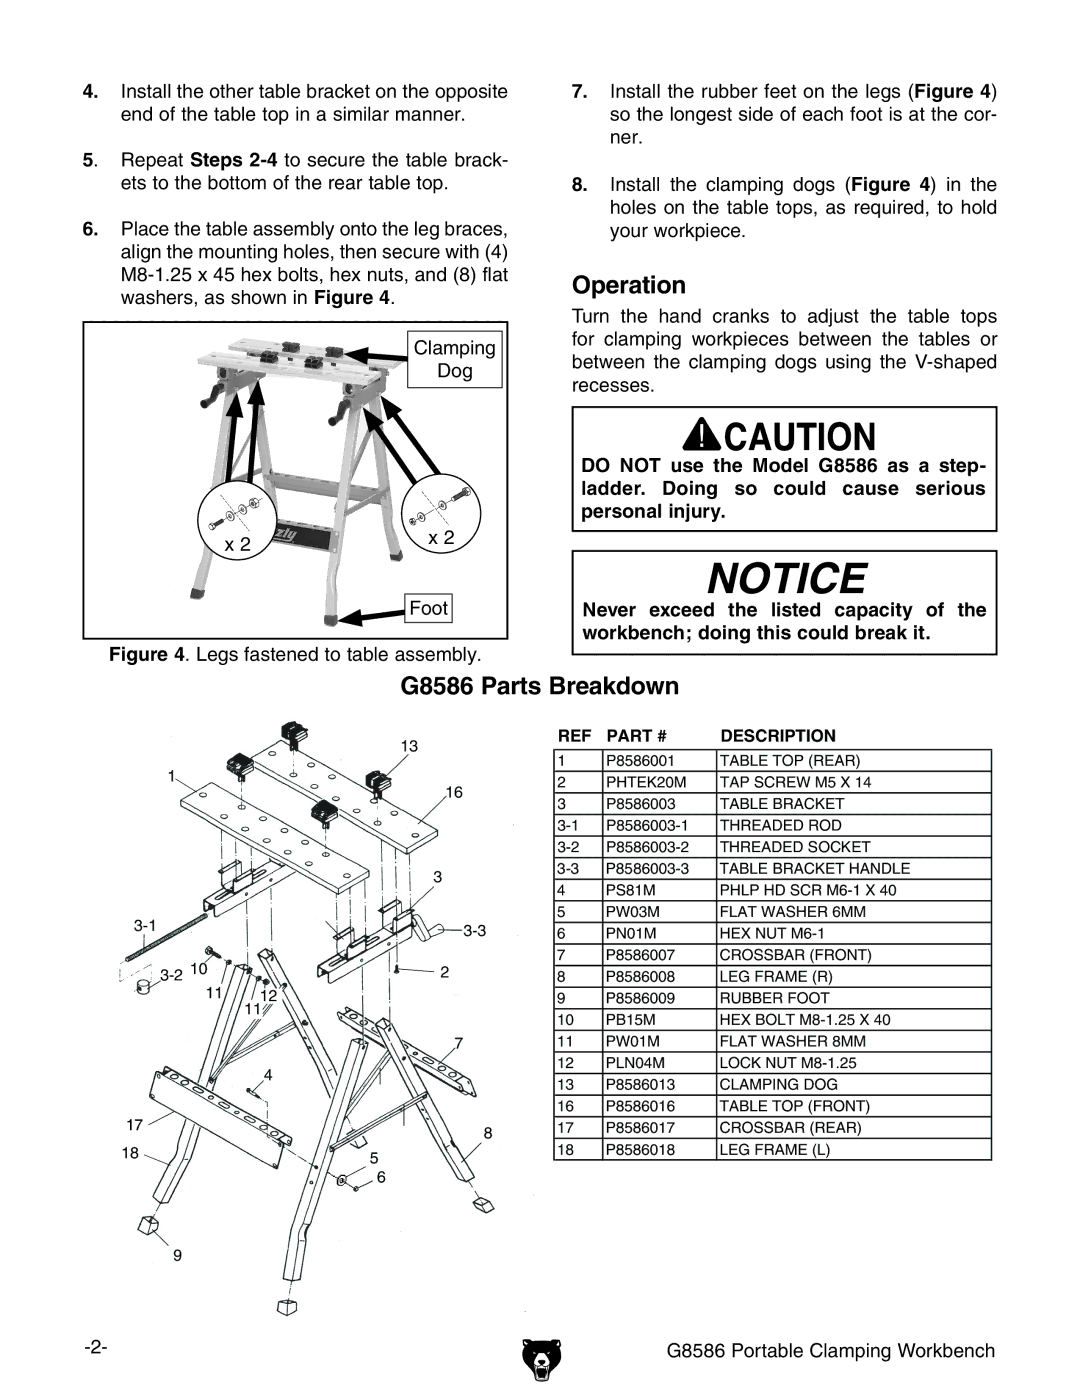
6..Place the table assembly onto the leg braces, align the mounting holes, then secure with (4)
Clamping
Dog
x 2 | x 2 |
|
Foot
Figure 4. Legs fastened to table assembly.
7..Install the rubber feet on the legs (Figure 4) so the longest side of each foot is at the cor- ner.
8..Install the clamping dogs (Figure 4) in the holes on the table tops, as required, to hold your workpiece.
Operation
Turn the hand cranks to adjust the table tops for clamping workpieces between the tables or between the clamping dogs using the
DO NOT use the Model G8586 as a step- ladder.. Doing so could cause serious personal injury..
NOTICE
Never exceed the listed capacity of the workbench; doing this could break it..
G8586 Parts Breakdown
| &( |
& | &+ |
| |
| ( |
("& | ("( |
| |
("' &% | ' |
&&&&&'
,
| ) |
&, | - |
| |
&- | * |
| |
| + |
REF | PART # | DESCRIPTION |
|
|
|
1 | P8586001 | TABLE TOP (REAR) |
2 | PHTEK20M | TAP SCREW M5 X 14 |
3 | P8586003 | TABLE BRACKET |
THREADED ROD | ||
THREADED SOCKET | ||
TABLE BRACKET HANDLE | ||
4 | PS81M | PHLP HD SCR |
5 | PW03M | FLAT WASHER 6MM |
6 | PN01M | HEX NUT |
7 | P8586007 | CROSSBAR (FRONT) |
8 | P8586008 | LEG FRAME (R) |
9 | P8586009 | RUBBER FOOT |
10 | PB15M | HEX BOLT |
11 | PW01M | FLAT WASHER 8MM |
12 | PLN04M | LOCK NUT |
13 | P8586013 | CLAMPING DOG |
16 | P8586016 | TABLE TOP (FRONT) |
17 | P8586017 | CROSSBAR (REAR) |
18 | P8586018 | LEG FRAME (L) |
.
G8586 Portable Clamping Workbench |