MODEL T20682 |
SCRIMSHAW |
BABY STUBBY® KNIFE |
INSTRUCTIONS |
Be careful when using power tools to create this inlay insert. This workpiece is small, which will require extra care when cutting or sanding. Please review the safety instruc- tions on your equipment before beginning operation.
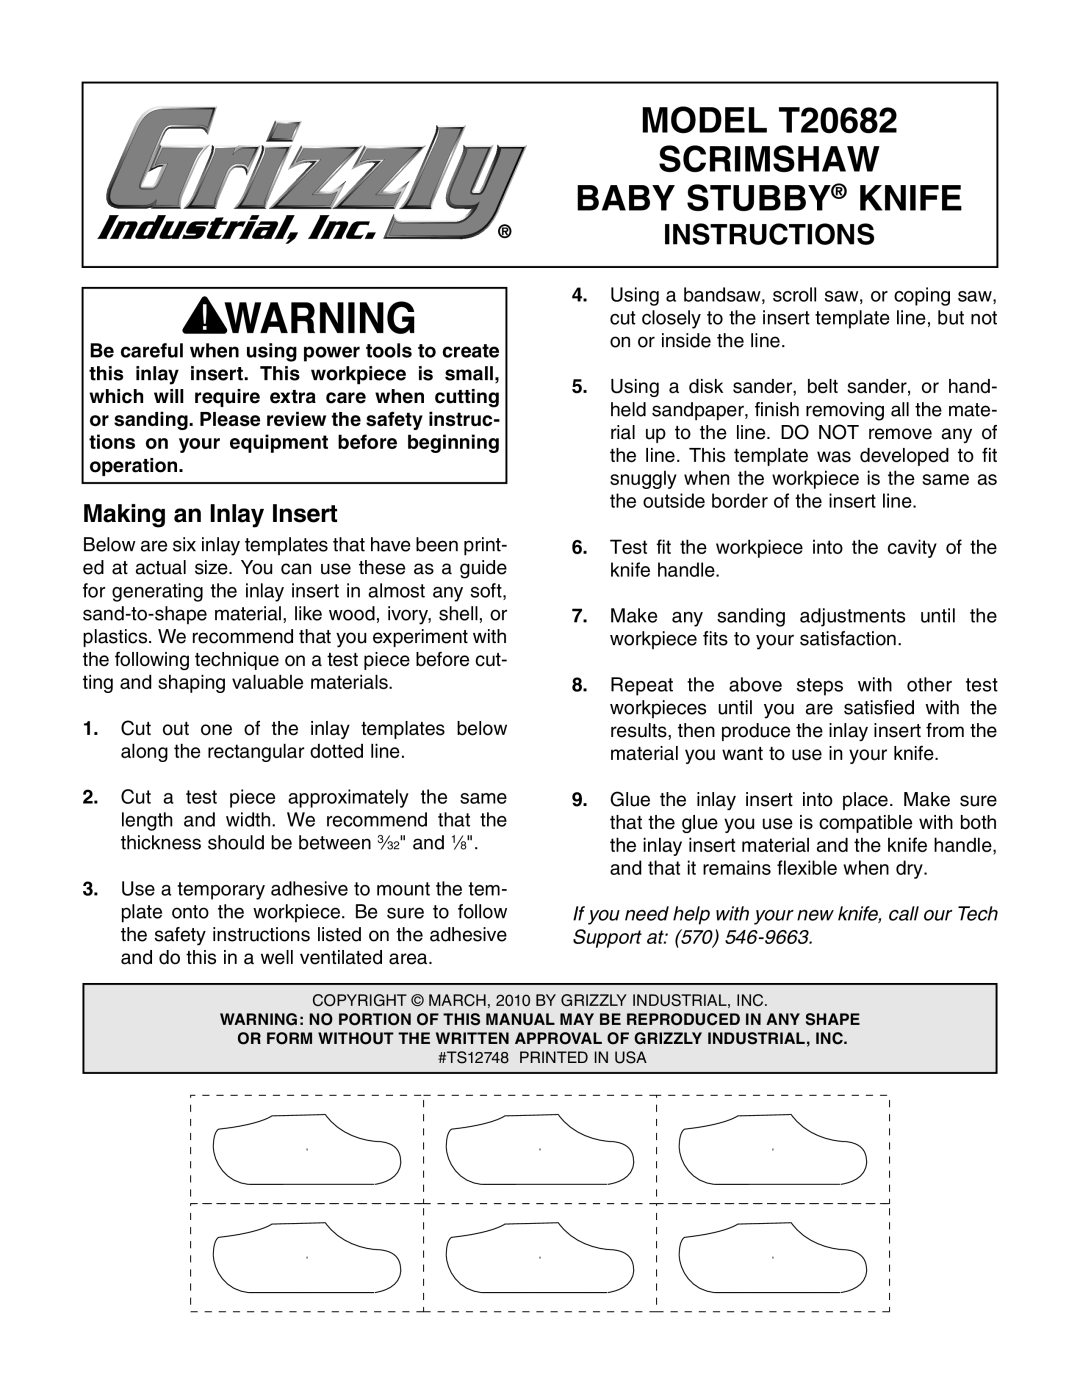
Making an Inlay Insert
Below are six inlay templates that have been print- ed at actual size. You can use these as a guide for generating the inlay insert in almost any soft,
1.Cut out one of the inlay templates below along the rectangular dotted line.
2.Cut a test piece approximately the same length and width. We recommend that the thickness should be between 3⁄32" and 1⁄8".
3.Use a temporary adhesive to mount the tem- plate onto the workpiece. Be sure to follow the safety instructions listed on the adhesive and do this in a well ventilated area.
4.Using a bandsaw, scroll saw, or coping saw, cut closely to the insert template line, but not on or inside the line.
5.Using a disk sander, belt sander, or hand- held sandpaper, finish removing all the mate- rial up to the line. DO NOT remove any of the line. This template was developed to fit snuggly when the workpiece is the same as the outside border of the insert line.
6.Test fit the workpiece into the cavity of the knife handle.
7.Make any sanding adjustments until the workpiece fits to your satisfaction.
8.Repeat the above steps with other test workpieces until you are satisfied with the results, then produce the inlay insert from the material you want to use in your knife.
9.Glue the inlay insert into place. Make sure that the glue you use is compatible with both the inlay insert material and the knife handle, and that it remains flexible when dry.
If you need help with your new knife, call our Tech Support at: (570)
Copyright © MARCH, 2010 By Grizzly Industrial, Inc.
Warning: No portion of this manual may be reproduced in any shape Or form without the written approval of Grizzly Industrial, inc.
#TS12748 printed in USA