Parts and Functions
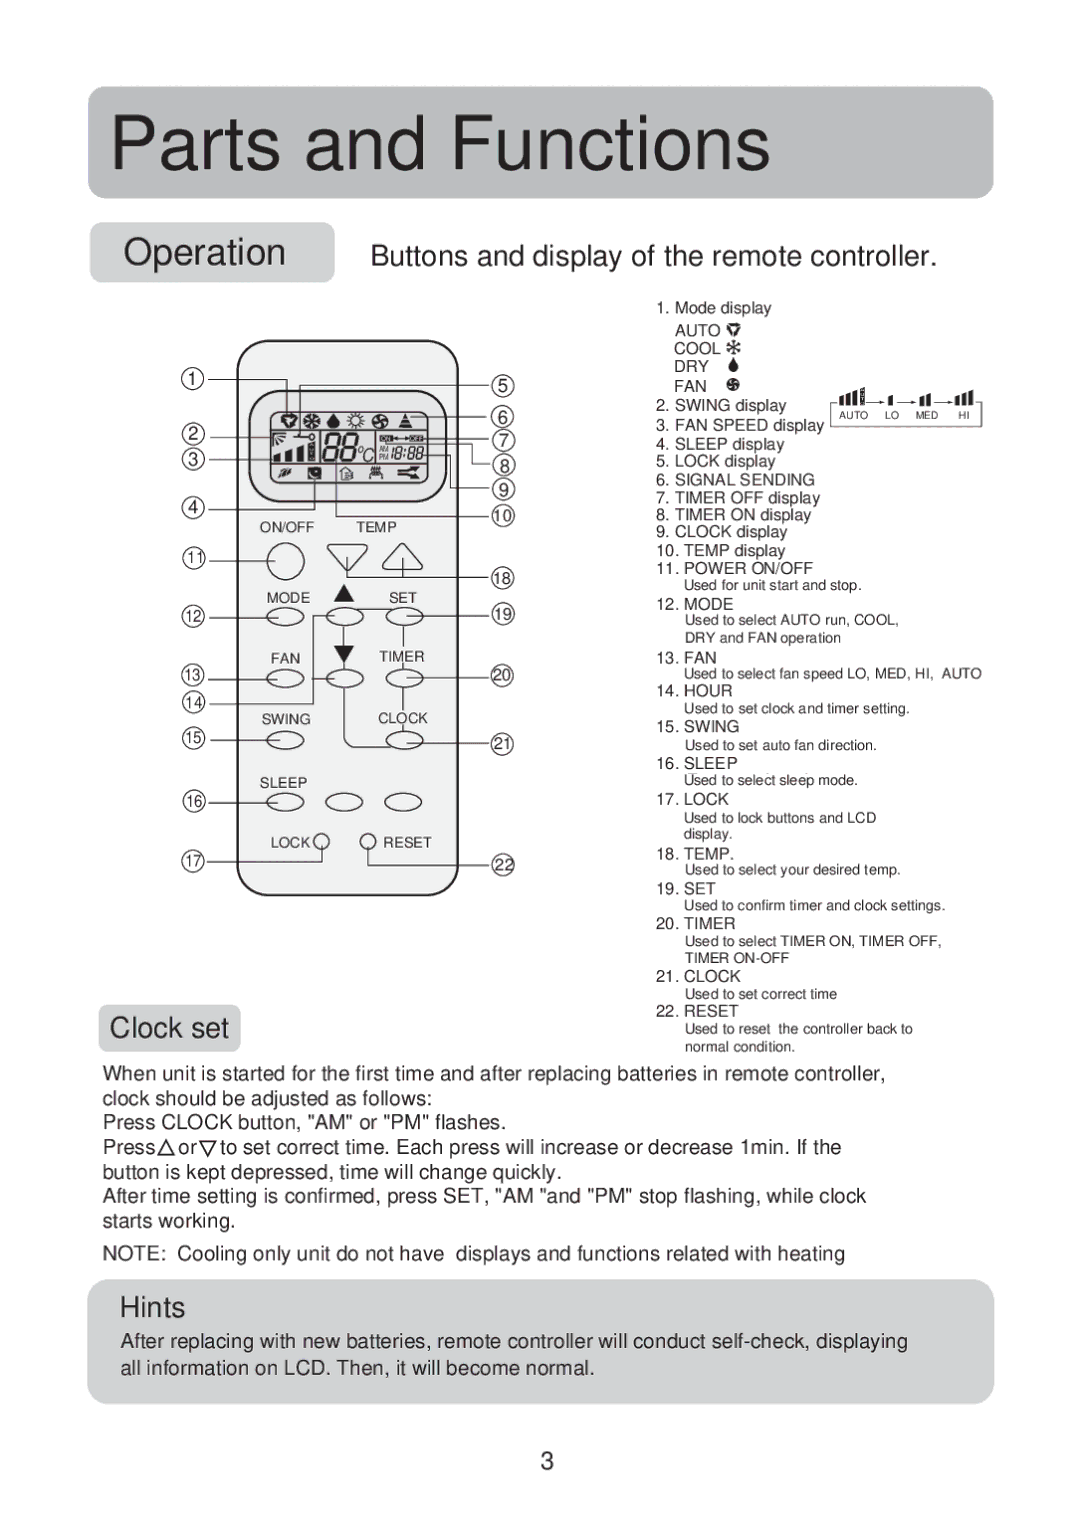
Operation Buttons and display of the remote controller.
1 |
|
|
|
2 | A | ON | OFF |
| AM |
| |
3 | U |
| |
T |
| ||
O | oC PM |
| |
4 |
|
|
|
| ON/OFF | TEMP |
|
11 |
|
|
|
5
6
7
8
9
10
18
1.Mode display
AUTO ![]()
![]() COOL
COOL ![]()
![]()
![]() DRY
DRY ![]() FAN
FAN ![]()
2.SWING display
3.FAN SPEED display
4.SLEEP display
5.LOCK display
6.SIGNAL SENDING
7.TIMER OFF display
8.TIMER ON display
9.CLOCK display
10.TEMP display
11.POWER ON/OFF
AUTO LO MED HI
MODE | SET |
12 |
|
FAN | TIMER |
13 |
|
14 | CLOCK |
SWING | |
15 |
|
SLEEP |
|
19
20
21
Used for unit start and stop.
12.MODE
Used to select AUTO run, COOL, DRY and FAN operation
13.FAN
Used to select fan speed LO, MED, HI, AUTO
14.HOUR
Used to set clock and timer setting.
15.SWING
Used to set auto fan direction.
16.SLEEP
Used to select sleep mode.
16 |
|
| 17. LOCK |
|
|
| Used to lock buttons and LCD |
LOCK | RESET |
| display. |
| 18. TEMP. | ||
17 |
| 22 | |
| Used to select your desired temp. | ||
|
|
|
19. SET
Used to confirm timer and clock settings.
20. TIMER
Used to select TIMER ON, TIMER OFF,
TIMER
Clock set
21.CLOCK
Used to set correct time
22.RESET
Used to reset the controller back to normal condition.
When unit is started for the first time and after replacing batteries in remote controller, clock should be adjusted as follows:
Press CLOCK button, "AM" or "PM" flashes.
Press![]() or
or![]() to set correct time. Each press will increase or decrease 1min. If the button is kept depressed, time will change quickly.
to set correct time. Each press will increase or decrease 1min. If the button is kept depressed, time will change quickly.
After time setting is confirmed, press SET, "AM "and "PM" stop flashing, while clock starts working.
NOTE: Cooling only unit do not have displays and functions related with heating
Hints
After replacing with new batteries, remote controller will conduct
3