
Drink Master specifications
The Hamilton Beach Drink Master is a versatile and stylish countertop appliance designed to bring the excitement of a classic soda shop right into your kitchen. This powerful milkshake maker is perfect for creating delicious milkshakes, smoothies, and other frozen beverages, all while catering to the needs of both casual users and aspiring mixologists.One of the standout features of the Drink Master is its robust 700-watt motor, which effortlessly blends and mixes ingredients to achieve the perfect consistency. This high-powered motor ensures that even the thickest concoctions can be tackled with ease, producing creamy milkshakes that are sure to delight both kids and adults alike. Coupled with a stainless steel mixing cup that can hold up to 28 ounces, this appliance is perfect for serving multiple mugs or glasses in one go.
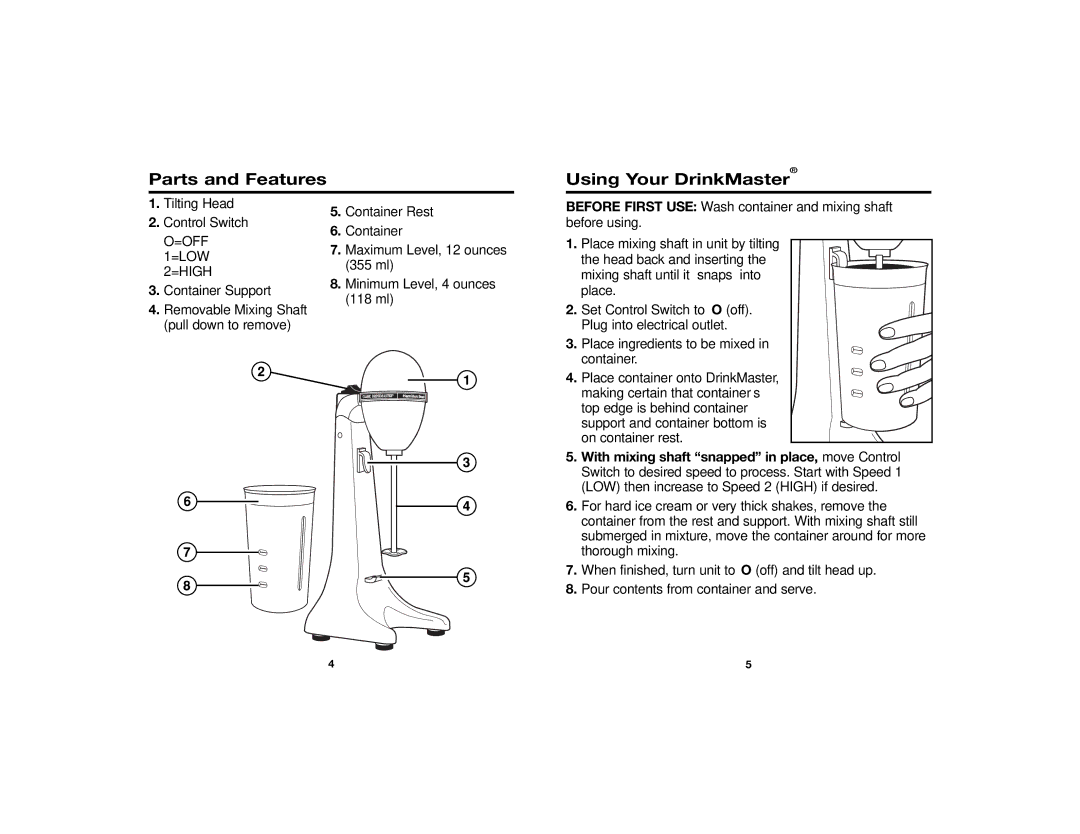
The Hamilton Beach Drink Master also boasts two speeds, allowing users to easily switch between gentle mixing for delicate recipes and more powerful blending for thicker shakes. This flexibility is essential for any home bartender or dessert enthusiast who seeks to customize their drink creations according to their taste preferences.
In terms of design, the Drink Master is both functional and eye-catching. Its retro styling, complete with a sleek chrome finish, affords it a timeless look that can complement any kitchen decor. The convenient mixing cup holder keeps your ingredients and utensils organized while you work, so you can enjoy a clutter-free experience.
Another noteworthy characteristic of the Hamilton Beach Drink Master is its easy maintenance. The stainless steel mixing cup is dishwasher safe, making cleanup quick and simple after crafting your delightful beverages. The base of the machine also features a cord storage compartment, ensuring that your counter remains neat and tidy even when the appliance is not in use.
Additionally, the Drink Master comes with a variety of recipes, inspiring users to get creative with different flavors and ingredients. Whether you're experimenting with traditional chocolate or vanilla shakes, or trying something more adventurous like seasonal pumpkin spice, the possibilities are endless.
In summary, the Hamilton Beach Drink Master combines power, versatility, and style into one impressive appliance. With its strong motor, two-speed settings, easy-to-clean components, and retro design, it stands out as a must-have for anyone looking to elevate their beverage crafting experience at home.