User’s Manual
INSTALLATION INSTRUCTIONS
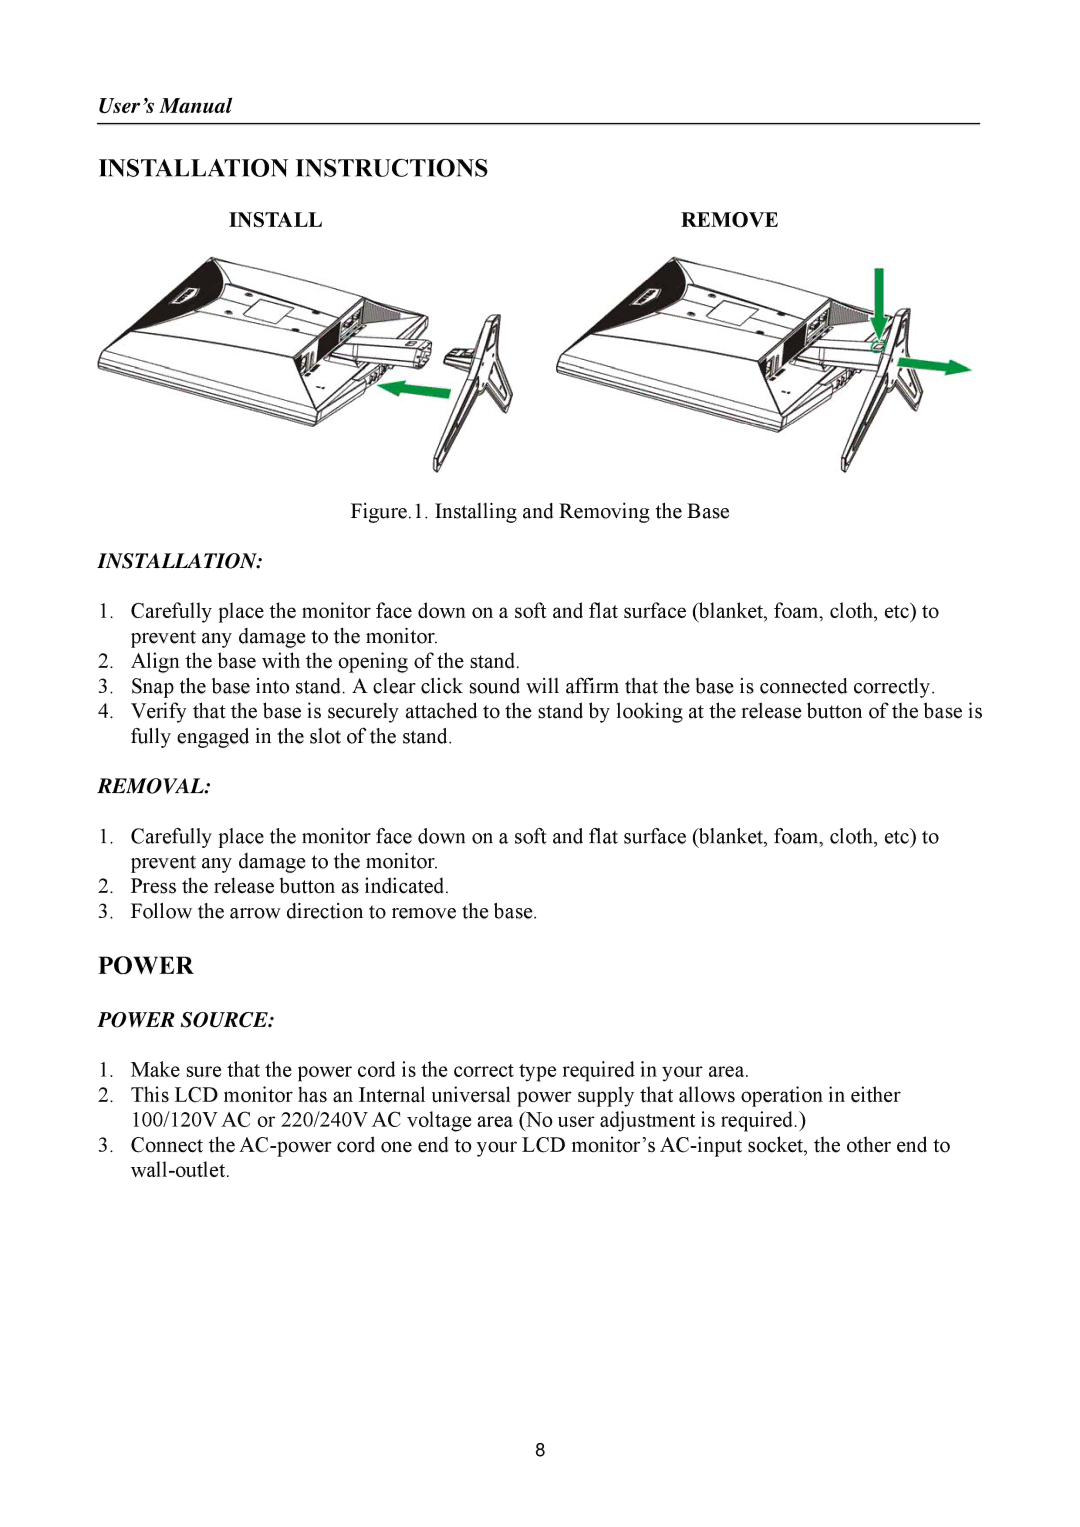
INSTALL | REMOVE |
Figure.1. Installing and Removing the Base
INSTALLATION:
1.Carefully place the monitor face down on a soft and flat surface (blanket, foam, cloth, etc) to prevent any damage to the monitor.
2.Align the base with the opening of the stand.
3.Snap the base into stand. A clear click sound will affirm that the base is connected correctly.
4.Verify that the base is securely attached to the stand by looking at the release button of the base is fully engaged in the slot of the stand.
REMOVAL:
1.Carefully place the monitor face down on a soft and flat surface (blanket, foam, cloth, etc) to prevent any damage to the monitor.
2.Press the release button as indicated.
3.Follow the arrow direction to remove the base.
POWER
POWER SOURCE:
1.Make sure that the power cord is the correct type required in your area.
2.This LCD monitor has an Internal universal power supply that allows operation in either 100/120V AC or 220/240V AC voltage area (No user adjustment is required.)
3.Connect the
8