Quick Start Guide
This guide is designed as a reference to help you start using your LCD TV quickly. Please refer to the User's Manual for more detailed installation and safety instructions.
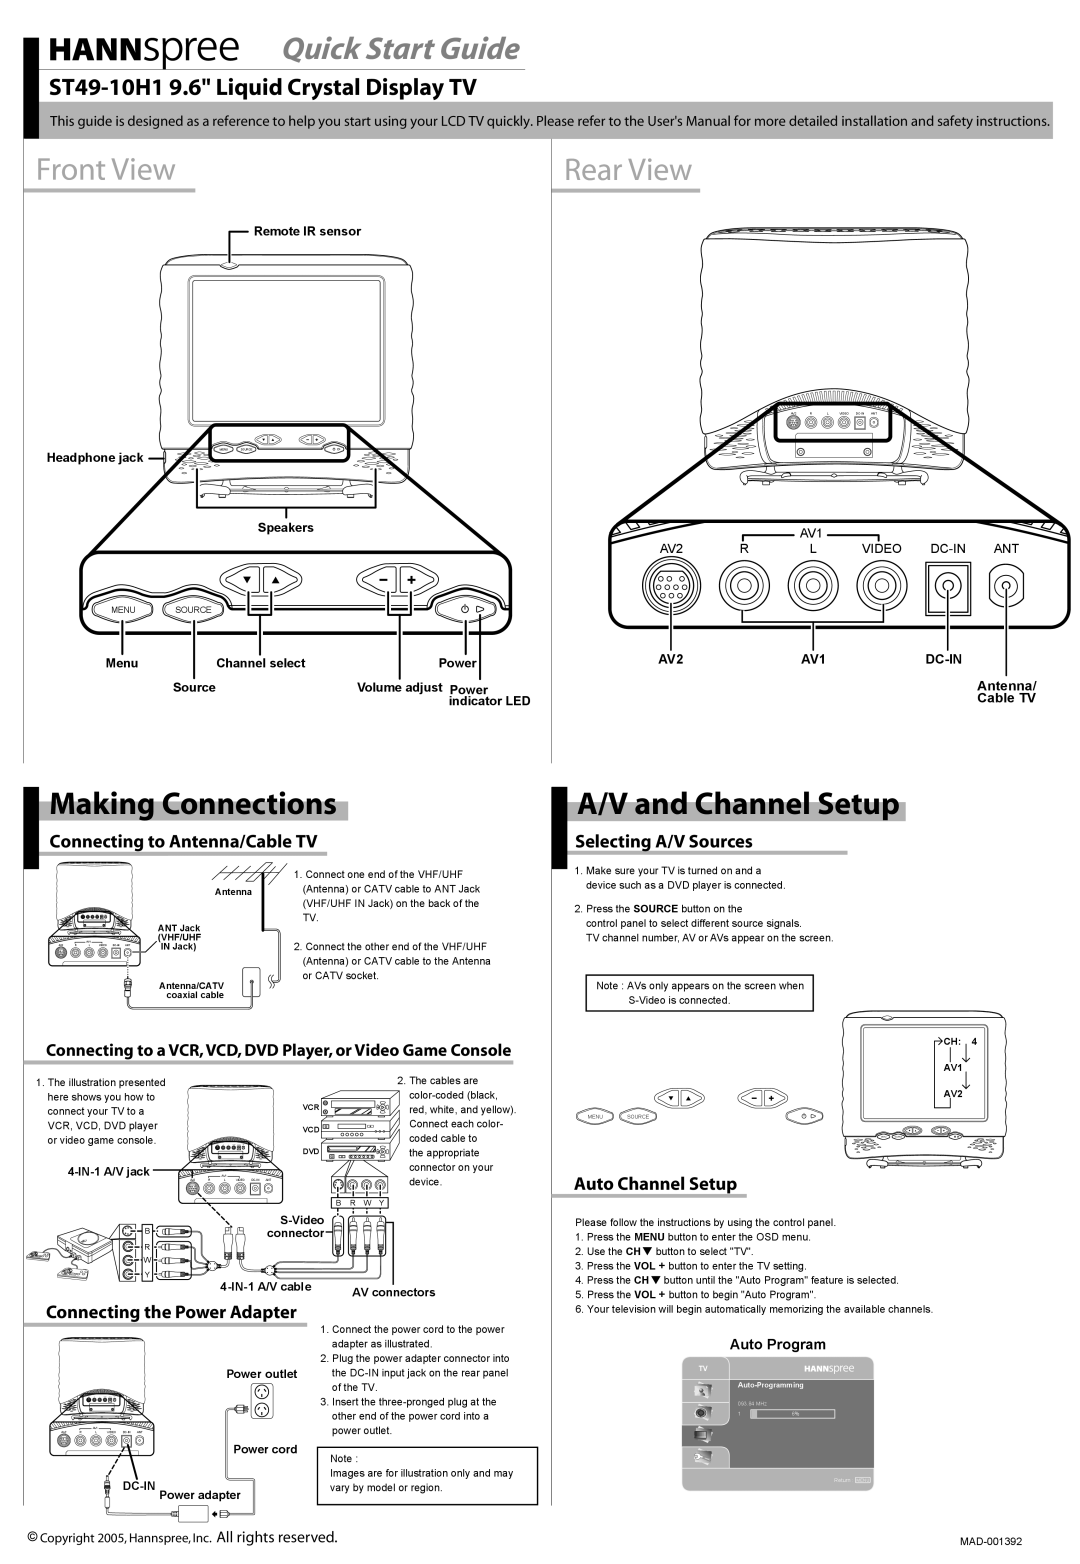
Front View
Rear View
Headphone jack
![]() Remote IR sensor
Remote IR sensor
MENU SOURCE
Speakers
AV2 | R | L | VIDEO | ANT | |
|
|
|
|
|
|
|
|
|
|
|
|
|
| AV1 |
|
|
|
AV2 | R | L | VIDEO | ANT |
MENU | SOURCE |
|
Menu | Channel select | Power |
| Source | Volume adjust Power |
|
| indicator LED |
AV2 | AV1 |
Antenna/
Cable TV
Making Connections
Connecting to Antenna/Cable TV
1. Connect one end of the VHF/UHF
Antenna (Antenna) or CATV cable to ANT Jack (VHF/UHF IN Jack) on the back of the
TV.
|
| ANT Jack |
|
AV1 |
| (VHF/UHF | 2. Connect the other end of the VHF/UHF |
AV2 R L | VIDEO | IN Jack) | |
|
|
| (Antenna) or CATV cable to the Antenna |
|
| Antenna/CATV | or CATV socket. |
|
|
| |
|
| coaxial cable |
|
Connecting to a VCR, VCD, DVD Player, or Video Game Console
1. The illustration presented |
|
|
|
|
|
|
| 2. The cables are |
here shows you how to |
|
|
|
| VCR |
|
| |
connect your TV to a |
|
|
|
|
|
| red, white, and yellow). | |
VCR, VCD, DVD player |
|
|
|
| VCD |
|
| Connect each color- |
or video game console. |
|
|
|
|
|
|
| coded cable to |
|
|
|
|
| DVD |
|
| the appropriate |
| AV1 |
|
|
|
|
| connector on your | |
|
|
|
|
|
| device. | ||
AV2 | R | L | VIDEO | ANT |
|
| ||
|
|
|
|
| B | R | W | Y |
|
|
|
|
|
|
|
| |
B |
|
|
|
| connector |
|
|
|
|
|
|
|
|
|
|
|
R
W
Y
AV connectors | |
|
A/V and Channel Setup
Selecting A/V Sources
1.Make sure your TV is turned on and a device such as a DVD player is connected.
2.Press the SOURCE button on the
control panel to select different source signals.
TV channel number, AV or AVs appear on the screen.
Note : AVs only appears on the screen when
![]() CH: 4
CH: 4
AV1
AV2
MENU SOURCE
MENU SOURCE
Auto Channel Setup
Please follow the instructions by using the control panel.
1. | Press the MENU button to enter the OSD menu. |
2. | Use the CH button to select "TV". |
3. | Press the VOL + button to enter the TV setting. |
4. | Press the CH button until the "Auto Program" feature is selected. |
5. Press the VOL + button to begin "Auto Program". | |
Connecting the Power Adapter
Power outlet
|
| AV1 |
|
|
|
AV2 | R | L | VIDEO | ANT |
Power cord
DC-IN Power adapter
1.Connect the power cord to the power adapter as illustrated.
2.Plug the power adapter connector into the
3.Insert the
Note :
Images are for illustration only and may vary by model or region.
6. Your television will begin automatically memorizing the available channels. |
Auto Program
TV
093.84 MHz
1 | 6% |
Return : MENU
![]() Copyright 2005, Hannspree, Inc. All rights reserved.
Copyright 2005, Hannspree, Inc. All rights reserved.