ASSEMBLY AND OPERATING INSTRUCTIONS
NOTE: For additional information regarding the parts listed in the following pages, refer to the Assembly Diagram on page 14.
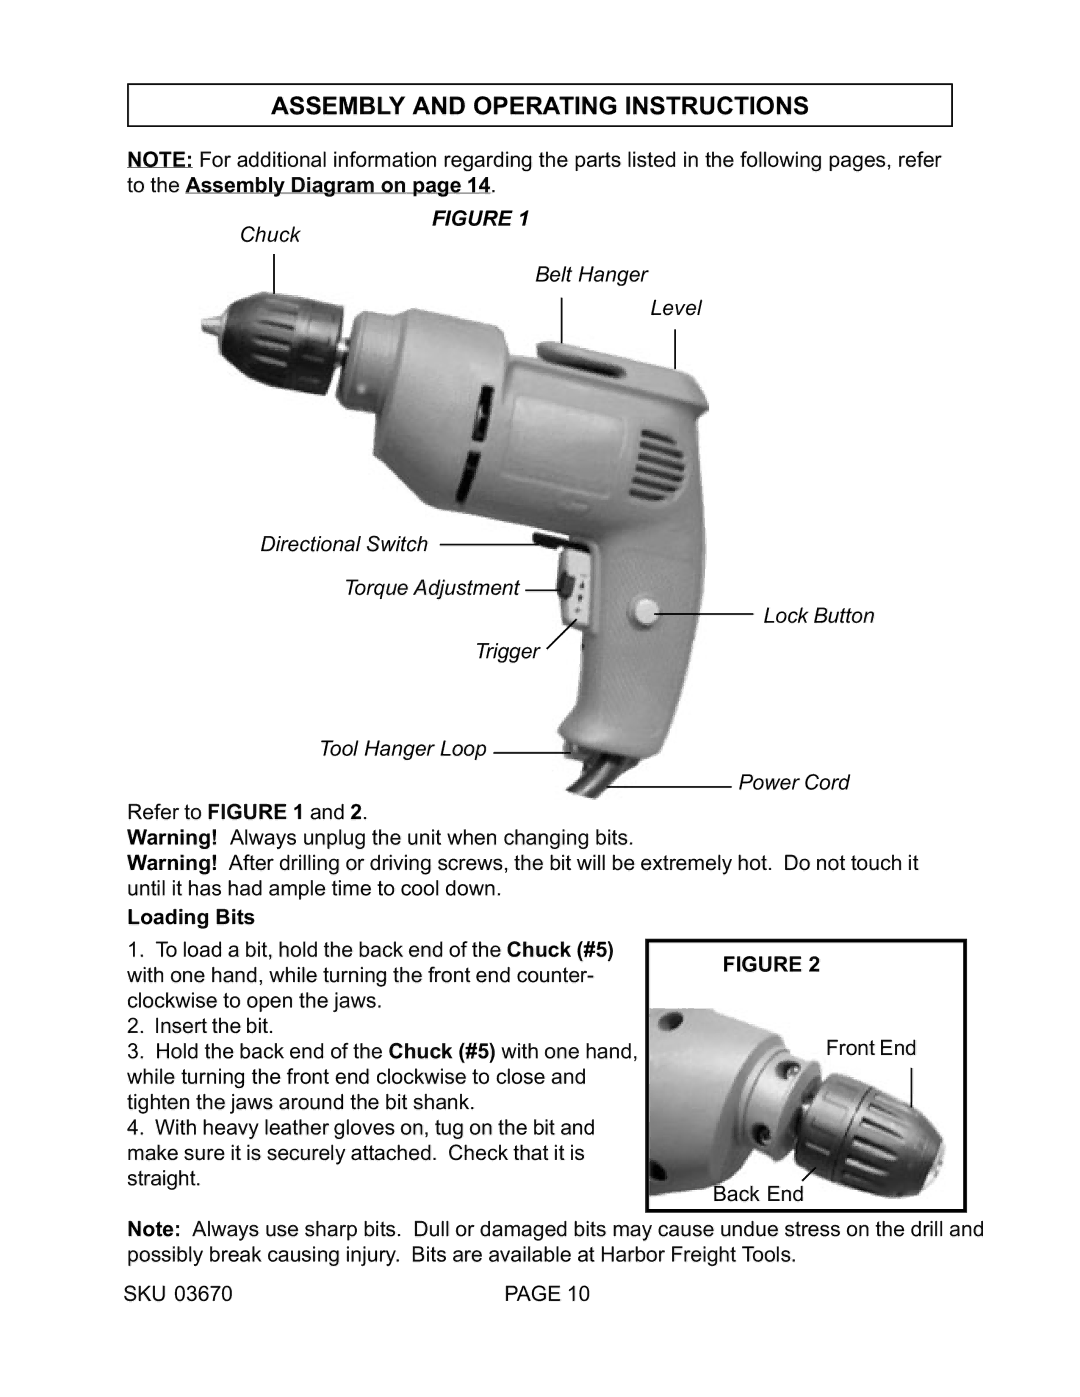
FIGURE 1
Chuck
Belt Hanger
Level
Directional Switch
Torque Adjustment
Lock Button
Trigger
Tool Hanger Loop
Power Cord
Refer to FIGURE 1 and 2.
Warning! Always unplug the unit when changing bits.
Warning! After drilling or driving screws, the bit will be extremely hot. Do not touch it until it has had ample time to cool down.
Loading Bits
1.To load a bit, hold the back end of the Chuck (#5) with one hand, while turning the front end counter- clockwise to open the jaws.
2.Insert the bit.
3.Hold the back end of the Chuck (#5) with one hand, while turning the front end clockwise to close and tighten the jaws around the bit shank.
4.With heavy leather gloves on, tug on the bit and make sure it is securely attached. Check that it is straight.
FIGURE 2
Front End
Back End
Note: Always use sharp bits. Dull or damaged bits may cause undue stress on the drill and possibly break causing injury. Bits are available at Harbor Freight Tools.
SKU 03670 | PAGE 10 |