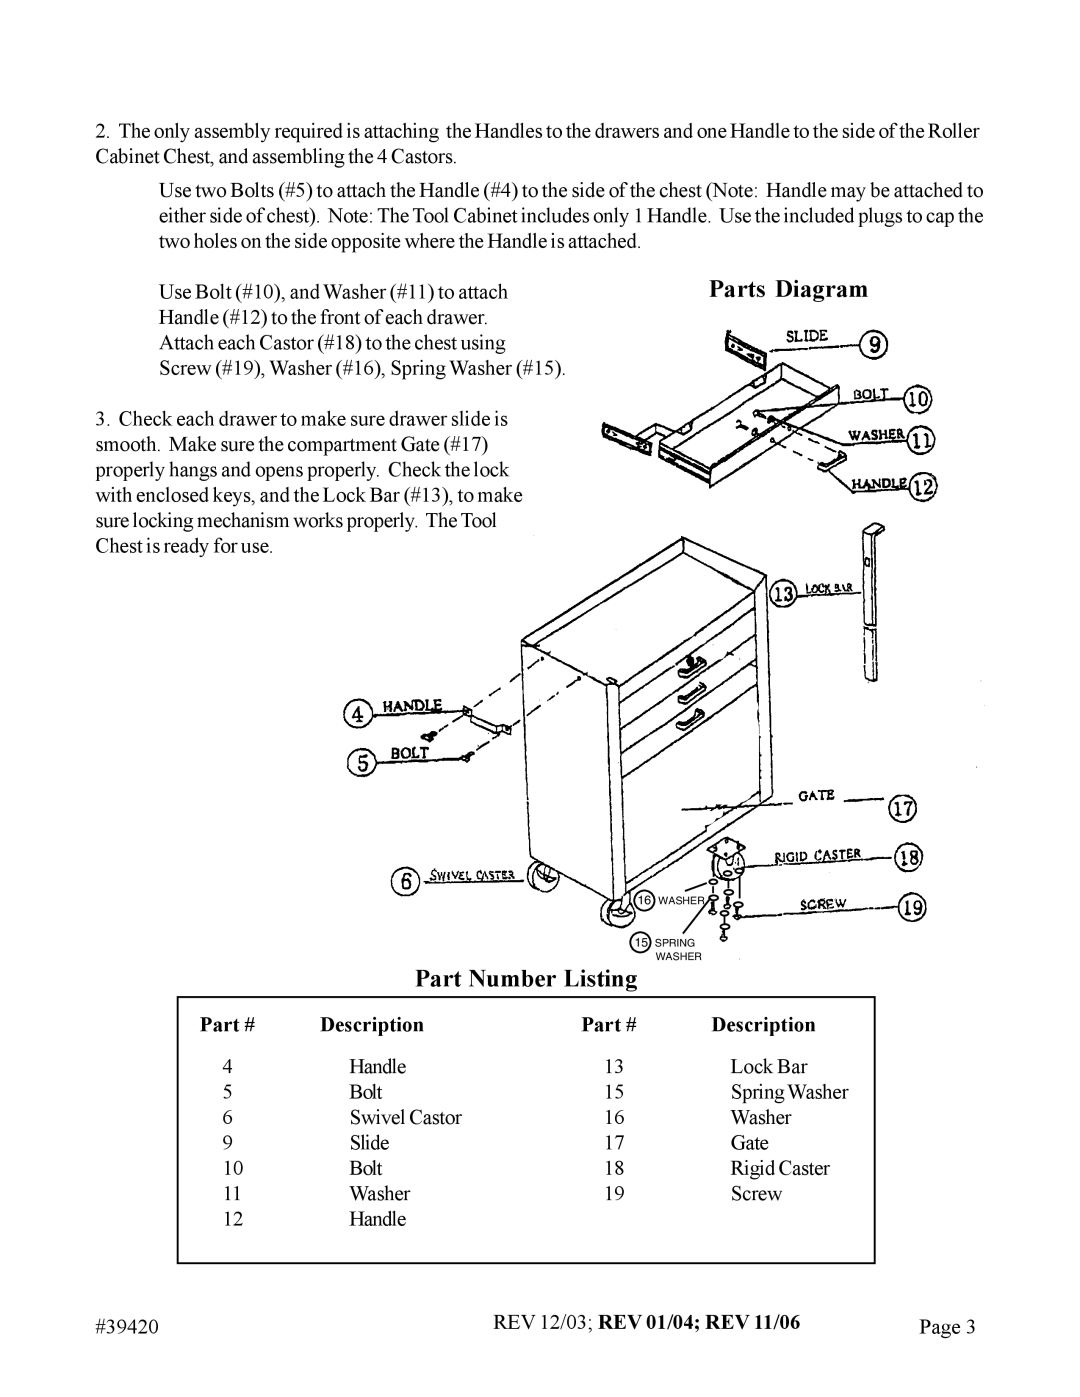
2.The only assembly required is attaching the Handles to the drawers and one Handle to the side of the Roller Cabinet Chest, and assembling the 4 Castors.
Use two Bolts (#5) to attach the Handle (#4) to the side of the chest (Note: Handle may be attached to
either side of chest). Note: The Tool Cabinet includes only 1 Handle. Use the included plugs to cap the two holes on the side opposite where the Handle is attached.
Use Bolt (#10), and Washer (#11) to attachParts Diagram Handle (#12) to the front of each drawer.
Attach each Castor (#18) to the chest using Screw (#19), Washer (#16), Spring Washer (#15).
3.Check each drawer to make sure drawer slide is smooth. Make sure the compartment Gate (#17) properly hangs and opens properly. Check the lock with enclosed keys, and the Lock Bar (#13), to make sure locking mechanism works properly. The Tool Chest is ready for use.
|
|
| 16 WASHER |
|
| 15 SPRING | |
| Part Number Listing | WASHER | |
Part # | Description | Part # | Description |
4 | Handle | 13 | Lock Bar |
5 | Bolt | 15 | Spring Washer |
6 | Swivel Castor | 16 | Washer |
9 | Slide | 17 | Gate |
10 | Bolt | 18 | Rigid Caster |
11 | Washer | 19 | Screw |
12 | Handle |
|
|
#39420 | REV 12/03; REV 01/04; REV 11/06 | Page 3 |
