10.The Lathe Spindle (part #23) turning speed is adjustable and allows the operator to run the Spindle speed at either 130 RPM, 200 RPM, 350 RPM, 560 RPM,
920 RPM, 1,500 RPM, 2,450 RPM, AND 4,000 RPM. The correct speed de- pends on the diameter and hardness of the workpiece. The larger the workpiece, the slower the speed. The harder the workpiece, the slower the speed.
(See Figure F.)
ASSEMBLY AND OPERATING INSTRUCTIONS
To Assemble The
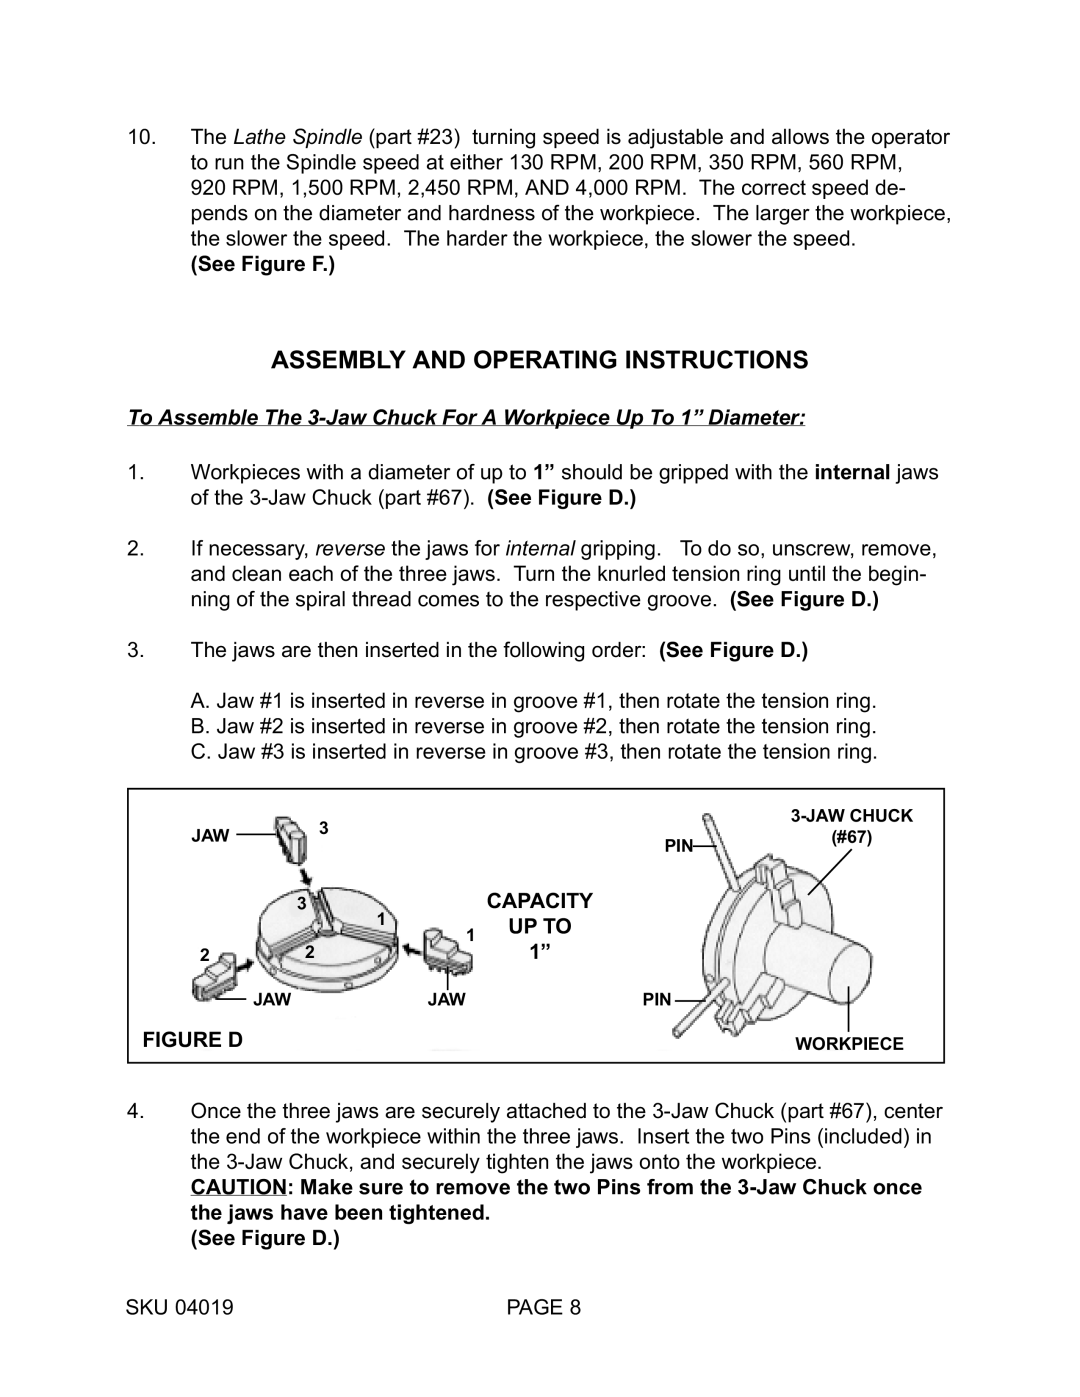
1.Workpieces with a diameter of up to 1” should be gripped with the internal jaws of the
2.If necessary, reverse the jaws for internal gripping. To do so, unscrew, remove, and clean each of the three jaws. Turn the knurled tension ring until the begin- ning of the spiral thread comes to the respective groove. (See Figure D.)
3.The jaws are then inserted in the following order: (See Figure D.)
A.Jaw #1 is inserted in reverse in groove #1, then rotate the tension ring.
B.Jaw #2 is inserted in reverse in groove #2, then rotate the tension ring.
C.Jaw #3 is inserted in reverse in groove #3, then rotate the tension ring.
JAW 3
3
1
1
2 2
JAWJAW
FIGURE D
PIN(#67)
CAPACITY
UP TO
1”
PIN
WORKPIECE
4.Once the three jaws are securely attached to the
CAUTION: Make sure to remove the two Pins from the
(See Figure D.)
SKU 04019 | PAGE 8 |