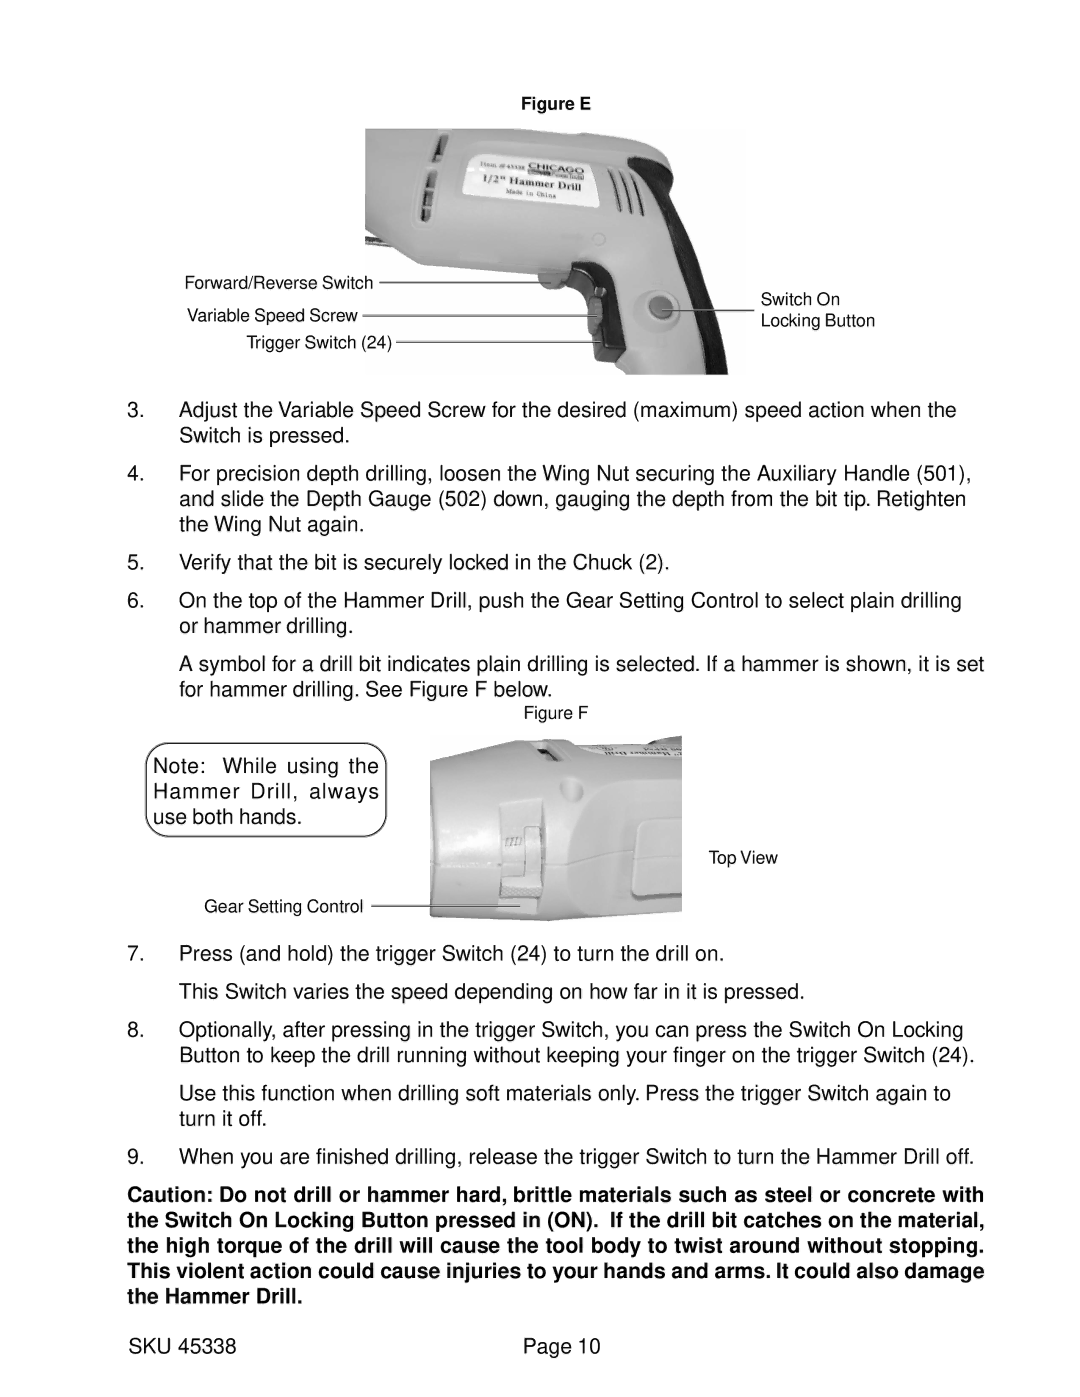
Figure E
Forward/Reverse Switch
Switch On
Variable Speed Screw ![]()
![]() Locking Button
Locking Button
Trigger Switch (24)
3.Adjust the Variable Speed Screw for the desired (maximum) speed action when the Switch is pressed.
4.For precision depth drilling, loosen the Wing Nut securing the Auxiliary Handle (501), and slide the Depth Gauge (502) down, gauging the depth from the bit tip. Retighten the Wing Nut again.
5.Verify that the bit is securely locked in the Chuck (2).
6.On the top of the Hammer Drill, push the Gear Setting Control to select plain drilling or hammer drilling.
A symbol for a drill bit indicates plain drilling is selected. If a hammer is shown, it is set
for hammer drilling. See Figure F below.
Figure F
Note: While using the Hammer Drill, always use both hands.
Top View
Gear Setting Control
7.Press (and hold) the trigger Switch (24) to turn the drill on.
This Switch varies the speed depending on how far in it is pressed.
8.Optionally, after pressing in the trigger Switch, you can press the Switch On Locking Button to keep the drill running without keeping your finger on the trigger Switch (24).
Use this function when drilling soft materials only. Press the trigger Switch again to turn it off.
9.When you are finished drilling, release the trigger Switch to turn the Hammer Drill off.
Caution: Do not drill or hammer hard, brittle materials such as steel or concrete with the Switch On Locking Button pressed in (ON). If the drill bit catches on the material, the high torque of the drill will cause the tool body to twist around without stopping. This violent action could cause injuries to your hands and arms. It could also damage the Hammer Drill.
SKU 45338 | Page 10 |
