Assembly Instructions
Note: All parts are secured using Bolts, Nuts, and Washers (8), with the Bolts inserted from outside the rack. Only finger tighten Bolts and Nuts (8) until assembly is complete.
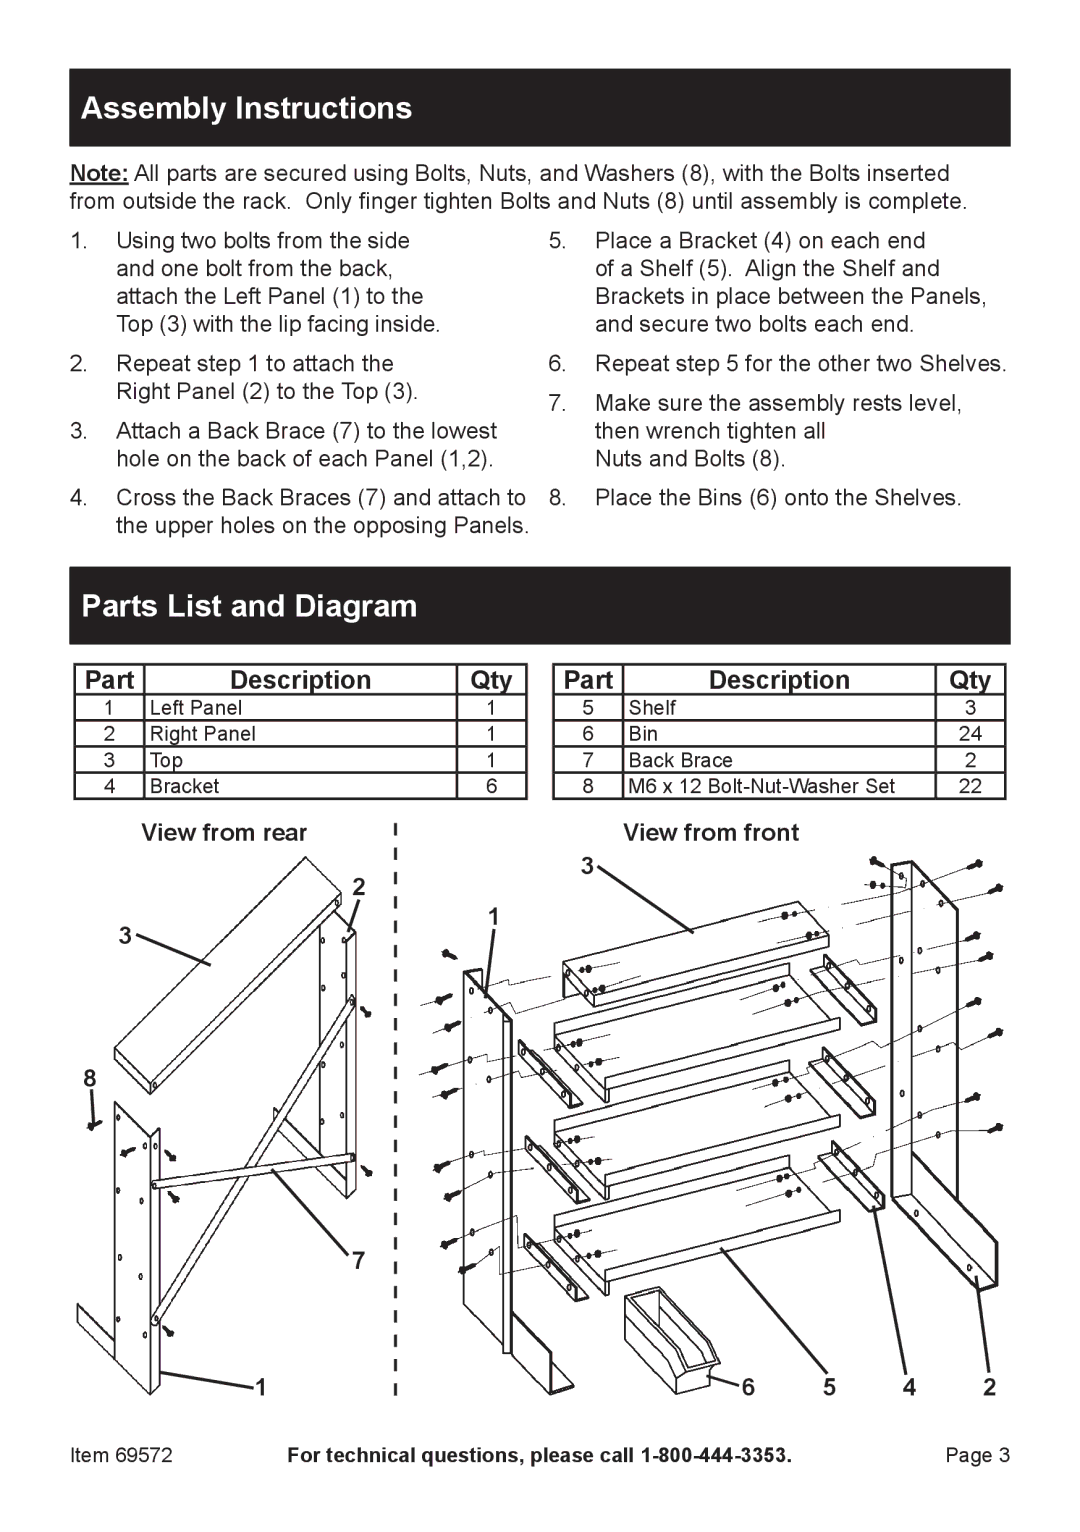
1.Using two bolts from the side and one bolt from the back, attach the Left Panel (1) to the Top (3) with the lip facing inside.
2.Repeat step 1 to attach the Right Panel (2) to the Top (3).
3.Attach a Back Brace (7) to the lowest hole on the back of each Panel (1,2).
4.Cross the Back Braces (7) and attach to the upper holes on the opposing Panels.
5.Place a Bracket (4) on each end of a Shelf (5). Align the Shelf and Brackets in place between the Panels, and secure two bolts each end.
6.Repeat step 5 for the other two Shelves.
7.Make sure the assembly rests level, then wrench tighten all
Nuts and Bolts (8).
8.Place the Bins (6) onto the Shelves.
Parts List and Diagram
Part | Description | Qty |
1 | Left Panel | 1 |
2 | Right Panel | 1 |
3 | Top | 1 |
4 | Bracket | 6 |
View from rear
2
Part | Description | Qty |
5 | Shelf | 3 |
6 | Bin | 24 |
7 | Back Brace | 2 |
8 | M6 x 12 | 22 |
View from front
3
3
8
1
7
1
 6 5 4 2
Item 69572 | For technical questions, please call | Page 3 |
