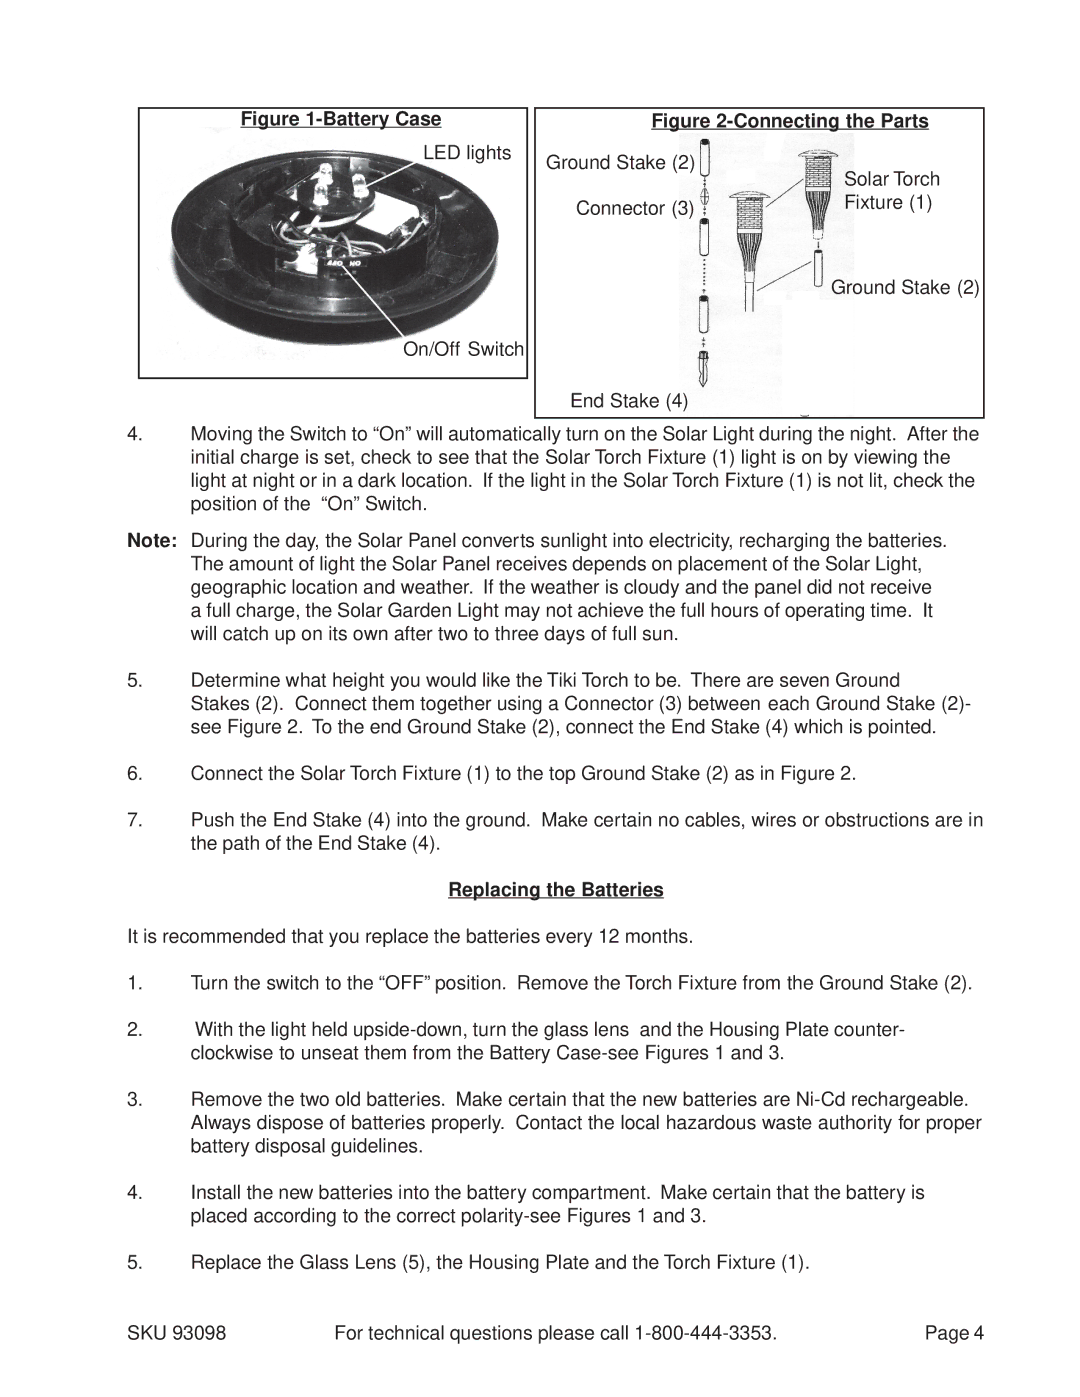
Figure 1-Battery Case
LED lights
On/Off Switch
Figure 2-Connecting the Parts
Ground Stake (2)
| Solar Torch |
Connector (3) | Fixture (1) |
| |
| Ground Stake (2) |
End Stake (4)
4.Moving the Switch to “On” will automatically turn on the Solar Light during the night. After the initial charge is set, check to see that the Solar Torch Fixture (1) light is on by viewing the light at night or in a dark location. If the light in the Solar Torch Fixture (1) is not lit, check the position of the “On” Switch.
Note: During the day, the Solar Panel converts sunlight into electricity, recharging the batteries. The amount of light the Solar Panel receives depends on placement of the Solar Light, geographic location and weather. If the weather is cloudy and the panel did not receive a full charge, the Solar Garden Light may not achieve the full hours of operating time. It will catch up on its own after two to three days of full sun.
5.Determine what height you would like the Tiki Torch to be. There are seven Ground
Stakes (2). Connect them together using a Connector (3) between each Ground Stake (2)- see Figure 2. To the end Ground Stake (2), connect the End Stake (4) which is pointed.
6.Connect the Solar Torch Fixture (1) to the top Ground Stake (2) as in Figure 2.
7.Push the End Stake (4) into the ground. Make certain no cables, wires or obstructions are in the path of the End Stake (4).
Replacing the Batteries
It is recommended that you replace the batteries every 12 months.
1.Turn the switch to the “OFF” position. Remove the Torch Fixture from the Ground Stake (2).
2.With the light held
3.Remove the two old batteries. Make certain that the new batteries are
4.Install the new batteries into the battery compartment. Make certain that the battery is placed according to the correct
5.Replace the Glass Lens (5), the Housing Plate and the Torch Fixture (1).
SKU 93098 | For technical questions please call | Page 4 |