Operation (continued)
Assembly - Attaching the Arm (48) is the only assembly required. See FIGURE 1 and the Assembly Drawing on page 8.
The two Clamp Screws (44) fit in the recessed gaps on the lower part of the Arm (48).
As shown below, hold the Clamp Screws (44) in place around the Body (18) and add a Washer (45) and a Nut (46) to the threaded ends of the Clamp Screws (44). Tighten them securely.
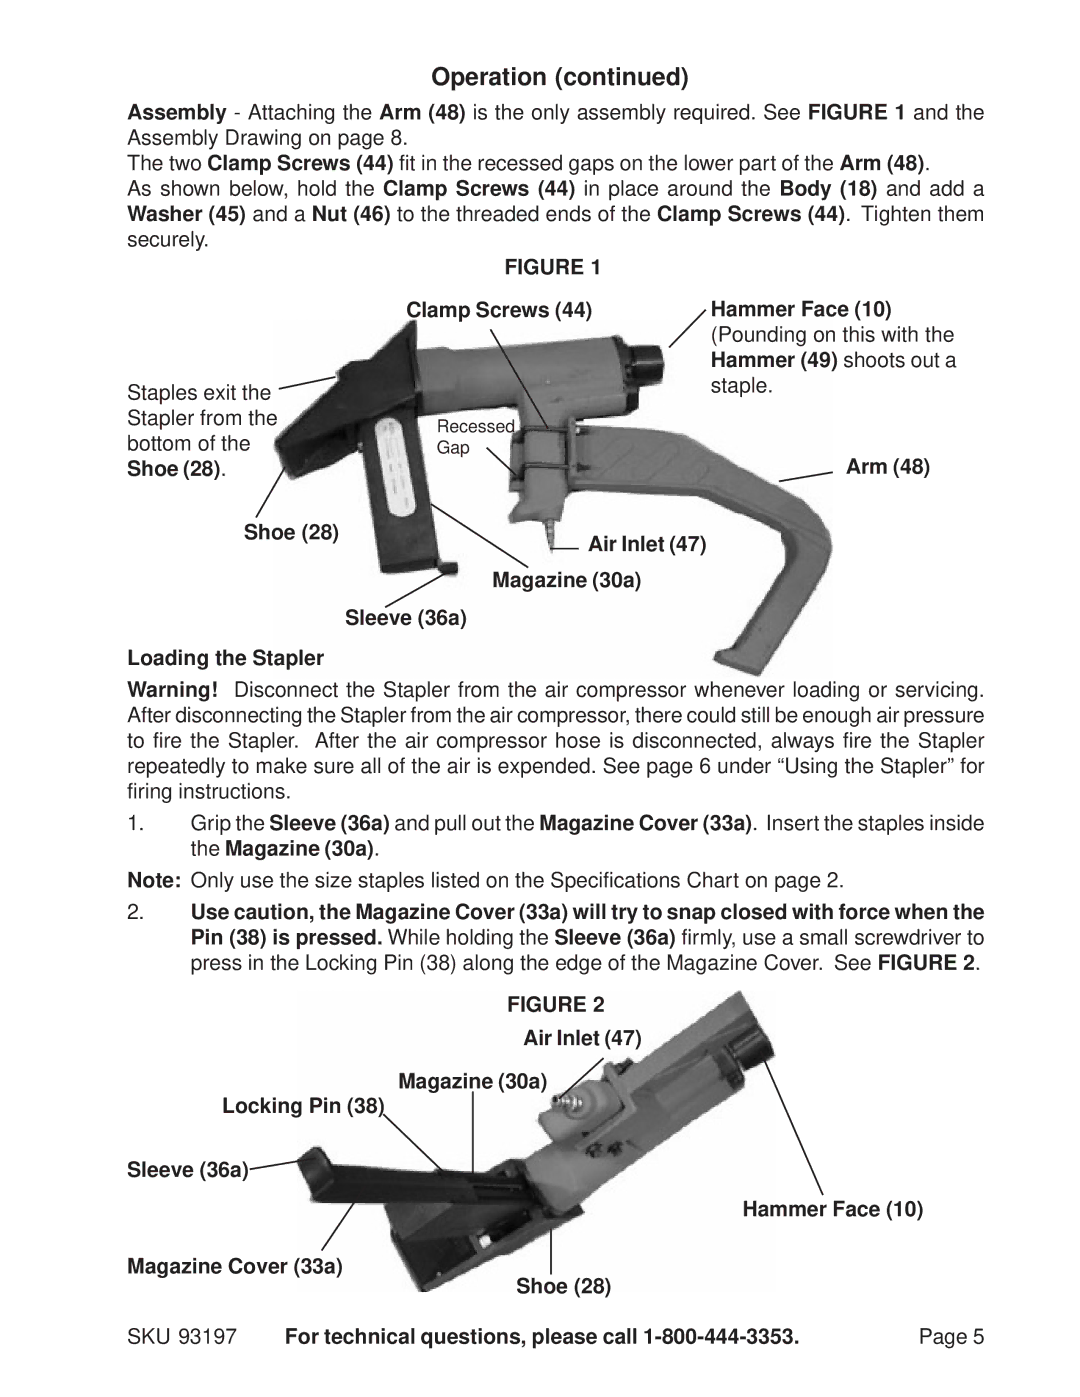
FIGURE 1
Staples exit the Stapler from the bottom of the Shoe (28).
Shoe (28)
Clamp Screws (44) | Hammer Face (10) |
| (Pounding on this with the |
| Hammer (49) shoots out a |
| staple. |
Recessed
Gap
Arm (48)
Air Inlet (47)
Magazine (30a)
Sleeve (36a)
Loading the Stapler
Warning! Disconnect the Stapler from the air compressor whenever loading or servicing. After disconnecting the Stapler from the air compressor, there could still be enough air pressure to fire the Stapler. After the air compressor hose is disconnected, always fire the Stapler repeatedly to make sure all of the air is expended. See page 6 under “Using the Stapler” for firing instructions.
1.Grip the Sleeve (36a) and pull out the Magazine Cover (33a). Insert the staples inside the Magazine (30a).
Note: Only use the size staples listed on the Specifications Chart on page 2.
2.Use caution, the Magazine Cover (33a) will try to snap closed with force when the Pin (38) is pressed. While holding the Sleeve (36a) firmly, use a small screwdriver to press in the Locking Pin (38) along the edge of the Magazine Cover. See FIGURE 2.
FIGURE 2
Air Inlet (47)
Magazine (30a)
Locking Pin (38)
Sleeve (36a)![]()
Hammer Face (10)
Magazine Cover (33a)
Shoe (28)
SKU 93197 | For technical questions, please call | Page 5 |