11.Dry running will cause damage to the inner seals. Make sure the water or liquid chemical supply used for the Sprayer is not dirty or sandy.
12.Do not pull or carry the Sprayer by its Spray Gun Assembly. Use the Handle on the Sprayer to move the tool from one location to another.
13.The work area should have adequate drainage to reduce the possibility of a fall due to slippery surfaces.
14.This product is designed for outdoor use only.
15.Keep the Cap and Spray Gun Assembly of the Sprayer connected to the tool while the system is pressurized. Prior to refilling or emptying the Tank, squeeze the Trigger on the Spray Gun Assembly to completely depressurize the system.
16.Prior to starting the Sprayer in cold weather, check all of the parts of the
tool to make sure ice has not formed. Do not store the Sprayer where the temperature will fall below 32o Fahrenheit.
17.Do not keep water or any liquid chemicals in the Sprayer after use.
18.Make sure to clean the Filter of the Sprayer before each use.
19.Never leave the Sprayer unattended. When finished using the Sprayer, empty the unit. Thoroughly clean the unit and store it in a clean, dry, safe location out of reach of children.
20.![]() WARNING! The warnings and cautions discussed in this manual cannot cover all possible conditions and situations that may occur. It must be under- stood by the operator that common sense and caution are factors which cannot be built into this product, but must be supplied by the operator.
WARNING! The warnings and cautions discussed in this manual cannot cover all possible conditions and situations that may occur. It must be under- stood by the operator that common sense and caution are factors which cannot be built into this product, but must be supplied by the operator.
ASSEMBLY AND OPERATING INSTRUCTIONS
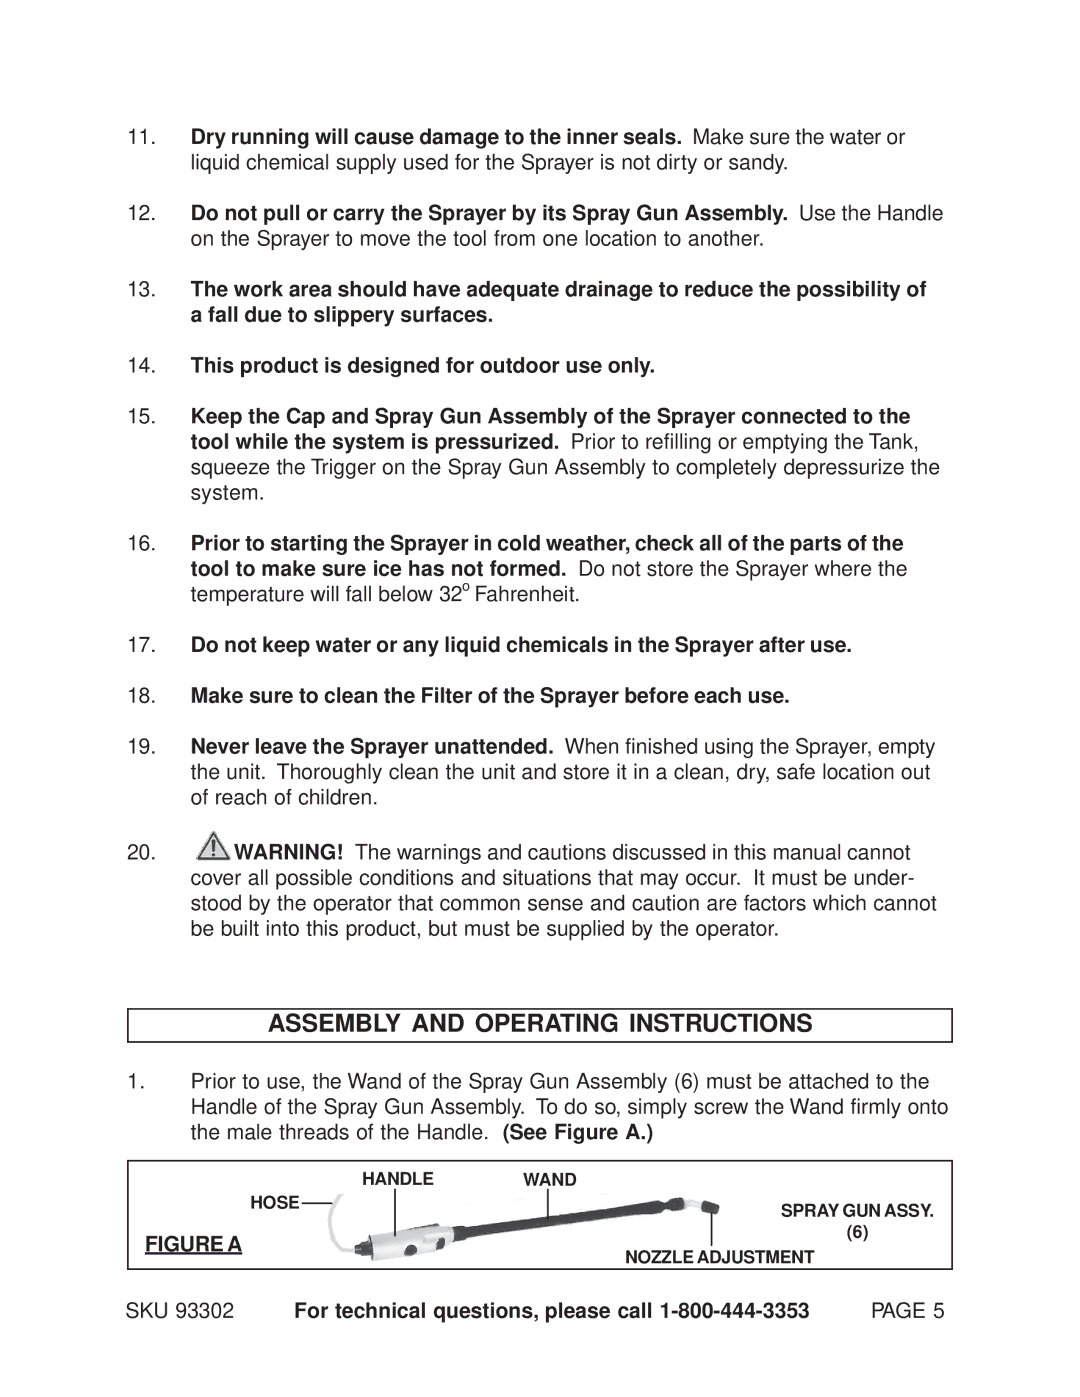
1.Prior to use, the Wand of the Spray Gun Assembly (6) must be attached to the Handle of the Spray Gun Assembly. To do so, simply screw the Wand firmly onto the male threads of the Handle. (See Figure A.)
HOSE |
| HANDLE | WAND | ||||
|
|
|
|
| SPRAY GUN ASSY. | ||
|
|
|
| ||||
|
|
|
|
|
| ||
|
|
|
|
| (6) | ||
FIGURE A | |||||||
| NOZZLE ADJUSTMENT | ||||||
|
|
|
|
| |||
SKU 93302 For technical questions, please call
