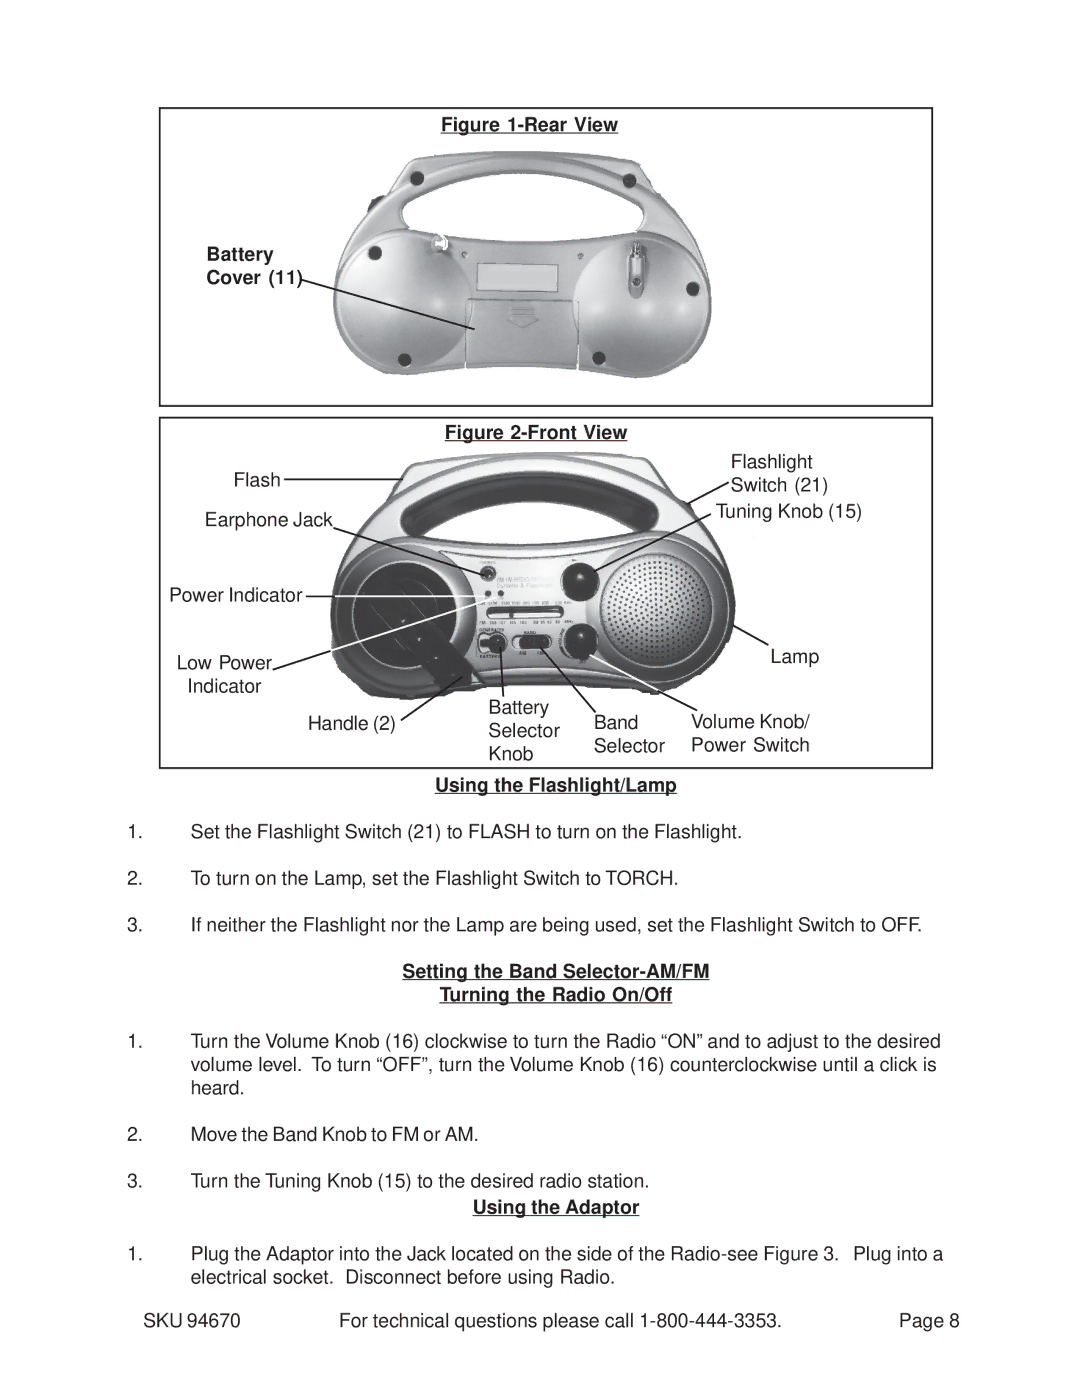
Figure 1-Rear View
Battery
Cover (11)
|
| Figure |
| |
Flash |
|
|
| Flashlight |
|
|
| Switch (21) | |
|
|
| ||
Earphone Jack |
|
| Tuning Knob (15) | |
|
|
| ||
Power Indicator |
|
|
| |
Low Power |
|
| Lamp | |
|
|
| ||
Indicator | Battery |
|
| |
| Handle (2) | Band | Volume Knob/ | |
| Selector | |||
|
| Selector | Power Switch | |
|
| Knob | ||
|
|
|
| |
|
|
|
|
|
Using the Flashlight/Lamp
1.Set the Flashlight Switch (21) to FLASH to turn on the Flashlight.
2.To turn on the Lamp, set the Flashlight Switch to TORCH.
3.If neither the Flashlight nor the Lamp are being used, set the Flashlight Switch to OFF.
Setting the Band Selector-AM/FM
Turning the Radio On/Off
1.Turn the Volume Knob (16) clockwise to turn the Radio “ON” and to adjust to the desired volume level. To turn “OFF”, turn the Volume Knob (16) counterclockwise until a click is heard.
2.Move the Band Knob to FM or AM.
3.Turn the Tuning Knob (15) to the desired radio station.
Using the Adaptor
1.Plug the Adaptor into the Jack located on the side of the
SKU 94670 | For technical questions please call | Page 8 |
