Installation
Warning: Before Installation, disconnect negative battery cable then disconnect the posi- tive battery cable, in that order.
Warning: Whenever drilling, be sure that the drill will not damage any wires, tubes or com- ponents on either side of the member being drilled. Plan for your installation so units will be located conveniently and wires will be routed out of the way of any other components. Plan to fill all drilled holes with sealant to prevent water intrusion or rust.
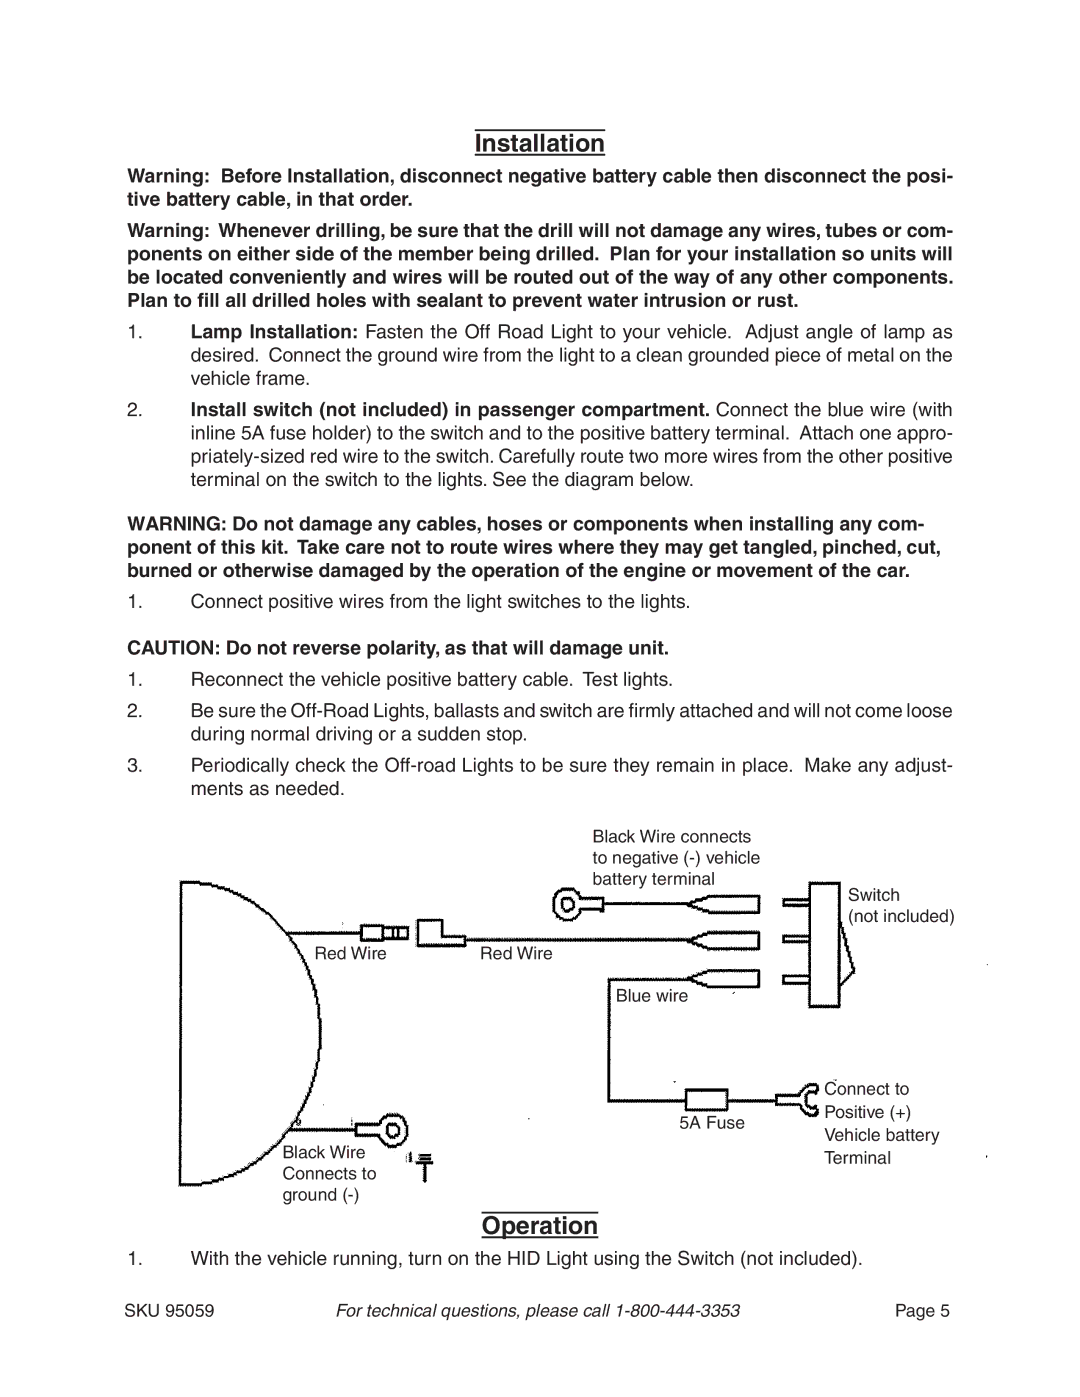
1.Lamp Installation: Fasten the Off Road Light to your vehicle. Adjust angle of lamp as desired. Connect the ground wire from the light to a clean grounded piece of metal on the vehicle frame.
2.Install switch (not included) in passenger compartment. Connect the blue wire (with inline 5A fuse holder) to the switch and to the positive battery terminal. Attach one appro-
WARNING: Do not damage any cables, hoses or components when installing any com- ponent of this kit. Take care not to route wires where they may get tangled, pinched, cut, burned or otherwise damaged by the operation of the engine or movement of the car.
1.Connect positive wires from the light switches to the lights.
CAUTION: Do not reverse polarity, as that will damage unit.
1.Reconnect the vehicle positive battery cable. Test lights.
2.Be sure the
3.Periodically check the
Black Wire connects to negative
Red Wire | Red Wire |
Blue wire
5A Fuse
Black Wire Connects to ground
Operation
Switch
(not included)
Connect to Positive (+) Vehicle battery Terminal
1.With the vehicle running, turn on the HID Light using the Switch (not included).
SKU 95059 | For technical questions, please call | Page 5 |
