1.Be sure to follow all safety precautions as listed on Pages
2.Acquire a 1/4” NPT air fitting (not supplied) and screw into the Air Inlet fitting. Tighten with a wrench.
3.Attach a
4.Once the air compressor is off, connect the Air Hose to the Air Inlet Coupling.
This air tool requires lubrication during operation. For best results, it is recom- mended to have an oiler and water filter in line with the air supply as shown. This will extend the life of the tool.
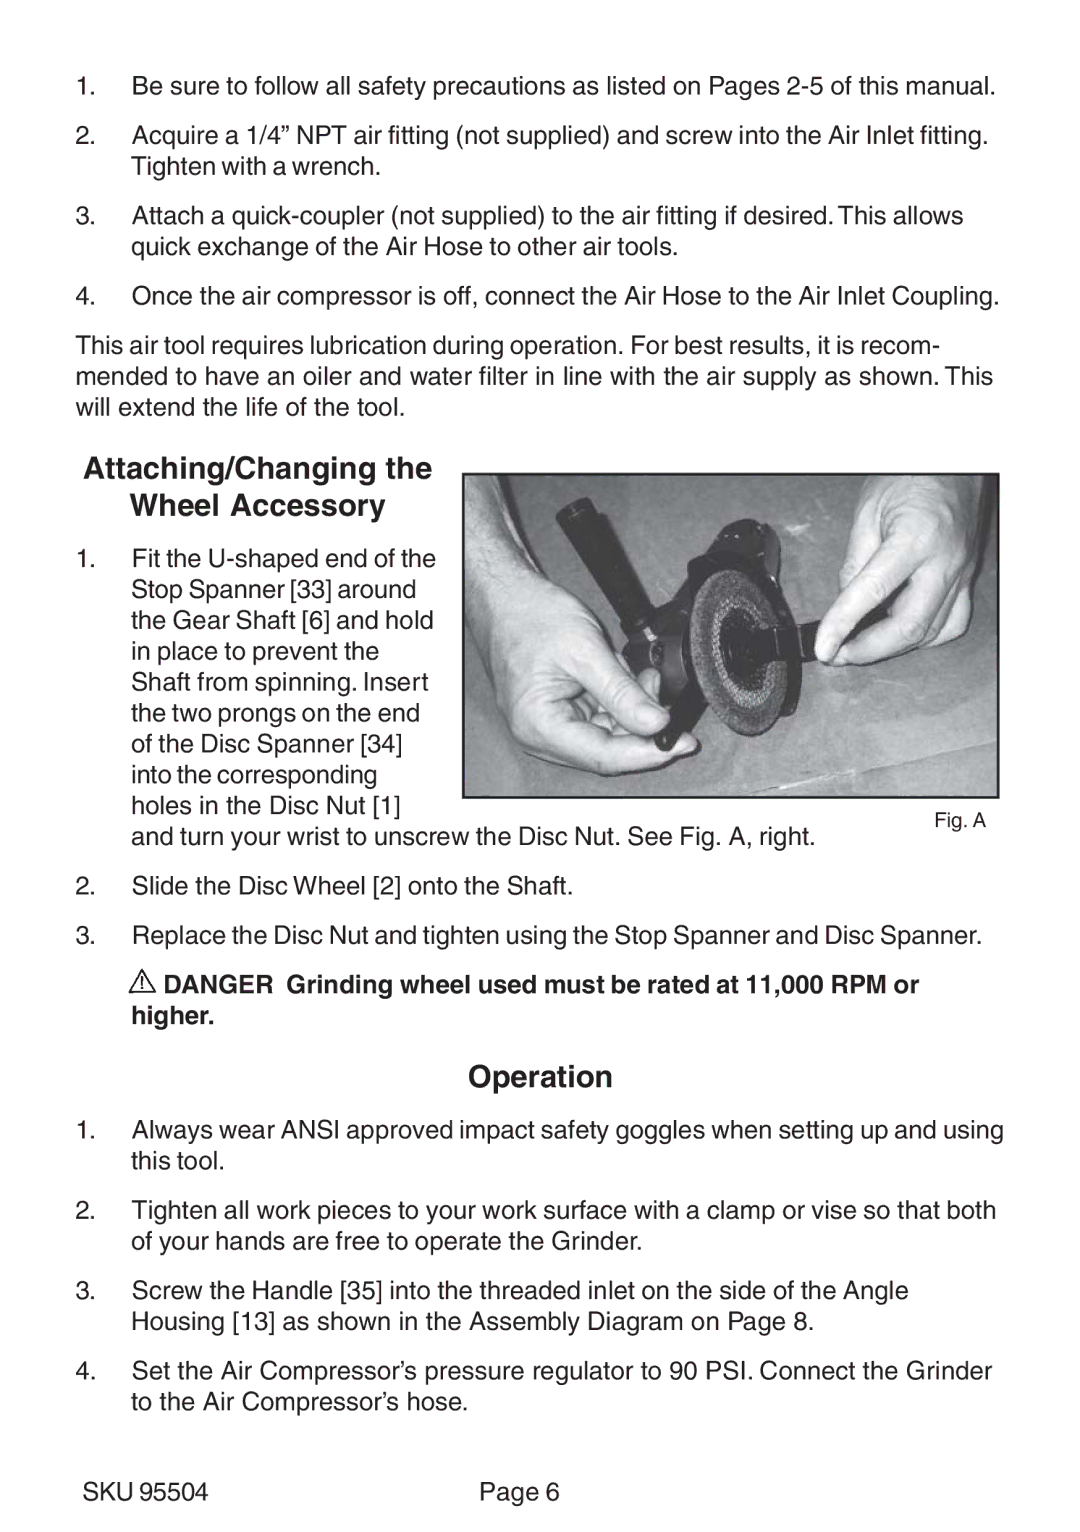
Attaching/Changing the
Wheel Accessory
1. Fit the
Fig. A
and turn your wrist to unscrew the Disc Nut. See Fig. A, right.
2.Slide the Disc Wheel [2] onto the Shaft.
3.Replace the Disc Nut and tighten using the Stop Spanner and Disc Spanner.
![]() DANGER Grinding wheel used must be rated at 11,000 RPM or higher.
DANGER Grinding wheel used must be rated at 11,000 RPM or higher.
Operation
1.Always wear ANSI approved impact safety goggles when setting up and using this tool.
2.Tighten all work pieces to your work surface with a clamp or vise so that both of your hands are free to operate the Grinder.
3.Screw the Handle [35] into the threaded inlet on the side of the Angle Housing [13] as shown in the Assembly Diagram on Page 8.
4.Set the Air Compressor’s pressure regulator to 90 PSI. Connect the Grinder to the Air Compressor’s hose.
SKU 95504 | Page 6 |