four mower mounting holes.
(See Figure A.)
NOTE: Depending on the mower, it may be necessary to drill mounting holes or make a mounting plate to align with the engine mounting holes.
4.Use four 3/8” diameter, coarse threaded, hardened, stainless steel Bolts, Lock Washers, and Washers (not included) of appropriate length to secure the Engine to the mower.
Make sure the hardware does not contact moving parts.
Choke | Choke | mower choke |
Control | bracket | cable sheath |
mower
choke
cable
Automatic
Throttle Control
(not adjustable)
FIGURE B
5.Insert the mower’s choke cable sheath through the hole in the Choke bracket. Secure the mower choke cable to the choke control. Adjust the choke cable sheath to remove all slack and secure it in place using the adjusting nuts on the cable sheath. (See Figure B.)
Brake | mower brake |
bracket | cable |
mower brake | Brake |
cable sheath | arm |
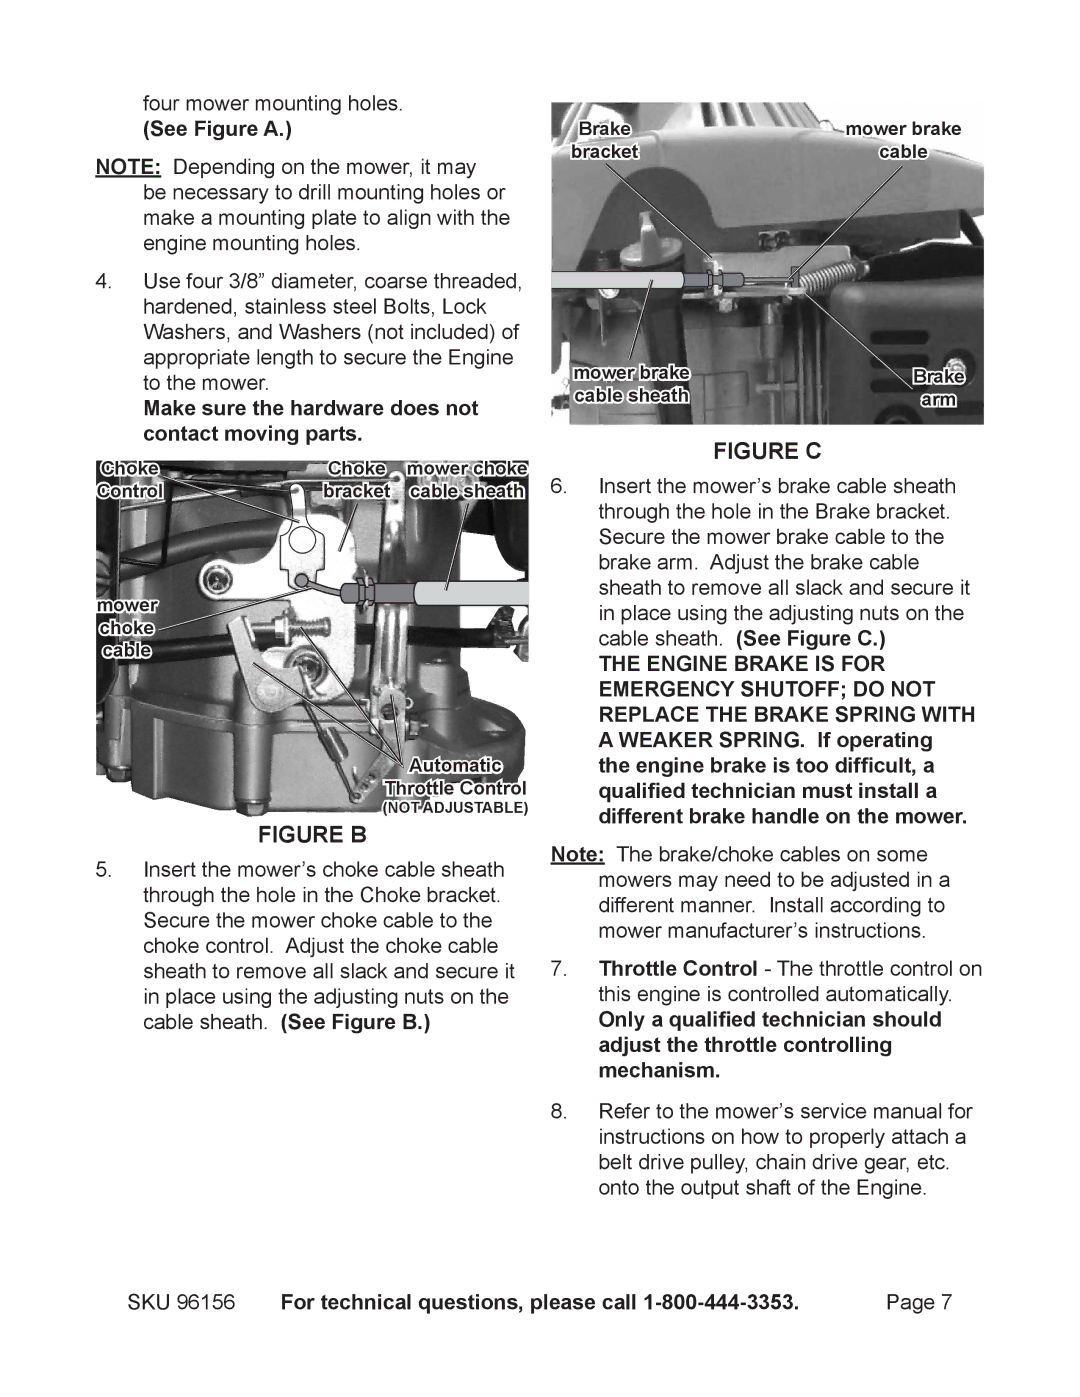
FIGURE C
6.Insert the mower’s brake cable sheath through the hole in the Brake bracket. Secure the mower brake cable to the brake arm. Adjust the brake cable sheath to remove all slack and secure it in place using the adjusting nuts on the cable sheath. (See Figure C.)
The engine brake is for emergency shutoff; do not replace the brake spring with a weaker spring. If operating the engine brake is too difficult, a qualified technician must install a different brake handle on the mower.
Note: The brake/choke cables on some mowers may need to be adjusted in a different manner. Install according to mower manufacturer’s instructions.
7.Throttle Control - The throttle control on this engine is controlled automatically.
Only a qualified technician should adjust the throttle controlling mechanism.
8.Refer to the mower’s service manual for instructions on how to properly attach a belt drive pulley, chain drive gear, etc. onto the output shaft of the Engine.
SKU 96156 | For technical questions, please call | Page 7 |
