
HK 3470 specifications
The Harman-Kardon HK 3470 is a versatile stereo receiver that combines pristine sound quality with a plethora of features designed for audio enthusiasts. Known for their commitment to high-fidelity sound, Harman-Kardon has engineered the HK 3470 to deliver an exceptional listening experience, whether for music, movies, or gaming.One of the standout features of the HK 3470 is its powerful amplification capabilities. With 120 watts per channel, this receiver can easily drive a variety of speakers, allowing users to enjoy dynamic and clear sound across a wide range of volumes. This amplification is supported by Harman-Kardon's advanced circuitry, which minimizes distortion and enhances audio clarity, creating an immersive listening environment.
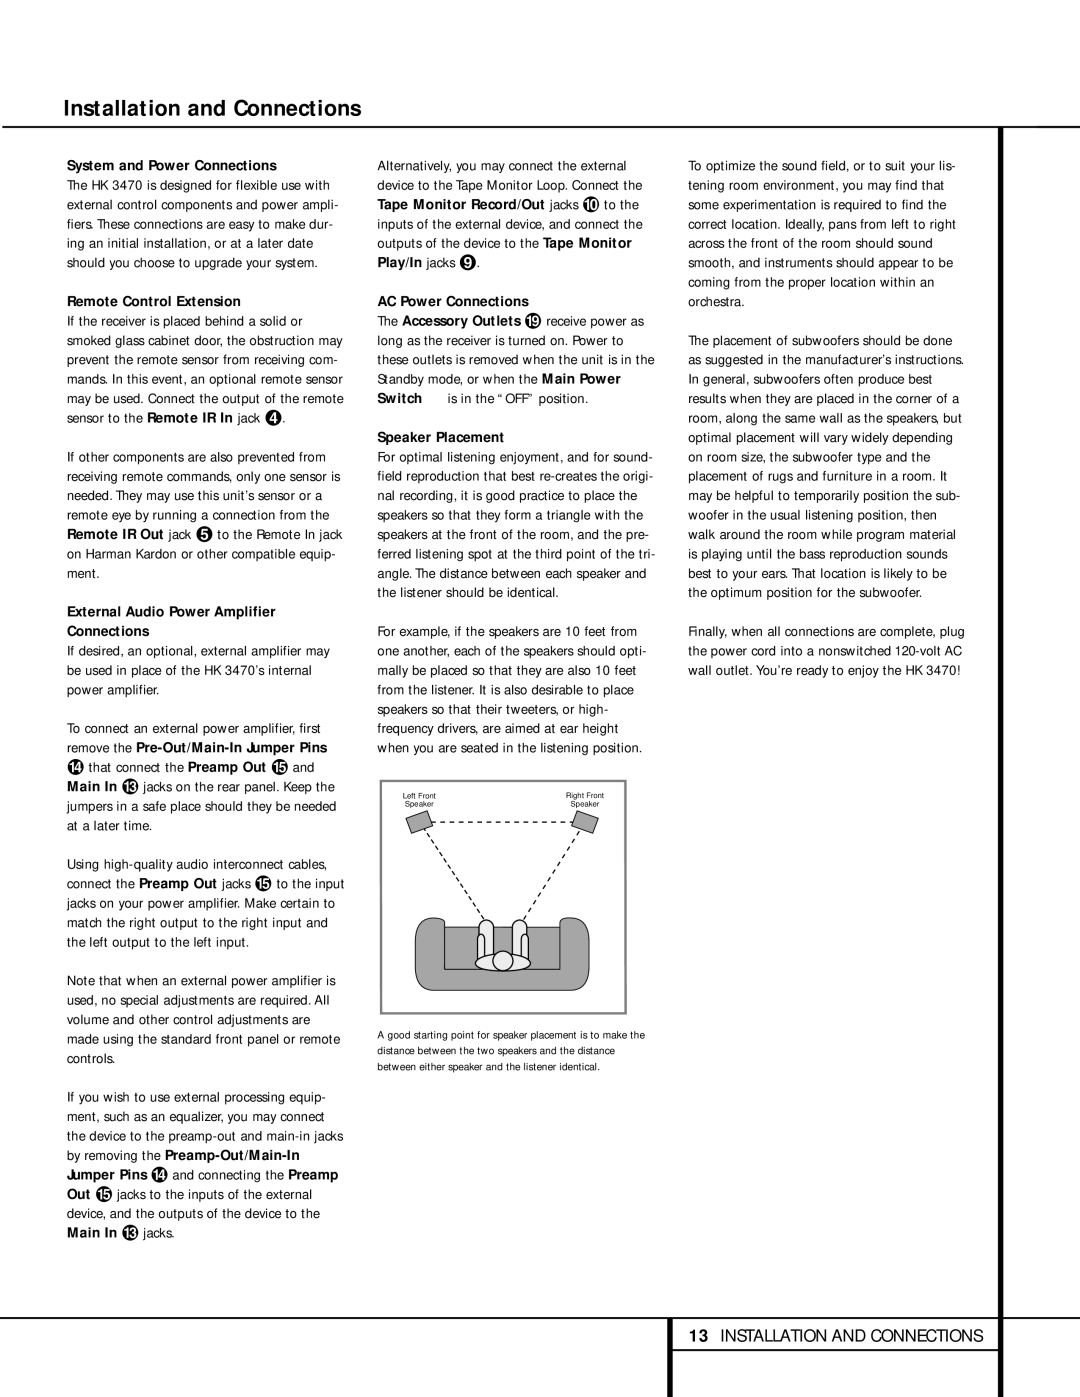
The HK 3470 comes equipped with multiple audio inputs, including five line-level inputs, a dedicated phono input for vinyl enthusiasts, and digital inputs for modern devices. This variety allows users to connect their favorite sources, from smartphones and tablets to CD players and turntables, ensuring compatibility with any audio setup. Additionally, the receiver features an FM/AM tuner with a large number of presets, enabling easy access to different radio stations.
In terms of technology, the HK 3470 utilizes Harman-Kardon's proprietary technologies such as the Quadruple Power Supply, which enhances performance during dynamic audio playback. Additionally, the receiver includes a remote control, making it user-friendly and convenient for adjusting settings from a distance.
The aesthetic appeal of the HK 3470 should not be overlooked. Its sleek design, featuring a brushed aluminum front panel and distinct display, adds a touch of sophistication to any audio system. The easy-to-read LCD screen provides essential information, such as input selection and volume levels, further enhancing the user experience.
Overall, the Harman-Kardon HK 3470 is an impressive stereo receiver that caters to audiophiles looking for high-quality sound and versatility. With its robust amplification, generous connectivity options, and elegant design, it stands as a reliable choice for anyone wanting to elevate their audio experience. Whether for casual listening or intense audio playback, the HK 3470 delivers a performance that truly resonates with users, capturing the essence of music and sound in a captivating manner.