WALL-MOUNTING THE PRIMUS 140 AND PRIMUS 150
The Primus 140 and Primus 150 are designed to mount directly to a wall. Each satellite speaker has two keyholes on the back. Each speaker will require (2)
NOTE: The customer is responsible for the correct selection and use of mounting hardware (available through hardware stores) that will ensure the proper and safe
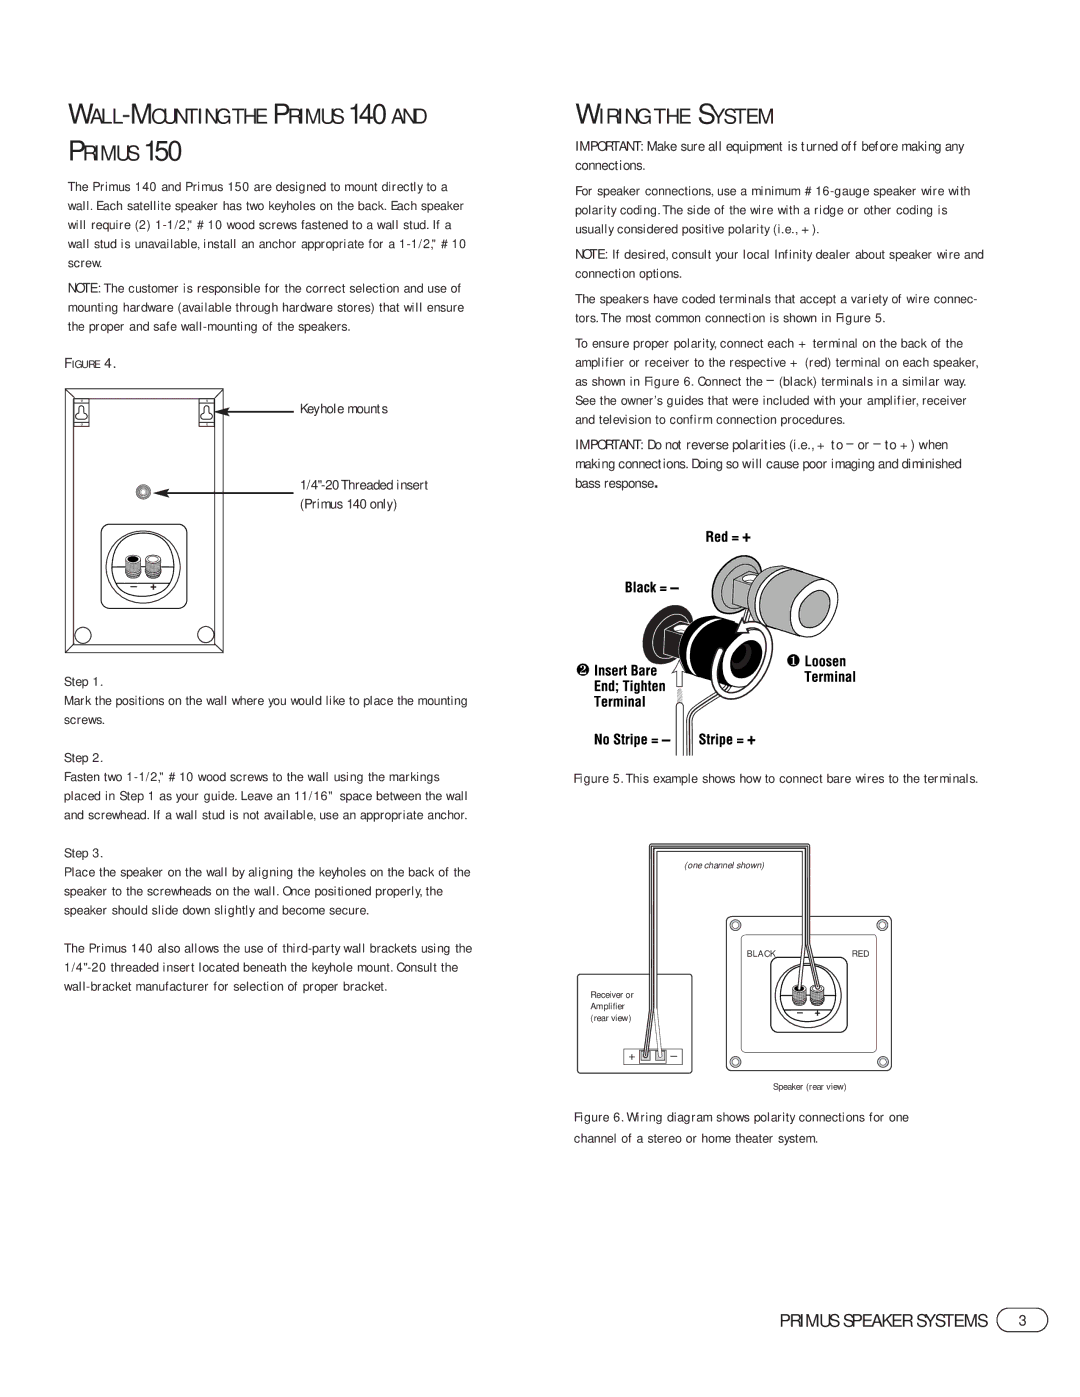
FIGURE 4. |
|
| Keyhole mounts |
| |
| (Primus 140 only) |
– | + |
Step 1.
Mark the positions on the wall where you would like to place the mounting screws.
Step 2.
Fasten two
Step 3.
Place the speaker on the wall by aligning the keyholes on the back of the speaker to the screwheads on the wall. Once positioned properly, the speaker should slide down slightly and become secure.
The Primus 140 also allows the use of
WIRING THE SYSTEM
IMPORTANT: Make sure all equipment is turned off before making any connections.
For speaker connections, use a minimum
NOTE: If desired, consult your local Infinity dealer about speaker wire and connection options.
The speakers have coded terminals that accept a variety of wire connec- tors. The most common connection is shown in Figure 5.
To ensure proper polarity, connect each + terminal on the back of the amplifier or receiver to the respective + (red) terminal on each speaker, as shown in Figure 6. Connect the – (black) terminals in a similar way. See the owner’s guides that were included with your amplifier, receiver and television to confirm connection procedures.
IMPORTANT: Do not reverse polarities (i.e., + to – or – to +) when making connections. Doing so will cause poor imaging and diminished bass response.
Figure 5. This example shows how to connect bare wires to the terminals.
(one channel shown)
BLACKRED
Receiver or |
| |
Amplifier | – + | |
(rear view) | ||
|
+ ![]()
![]()
![]()
![]()
![]()
![]() –
–
Speaker (rear view)
Figure 6. Wiring diagram shows polarity connections for one channel of a stereo or home theater system.
PRIMUS SPEAKER SYSTEMS | 3 |