INSTALLATION | Mounting Sensor |
❒Turn. power off at the fuse or circuit breaker.
This model Instant Motion Sensor Light Control can be used with many indoor or outdoor light fixtures where the motion sensing feature is desired.
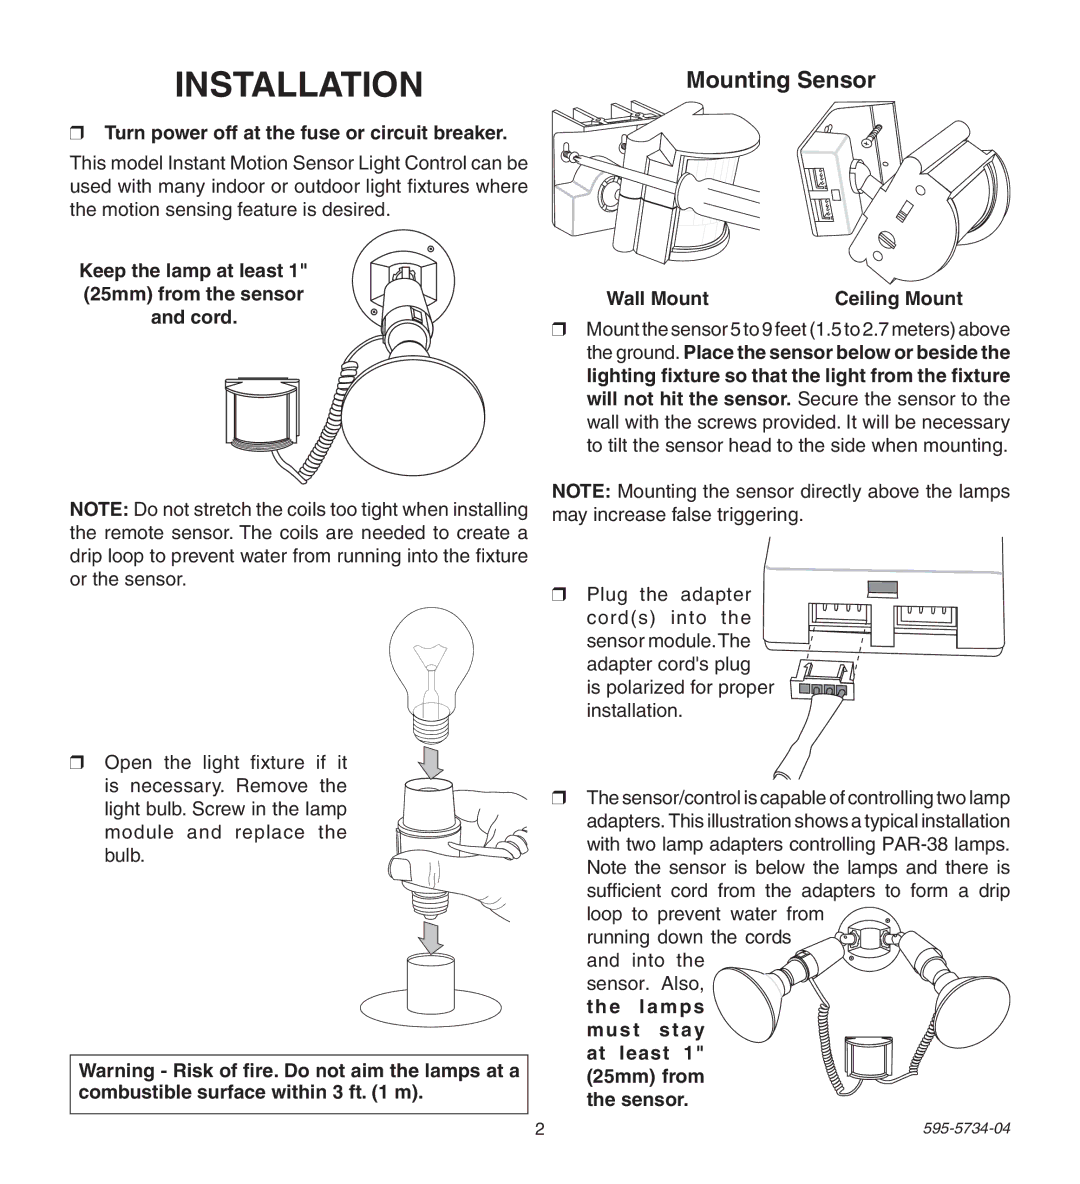
Keep the lamp at least 1" (25mm) from the sensor and cord.
NOTE: Do not stretch the coils too tight when installing the remote sensor. The coils are needed to create a drip loop to prevent water from running into the fixture or the sensor.
❒Open the light fixture if it
is necessary. Remove the light bulb. Screw in the lamp module and replace the bulb.
Warning - Risk of fire. Do not aim the lamps at a combustible surface within 3 ft. (1 m).
Wall Mount | Ceiling Mount |
❒Mount the sensor 5 to 9 feet (1.5 to 2.7 meters) above the ground. Place the sensor below or beside the lighting fixture so that the light from the fixture will not hit the sensor. Secure the sensor to the wall with the screws provided. It will be necessary to tilt the sensor head to the side when mounting.
NOTE: Mounting the sensor directly above the lamps may increase false triggering.
❒ Plug the adapter cord(s) into the sensor module.The adapter cord's plug is polarized for proper installation.
❒The sensor/control is capable of controlling two lamp adapters. This illustration shows a typical installation with two lamp adapters controlling
running down the cords and into the ![]() sensor. Also,
sensor. Also, ![]()
the lamps
must stay at least 1" (25mm) from the sensor.
2 |