Item | Model |
247590 |
Questions or problems? Before returning to your retailer, call our technical service department at
This quartz halogen floodlight disperses light over a wide area, at- taches to a standard junction box and is for use with 120 VAC.
PACKAGE CONTENTS
• | Floodlight | • | Bulb |
• | 2 Rubber plugs | • | Gasket |
• | Wire connectors | • | Mounting hardware |
READ ALL INSTRUCTIONS CAREFULLY BEFORE
BEGINNING INSTALLATION.
NOTE: All wiring must be run in accordance with the National Electrical Code through conduit or another acceptable means. Contact a qualified electrician if there is any ques- tion as to the suitability of the system.
FIXTURE INSTALLATION INSTRUCTIONS
Estimated Installation Time: 30 minutes Items needed for installation (not included):
• Phillips and flathead screwdrivers
• | Pliers | • | Wire strippers/cutters |
• | Safety glasses | • | Silicone caulk |
• | Ladder | • | Black tape |
To avoid Electrical Shock:
![]() WARNING: Turn power off at the circuit breaker or fuse.
WARNING: Turn power off at the circuit breaker or fuse.
Quartz Halogen
Floodlight
•Follow all warnings listed on fixture.
•Grounding and installations must comply with local codes and the National Electric Code.
•This product should be mounted on a grounded junction box and must be used with the canopy included.
•Permanently mount the fixture to a building or pole.
1.Thread aiming arm into the enclosed canopy and tighten. Apply silicon caulk to joint for a raintight seal. Seal the remaining holes with the enclosed canopy plugs.
2.Connect the fixture wires to the power source wiring. Secure with wire connectors.
3.Attach the canopy to the junction box (Apply silicon caulk be- tween canopy and junction box for a raintight seal). Keep the fixture horizontal (within +/- 4º) so the bulb inside is horizontal.
If the bulb is not horizontal, the bulb may darken or shatter and fail prematurely.
CAUTION to avoid fire or burn hazards:
•Allow fixture to cool before touching. The bulbs and fixture operate at high temperatures.
•Keep fixture at least 2" (51 mm) from combustible materials. Do not aim at objects closer than 3 feet (1 m).
•Replace bulb with up to 150W (max.) T3 halogen 120 VAC bulb only.
4.Loosen the side bolt connected to the arm to aim the fixture up and down.
5.To avoid water entering fixture, do not aim the fixture above the horizon.
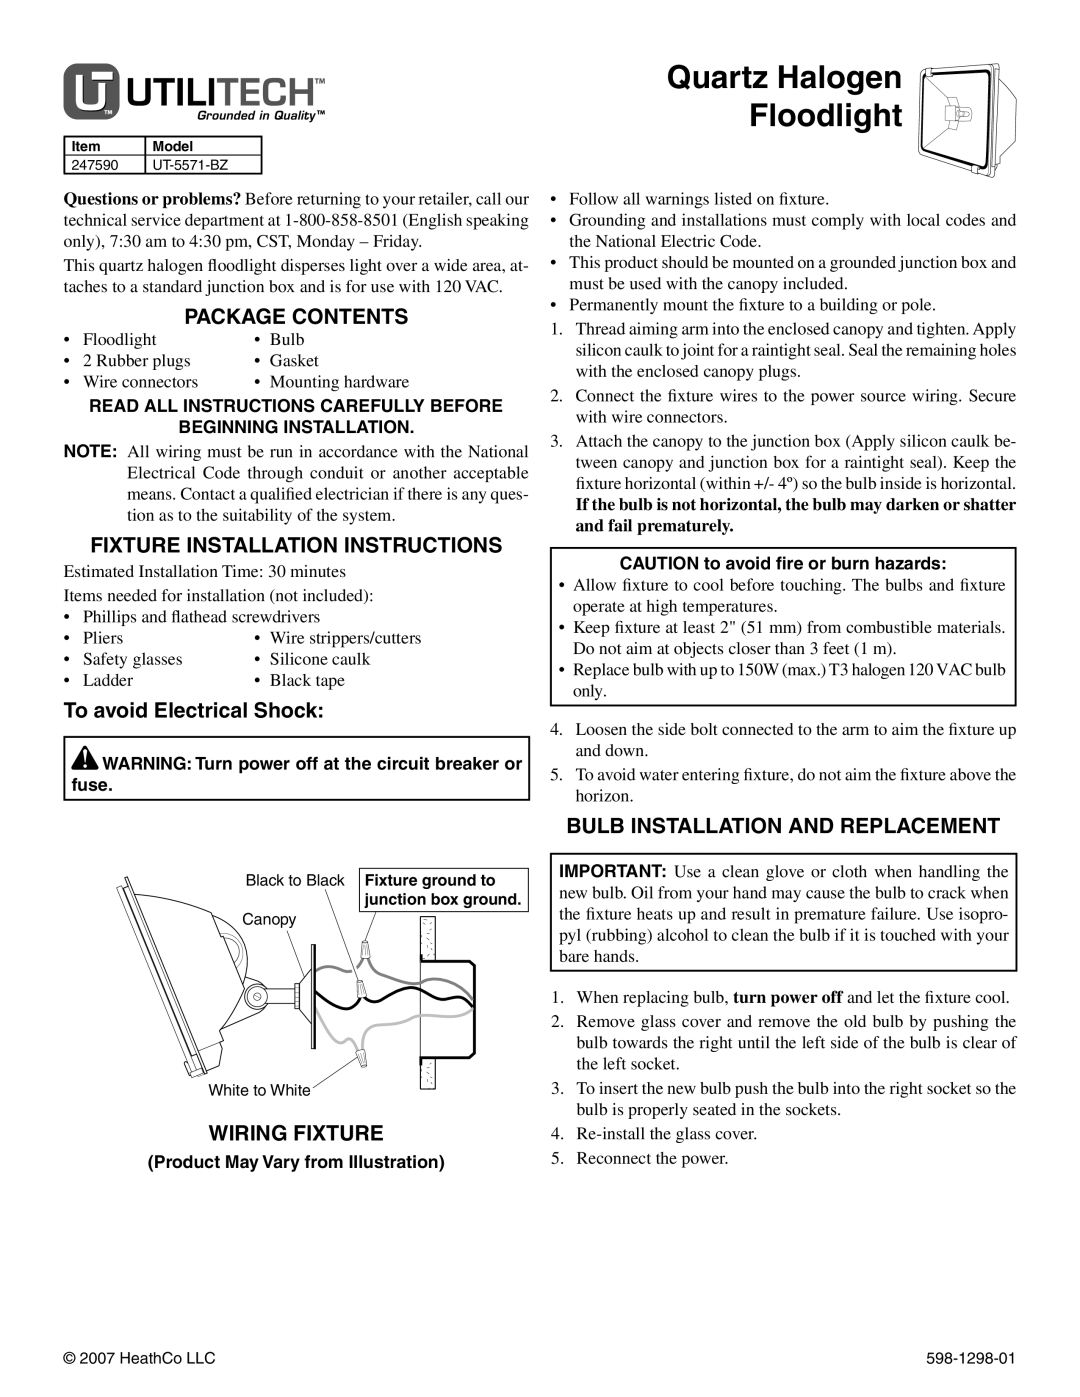
Black to Black
Canopy
White to White
Fixture ground to junction box ground.
BULB INSTALLATION AND REPLACEMENT
IMPORTANT: Use a clean glove or cloth when handling the new bulb. Oil from your hand may cause the bulb to crack when the fixture heats up and result in premature failure. Use isopro- pyl (rubbing) alcohol to clean the bulb if it is touched with your bare hands.
1. | When replacing bulb, turn power off and let the fixture cool. |
2. | Remove glass cover and remove the old bulb by pushing the |
| bulb towards the right until the left side of the bulb is clear of |
| the left socket. |
3. | To insert the new bulb push the bulb into the right socket so the |
| bulb is properly seated in the sockets. |
WIRING FIXTURE
(Product May Vary from Illustration)
4. | |
5. | Reconnect the power. |
© 2007 HeathCo LLC |