SCREEN Menu


MENU


PICTURE-1

START UP

ORIGNAL


MAIN

BLANK

MyScreen


PICTURE-2

MyScreen


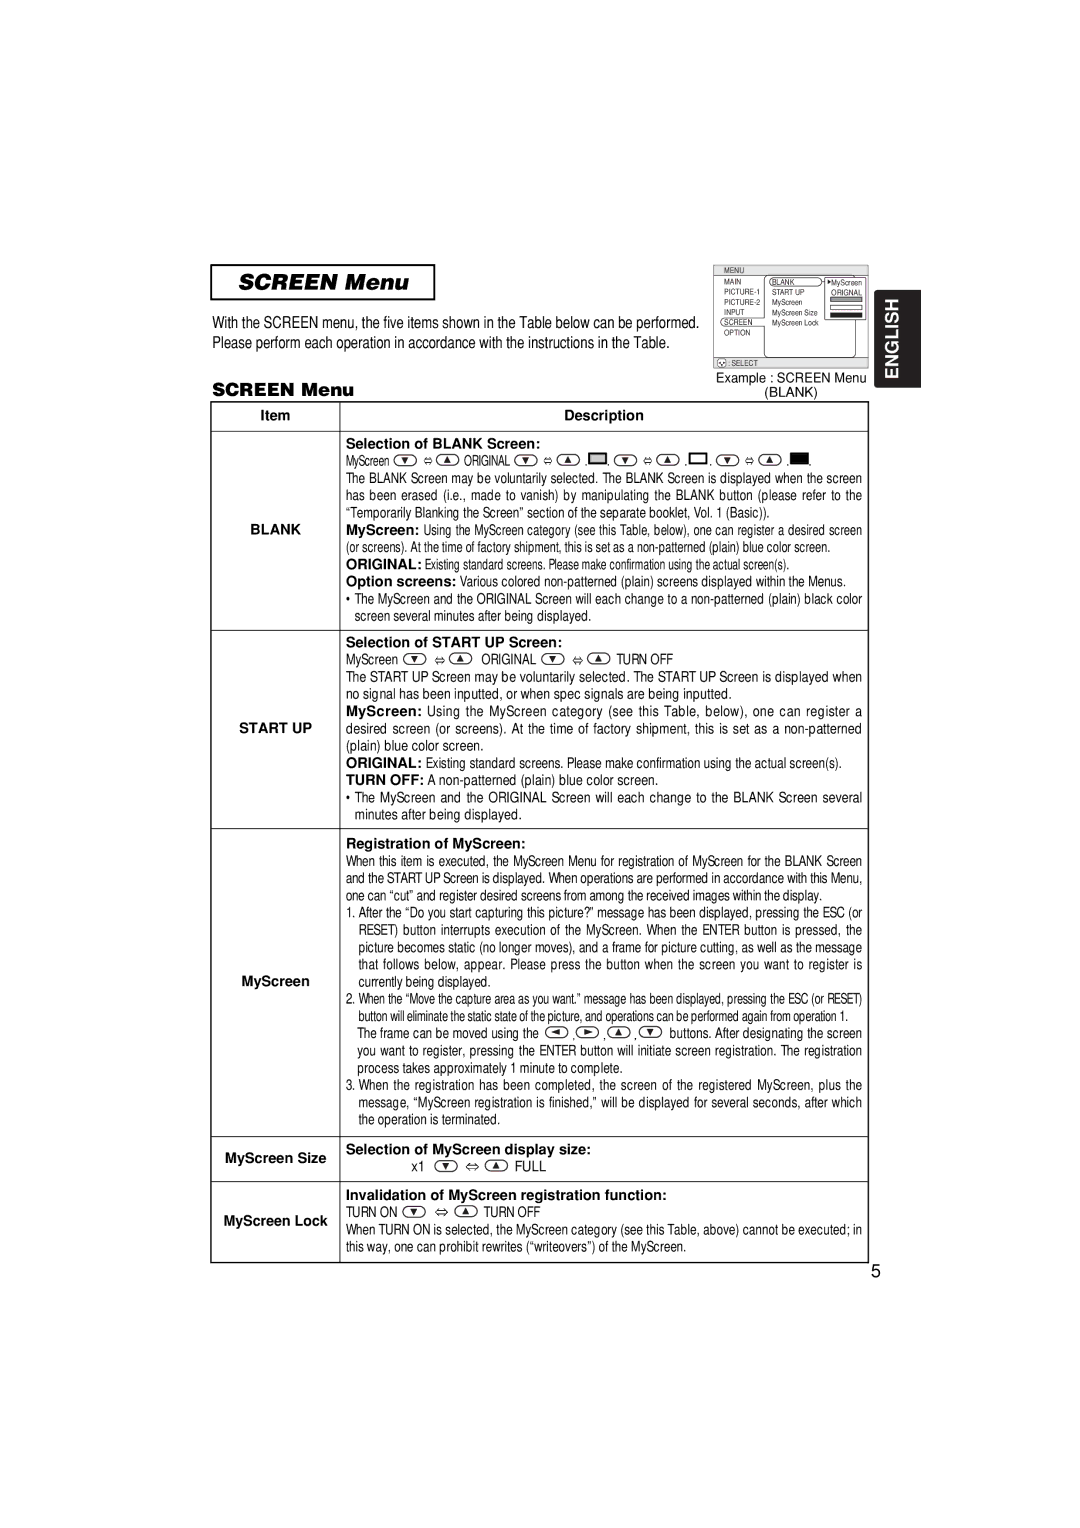
With the SCREEN menu, the five items shown in the Table below can be performed.

INPUT

MyScreen Size


SCREEN

MyScreen Lock


Please perform each operation in accordance with the instructions in the Table.


OPTION


: SELECT


SCREEN Menu


Example : SCREEN Menu


(BLANK)


Item


Description


Selection of BLANK Screen:


MyScreen

ORIGINAL

.


.

. .


.


.


The BLANK Screen may be voluntarily selected. The BLANK Screen is displayed when the screen


has been erased (i.e., made to vanish) by manipulating the BLANK button (please refer to the


“Temporarily Blanking the Screen” section of the separate booklet, Vol. 1 (Basic)).


BLANK

MyScreen: Using the MyScreen category (see this Table, below), one can register a desired screen


(or screens). At the time of factory shipment, this is set as a non-patterned (plain) blue color screen.


ORIGINAL: Existing standard screens. Please make confirmation using the actual screen(s).


Option screens: Various colored non-patterned (plain) screens displayed within the Menus.

The MyScreen and the ORIGINAL Screen will each change to a non-patterned (plain) black color screen several minutes after being displayed.

Selection of START UP Screen:

MyScreen ORIGINAL TURN OFF

The START UP Screen may be voluntarily selected. The START UP Screen is displayed when no signal has been inputted, or when spec signals are being inputted.

MyScreen: Using the MyScreen category (see this Table, below), one can register a

START UP desired screen (or screens). At the time of factory shipment, this is set as a non-patterned (plain) blue color screen.

ORIGINAL: Existing standard screens. Please make confirmation using the actual screen(s).

TURN OFF: A non-patterned (plain) blue color screen.

The MyScreen and the ORIGINAL Screen will each change to the BLANK Screen several minutes after being displayed.

Registration of MyScreen:

When this item is executed, the MyScreen Menu for registration of MyScreen for the BLANK Screen and the START UP Screen is displayed. When operations are performed in accordance with this Menu, one can “cut” and register desired screens from among the received images within the display.

1.After the “Do you start capturing this picture?” message has been displayed, pressing the ESC (or RESET) button interrupts execution of the MyScreen. When the ENTER button is pressed, the picture becomes static (no longer moves), and a frame for picture cutting, as well as the message that follows below, appear. Please press the button when the screen you want to register is

MyScreen

currently being displayed.

2.When the “Move the capture area as you want.” message has been displayed, pressing the ESC (or RESET) button will eliminate the static state of the picture, and operations can be performed again from operation 1.

The frame can be moved using the buttons. After designating the screen you want to register, pressing the ENTER button will initiate screen registration. The registration process takes approximately 1 minute to complete.

3.When the registration has been completed, the screen of the registered MyScreen, plus the message, “MyScreen registration is finished,” will be displayed for several seconds, after which the operation is terminated.

MyScreen Size

Selection of MyScreen display size:

x1

FULL


Invalidation of MyScreen registration function:

MyScreen Lock

TURN ON

TURN OFF

When TURN ON is selected, the MyScreen category (see this Table, above) cannot be executed; in


this way, one can prohibit rewrites (“writeovers”) of the MyScreen.

ENGLISH

5

Page 37
Image 37
Hitachi CP-X327W, CP-S317W user manual Screen Menu, Blank

CP-X327, CP-S317, CP-S317W, CP-X327W specifications

The Hitachi CP-X327W and CP-S317W projectors, along with their counterparts CP-S317 and CP-X327, represent a blend of advanced projection technologies and user-friendly features designed to enhance presentations across various environments.

The CP-X327W is notable for its WXGA resolution (1280 x 800 pixels), making it ideal for high-definition presentations. This model boasts a brightness level of 3,200 ANSI lumens, ensuring bright and vivid images even in well-lit rooms. Its 2,500:1 contrast ratio adds depth to images, making text sharp and graphics pop. The projector features 3LCD technology, which provides accurate color reproduction and reduces rainbow effects often seen in single-chip projectors.

Equally impressive, the CP-S317W stands out with its XGA resolution (1024 x 768 pixels) and a brightness of 3,000 ANSI lumens. Its lightweight and compact design makes it suitable for portability, appealing to users who frequently present on the go. The 2,000:1 contrast ratio enhances visual clarity, making it a solid choice for educational and business settings.

Both models incorporate Hitachi's advanced image-processing technology, which aids in scaling images without significant loss of quality. This feature is particularly beneficial when projecting content from a variety of device sources, from laptops to tablets. The ability to easily connect via multiple ports, including HDMI, VGA, and USB, adds versatility, allowing users to switch between devices seamlessly.

One standout characteristic across these projectors is their energy-efficient operation. With a lamp life expectancy of up to 6,000 hours in eco-mode, maintenance is minimized, which is especially valuable for schools and organizations that aim to lower operational costs.

In terms of usability, both the CP-X327W and CP-S317W feature intuitive menu systems, remote controls, and easy-to-navigate settings, allowing users of all skill levels to operate them with confidence. Furthermore, they include built-in speakers for basic audio needs, although external sound systems are recommended for larger venues.

In summary, the Hitachi CP-X327W, CP-X327, CP-S317W, and CP-S317 projectors exemplify quality and reliability. Their robust features, advanced technologies, and user-centric designs make them suitable options for a variety of professional settings, ranging from classrooms to corporate boardrooms, ensuring effective and impactful presentations.