F E A T U R E S - O P E R A T I O N
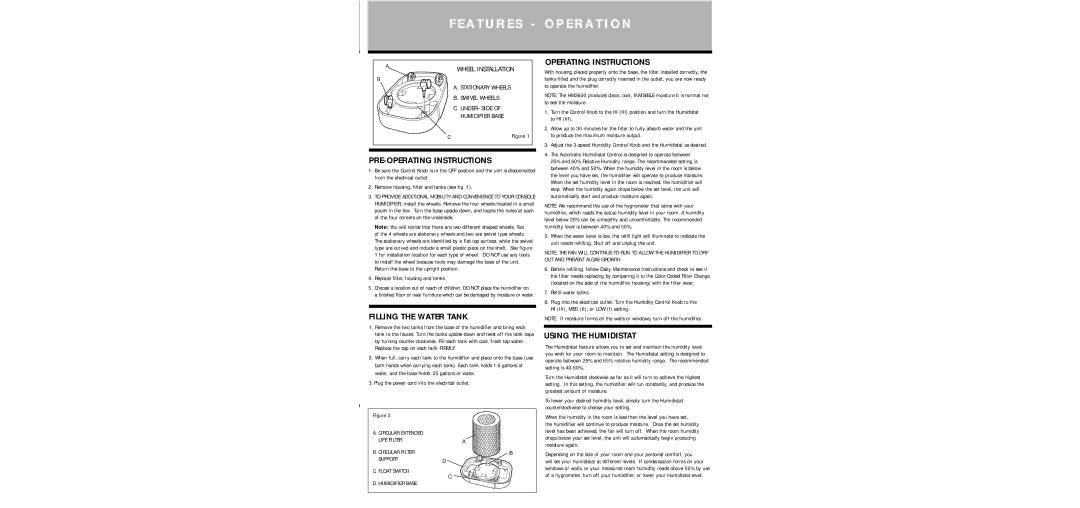
A | WHEEL INSTALLATION |
B
A. STATIONARY WHEELS
B. SWIVEL WHEELS
C.
HUMIDIFIER BASE
C | Figure 1 |
PRE-OPERATING INSTRUCTIONS
1.Be sure the Control Knob is in the OFF position and the unit is disconnected from the electrical outlet.
2.Remove housing, filter and tanks (see fig. 1).
3.TO PROVIDE ADDITIONAL MOBILITY AND CONVENIENCE TO YOUR CONSOLE HUMIDIFIER, install the wheels. Remove the four wheels located in a small pouch in the box. Turn the base upside down, and locate the holes at each of the four corners on the underside.
Note: You will notice that there are two different shaped wheels. Two of the 4 wheels are stationary wheels and two are swivel type wheels. The stationary wheels are identified by a flat top surface, while the swivel type are curved and include a small plastic piece on the shaft. See figure 1 for installation location for each type of wheel. DO NOT use any tools to install the wheel because tools may damage the base of the unit. Return the base to the upright position.
4.Replace filter, housing and tanks.
5.Choose a location out of reach of children. DO NOT place the humidifier on
a finished floor or near furniture which can be damaged by moisture or water.
FILLING THE WATER TANK
1.Remove the two tanks from the base of the humidifier and bring each tank to the faucet. Turn the tanks upside down and twist off the tank caps by turning
2.When full, carry each tank to the humidifier and place onto the base (use both hands when carrying each tank). Each tank holds 1.6 gallons of water, and the base holds .25 gallons of water.
3.Plug the power cord into the electrical outlet.
Figure 2 |
|
A. CIRCULAR EXTENDED |
|
LIFE FILTER | A |
B. CIRCULAR FILTER | B |
SUPPORT | D |
C. FLOAT SWITCH
C
D. HUMIDIFIER BASE
OPERATING INSTRUCTIONS
With housing placed properly onto the base, the filter installed correctly, the tanks filled and the plug correctly inserted in the outlet, you are now ready to operate the humidifier.
NOTE: The HM3600 produces clean, cool, INVISIBLE moisture.It is normal not to see the moisture.
1.Turn the Control Knob to the HI (III) position and turn the Humidistat to HI (III).
2.Allow up to 30 minutes for the filter to fully absorb water and the unit to produce the maximum moisture output.
3.Adjust the
4.The Automatic Humidistat Control is designed to operate between
25% and 60% Relative Humidity range. The recommended setting is between 40% and 50%. When the humidity level in the room is below the level you have set, the humidifier will operate to produce moisture. When the set humidity level in the room is reached, the humidifier will stop. When the humidity again drops below the set level, the unit will automatically start and produce moisture again.
NOTE: We recommend the use of the hygrometer that came with your humidifier, which reads the actual humidity level in your room. A humidity level below 20% can be unhealthy and uncomfortable. The recommended humidity level is between 40% and 50%.
5.When the water level is low, the refill light will illuminate to indicate the unit needs refilling. Shut off and unplug the unit.
NOTE: THE FAN WILL CONTINUE TO RUN TO ALLOW THE HUMIDIFIER TO DRY OUT AND PREVENT ALGAE GROWTH.
6.Before refilling, follow Daily Maintenance Instructions and check to see if the filter needs replacing by comparing it to the
7.Refill water tanks.
8.Plug into the electrical outlet. Turn the Humidity Control Knob to the HI (III), MED (II), or LOW (I) setting.
NOTE: If moisture forms on the walls or windows, turn off the humidifier.
USING THE HUMIDISTAT
The Humidistat feature allows you to set and maintain the humidity level you wish for your room to maintain. The Humidistat setting is designed to operate between 25% and 65% relative humidity range. The recommended setting is
Turn the Humidistat clockwise as far as it will turn to achieve the highest setting. In this setting, the humidifier will run constantly, and produce the greatest amount of moisture.
To lower your desired humidity level, simply turn the Humidistat counterclockwise to choose your setting.
When the humidity in the room is less than the level you have set,
the humidifier will continue to produce moisture. Once the set humidity level has been achieved, the fan will turn off. When the room humidity drops below your set level, the unit will automatically begin producing moisture again.
Depending on the size of your room and your personal comfort, you
will set your humidistat at different levels. If condensation forms on your windows or walls, or your measured room humidity reads above 50% by use of a hygrometer, turn off your humidifier, or lower your Humidistat level.
