Setting up the Lamp Module

Setting up the Appliance Module

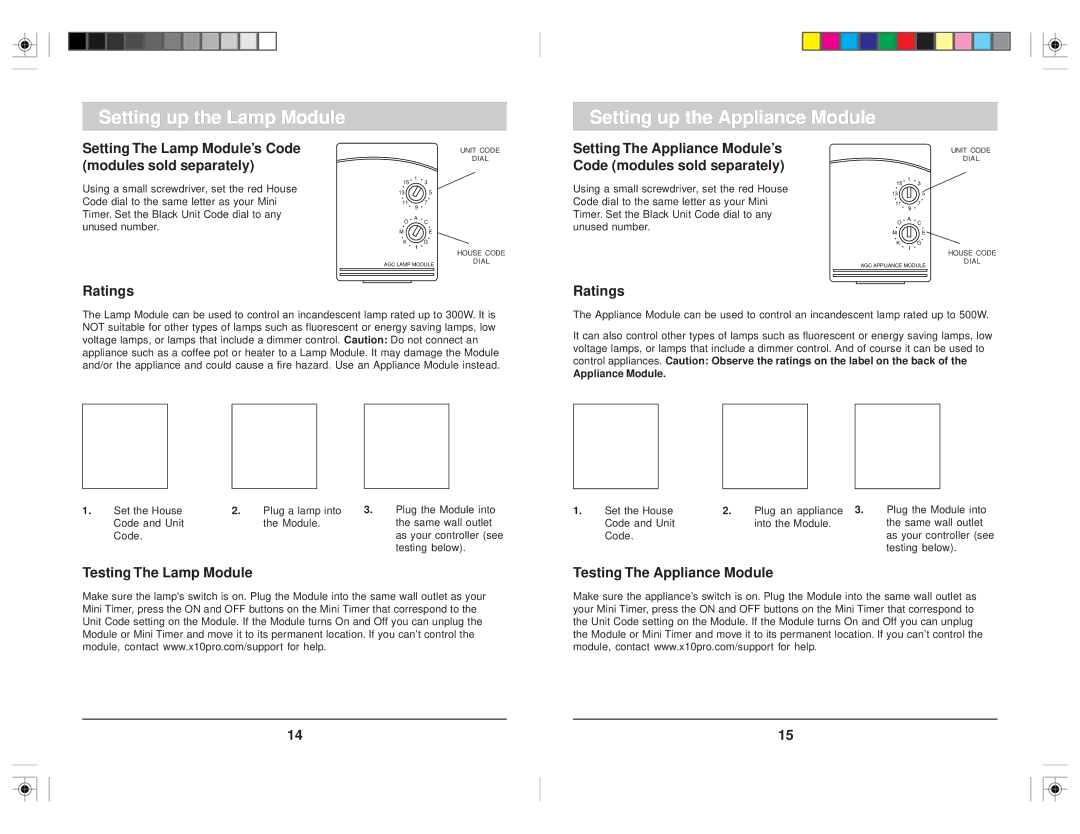
Setting The Lamp Module’s Code (modules sold separately)

Using a small screwdriver, set the red House Code dial to the same letter as your Mini Timer. Set the Black Unit Code dial to any unused number.

UNIT CODE

DIAL

15

1

3


13


5

117

9

O

A

C


M E

KG

I

HOUSE CODE

Setting The Appliance Module’s Code (modules sold separately)

Using a small screwdriver, set the red House Code dial to the same letter as your Mini Timer. Set the Black Unit Code dial to any unused number.

UNIT CODE

DIAL

15

1

3


13


5


117

9

O

A

C


M


E


K


G

I

HOUSE CODE


AGC LAMP MODULE

DIAL


AGC APPLIANCE MODULE

DIAL

Ratings

The Lamp Module can be used to control an incandescent lamp rated up to 300W. It is NOT suitable for other types of lamps such as fluorescent or energy saving lamps, low voltage lamps, or lamps that include a dimmer control. Caution: Do not connect an appliance such as a coffee pot or heater to a Lamp Module. It may damage the Module and/or the appliance and could cause a fire hazard. Use an Appliance Module instead.

1.

Set the House

2.

Plug a lamp into

3.

Plug the Module into


Code and Unit


the Module.


the same wall outlet


Code.


as your controller (see


testing below).

Testing The Lamp Module

Make sure the lamp's switch is on. Plug the Module into the same wall outlet as your Mini Timer, press the ON and OFF buttons on the Mini Timer that correspond to the Unit Code setting on the Module. If the Module turns On and Off you can unplug the Module or Mini Timer and move it to its permanent location. If you can’t control the module, contact www.x10pro.com/support for help.

14

Ratings

The Appliance Module can be used to control an incandescent lamp rated up to 500W.

It can also control other types of lamps such as fluorescent or energy saving lamps, low voltage lamps, or lamps that include a dimmer control. And of course it can be used to control appliances. Caution: Observe the ratings on the label on the back of the

Appliance Module.

1.

Set the House

2.

Plug an appliance 3.

Plug the Module into


Code and Unit


into the Module.

the same wall outlet


Code.


as your controller (see


testing below).

Testing The Appliance Module

Make sure the appliance’s switch is on. Plug the Module into the same wall outlet as your Mini Timer, press the ON and OFF buttons on the Mini Timer that correspond to the Unit Code setting on the Module. If the Module turns On and Off you can unplug the Module or Mini Timer and move it to its permanent location. If you can’t control the module, contact www.x10pro.com/support for help.

15

Page 8
Image 8
HomeTech XPMT1 owner manual Setting up the Lamp Module Setting up the Appliance Module

XPMT1 specifications

HomeTech XPMT1 is a state-of-the-art smart home hub designed to streamline and enhance home automation experiences. This next-generation device integrates seamlessly with a multitude of smart devices, providing users with centralized control over their connected environment. With its sleek and compact design, the XPMT1 fits perfectly into any modern home decor while offering powerful functionalities.

One of the standout features of the HomeTech XPMT1 is its compatibility with a wide range of smart home devices. Whether it be smart lights, thermostats, security cameras, or locks, the XPMT1 recognizes and syncs with various brands and protocols. This interoperability ensures that users can create a personalized smart home ecosystem that caters to their specific needs.

The XPMT1 leverages advanced wireless technologies, including Wi-Fi 6 and Bluetooth Low Energy (BLE), to facilitate blazing-fast connections and reliable performance. Wi-Fi 6 enhances the hub's capability to handle multiple devices simultaneously, ensuring that your smart home operates without any lag or interruptions. Meanwhile, BLE allows for energy-efficient communication with battery-powered devices, prolonging their operational life.

Customization is at the forefront of the XPMT1 experience. Users can create tailored automation routines through the intuitive HomeTech app. Whether it’s setting the mood for a movie night by dimming the lights and adjusting the thermostat or ensuring the house is secure by locking doors and turning on security cameras at night, the possibilities are virtually limitless.

Moreover, the hub’s voice control integration is a game-changer. With compatibility for major voice assistants like Amazon Alexa, Google Assistant, and Apple HomeKit, users can control their devices hands-free. This feature is particularly beneficial for those with mobility challenges or when multitasking around the house.

Security is another priority with HomeTech XPMT1. The hub includes robust encryption and secure access protocols to protect user data and ensure that personal information remains confidential. With regular software updates, the device continually adapts to emerging threats, providing peace of mind in today’s interconnected world.

Lastly, the HomeTech XPMT1 is energy-efficient, contributing to reduced energy costs while maximizing convenience. Its smart scheduling features allow users to monitor and manage energy consumption, promoting sustainable living.

In conclusion, the HomeTech XPMT1 stands out as a versatile and powerful smart home hub. Its advanced technologies, comprehensive compatibility, user-friendly interface, and commitment to security make it an essential addition to any modern automated home. Whether you’re a tech-savvy homeowner or just starting your smart home journey, the XPMT1 offers the features you need for a smarter, more connected lifestyle.