Questions or Concerns?
The Hoover Company wants to quickly resolve any concerns about your cleaner or questions regarding its use. Look on the list pro- vided with the product for your local Hoover Factory Service Center or in the Yellow Pages under “Vacuum Cleaners - House- hold” for the nearest Authorized Hoover Warranty Service Dealer (Depot) or call:
OR
DO NOT RETURN THIS PRODUCT TO THE STORE OR SEND IT TO NORTH CANTON FOR SERVICE.
How to attach hose and tools
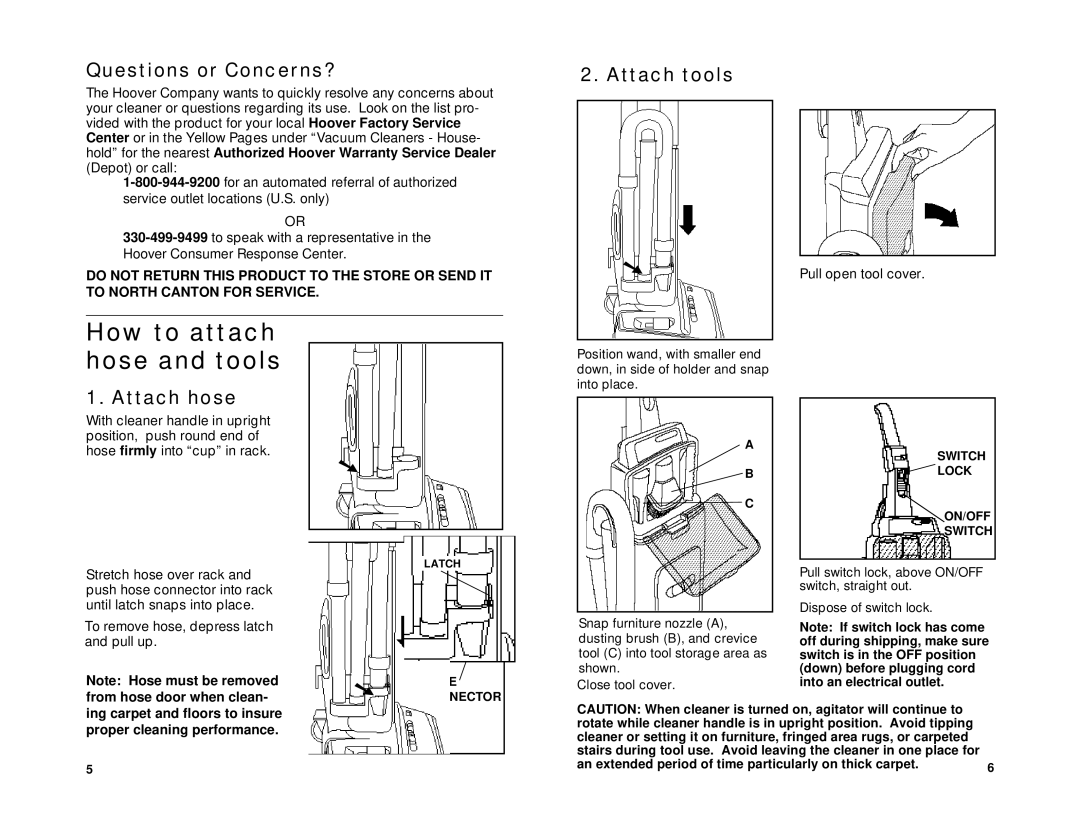
1. Attach hose
2. Attach tools
➘ |
|
|
|
| |
| Pull open tool cover. | |
|
|
|
Position wand, with smaller end down, in side of holder and snap into place.
With cleaner handle in upright position, push round end of hose firmly into “cup” in rack.
➘
A
![]() B
B ![]() C
C
SWITCH ![]() LOCK
LOCK
ON/OFF
SWITCH
Stretch hose over rack and push hose connector into rack until latch snaps into place.
To remove hose, depress latch and pull up.
Note: Hose must be removed from hose door when clean-
| LATCH |
➘ | HOSE |
CONNECTOR |
Snap furniture nozzle (A), dusting brush (B), and crevice tool (C) into tool storage area as shown.
Close tool cover.
Pull switch lock, above ON/OFF switch, straight out.
Dispose of switch lock.
Note: If switch lock has come off during shipping, make sure switch is in the OFF position (down) before plugging cord into an electrical outlet.
ing carpet and floors to insure proper cleaning performance.
5
CAUTION: When cleaner is turned on, agitator will continue to |
|
rotate while cleaner handle is in upright position. Avoid tipping |
|
cleaner or setting it on furniture, fringed area rugs, or carpeted |
|
stairs during tool use. Avoid leaving the cleaner in one place for |
|
an extended period of time particularly on thick carpet. | 6 |
|